Dubbing from videotape to hdd / dvd, Press [dubbing, Then press [enter – Toshiba RD-XV47KE User Manual
Page 55: Select a desired rec mode using [cursor, Select “yes” using [cursor
55
EN
In
troducti
on
Connecti
o
ns
Bas
ic Setup
P
layback
Ed
iti
n
g
V
CR Fu
ncti
on
s
O
th
ers
Fu
nc
ti
on
Set
u
p
Recordi
n
g
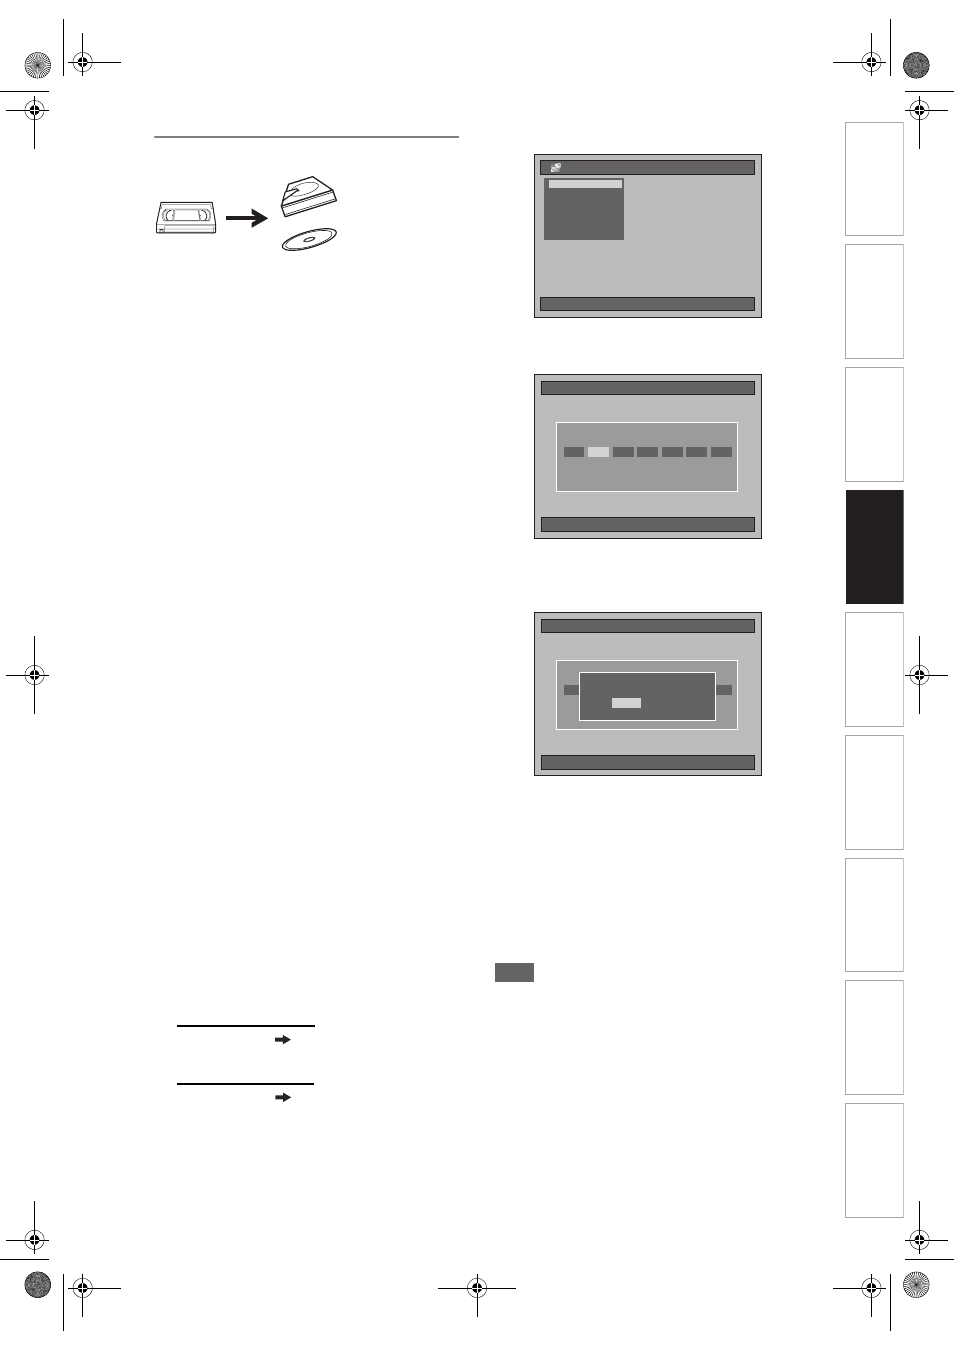
Dubbing from Videotape to HDD / DVD
You can copy the contents of a videotape to HDD or
DVD disc.
Limitation:
• If a copy control signal is detected during
dubbing, the dubbing will be stopped.
Limitations (VCR to HDD):
• With VCR to HDD dubbing, the unit recognise
the HDD’s remaining time as the dubbing
duration. The maximum possible duration is 10
hours and 30 minutes.
Limitations (VCR to DVD):
• You cannot dub to the finalised Video mode
DVDs.
• You cannot dub to the protected VR mode
DVDs.
• Copy-once programmes which are recorded
directly from the TV can be dubbed to the HDD
and CPRM compatible VR mode DVD-RW.
• Copy-once programmes which are copied from
the HDD / DVD to a videotape cannot be
dubbed further from the videotape to the HDD /
DVD.
• With VCR to DVD dubbing, the unit recognise
DVD’s remaining time as the dubbing duration
although the actual dubbing will end when the
videotape ends.
Preparing for dubbing:
• Insert a videotape to be dubbed.
Preparing for dubbing (VCR to HDD):
• Make sure there is enough space on the HDD.
Preparing for dubbing (VCR to DVD):
• Insert a recordable DVD. (See pages 34 to 37.)
• Make sure there is enough space on the DVD.
Press [VCR] first.
1
Press [PLAY
P] to start playback of
the videotape, and press [STOP
S]
when it reaches the point where you
want to start dubbing.
2
Press [DUBBING].
The Dubbing Direction will appear.
3
For HDD dubbing:
Select “VCR HDD Dubbing” using
[Cursor
U
/
D
], then press [ENTER].
For DVD dubbing:
Select “VCR DVD Dubbing” using
[Cursor
U
/
D
], then press [ENTER].
Example: VCR
➞ HDD
4
Select a desired Rec Mode using
[Cursor
L
/
P
], then press [ENTER].
Confirmation window will appear.
5
Select “Yes” using [Cursor
L
/
P
],
then press [ENTER].
Dubbing will start.
When the dubbing is completed, completion
message will be displayed on the screen for a few
seconds.
To stop the dubbing in progress:
1 Press [DUBBING] for 4 seconds. Confirmation
window will appear.
2 Select “Yes” using [Cursor
L / P], then press
[ENTER].
3 Press [ENTER] to exit.
Note
• The device mode change is available only between
HDD and DVD during the videotape to the HDD /
DVD dubbing.
• After starting dubbing, the picture may be distorted
because of the digital tracking function. This is not a
malfunction. Be advised to play back the videotape
until the picture is stabilised, then set the starting
point at which you wish to start recording, and start
dubbing.
• Playback audio is determined by the setting you
make in the “Selecting the Sound Mode” section on
page 102.
01/01/07(Mon)
19:34
Dubbing
DVD
➔HDD Dubbing
DVD
➔HDD Dubbing
HDD
➔VCR Dubbing
HDD
➔VCR Dubbing
VCR
➔HDD Dubbing
VCR
➔HDD Dubbing
DVD
➔VCR Dubbing
DVD
➔VCR Dubbing
VCR
➔DVD Dubbing
VCR
➔DVD Dubbing
HDD
➔DVD Dubbing
01/01/07(Mon)
19:53
VCR
➔
HDD Dubbing
Please Select Rec Mode
Fast
XP
SP
LP
EP
SLP
Auto
Space available
154335MB
01/01/07(Mon)
19:53
VCR
➔
HDD Dubbing
Please Select Rec Mode
Fast
XP
SP
LP
EP
SLP
Auto
Space available
154335MB
Start dubbing.
OK to proceed?
Start dubbing.
OK to proceed?
Yes
No
E3B90ED_EN.book Page 55 Friday, February 23, 2007 12:38 PM