Connections, Timer-controlled recording, Connections with a timer – Tascam D00935220B User Manual
Page 25: Important safety instructions, 4 − recording
IMPORTANT SAFETY INSTRUCTIONS
TASCAM 202
MK
IV
4 − Recording
TASCAM 202
MK
IV
Connecting a commercially available timer to your
audio setup lets you wake up to your favorite cassette
tape, or start recording at specified times.
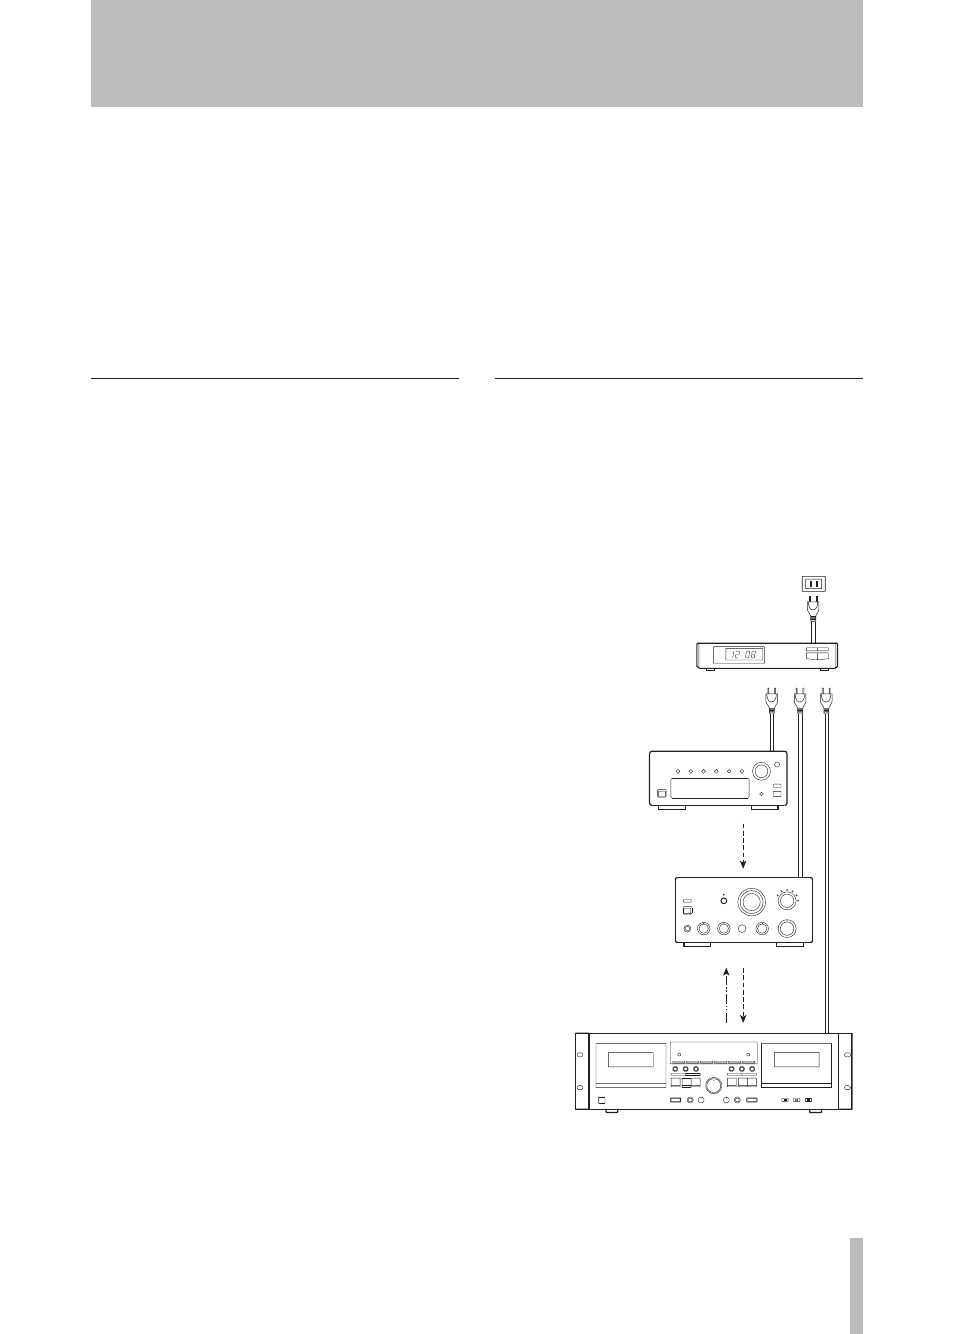
Refer to the illustration below, and connect your audio
components.
4. Set the
REV MODE
switch to the required posi-
tion.
To let both decks play continuously, set the
REV
MODE
switch to the
ä
(CONT PLAY) position.
5. Set the
DOLBY NR
switch.
6. Set the
TIMER
switch to the
PLAY
position.
7. Set the audio timer to the required start (power
on) and stop (power off) times. When this set-
ting is completed, the power to all components
will be switched off.
When a preset start time is reached, power will be
supplied and playback will start automatically.
Playback automatically starts also by simply
pressing on the
POWER
switch of this deck.
When you don’t use the timer, set the
TIMER
switch to the
OFF
position.
Playback always starts from side “A”.
AC concent
Audio source
( To make a timer-
controlled recording
of a radio program,
s e t yo ur tu n e r a s
required.)
Amplifier
(Set the input /output
selectors and others to
the proper positions.)
Timer
Signal flow
At
recording
time
At
playback
time
Timer-controlled recording
(Example: Recording a broadcast program)
1. Connect this unit and stereo system to a com-
mercially available audio timer.
2. Set the
POWER
switch of all components to
ON.
3. Load a recordable cassette tape(s) in TAPE 1
or ll (or both decks for continuous recording).
4. Set the
REV MODE
switch to the required posi-
tion.
For continuous recording on both decks, set the
REV MODE switch to the
ä
(CONT PLAY)
position.
5. Set the
DOLBY NR
switch as required.
6. Tune in a broadcasting station to be recorded.
7. Press the
RECORD
key of the deck to be re-
corded to set the deck to the record-pause
mode.
8. Adjust the recording level.
9. Set the
TIMER
switch to the
REC
position.
10. Set the audio timer to the required start (power
on) and stop (power off) times. When this set-
ting is completed, the power to all components
will be switched off.
When the preset start time is reached, power will
be supplied and recording will start automatically.
Recording automatically starts also by simply
pressing on the
POWER
switch of this deck.
When you don’t use the timer for a while, be sure
to set the
TIMER
switch back to the
OFF
position
to prevent accidental erasure of your important
tape.
Recording always starts from side “A”.
Connections with a timer