3 before first use, 2 your aquatrio, 1 introduction – Philips FC7070 User Manual
Page 8: 2 what is in the box, 3 front of aquatrio, 4 back of aquatrio
8
4 Turnable cord storage hook
5 Mains cord
6 Carrying handle
7 Lever for clean water tank
8 Cap of clean water tank
9 Clean water tank
10 Ventilation openings
11 Air inlet
12 Lever for dirty water tank
13 Lid of dirty water tank
14 Dirty water tank
15 Parking position release button
16 Wheels
17 Flushing tray
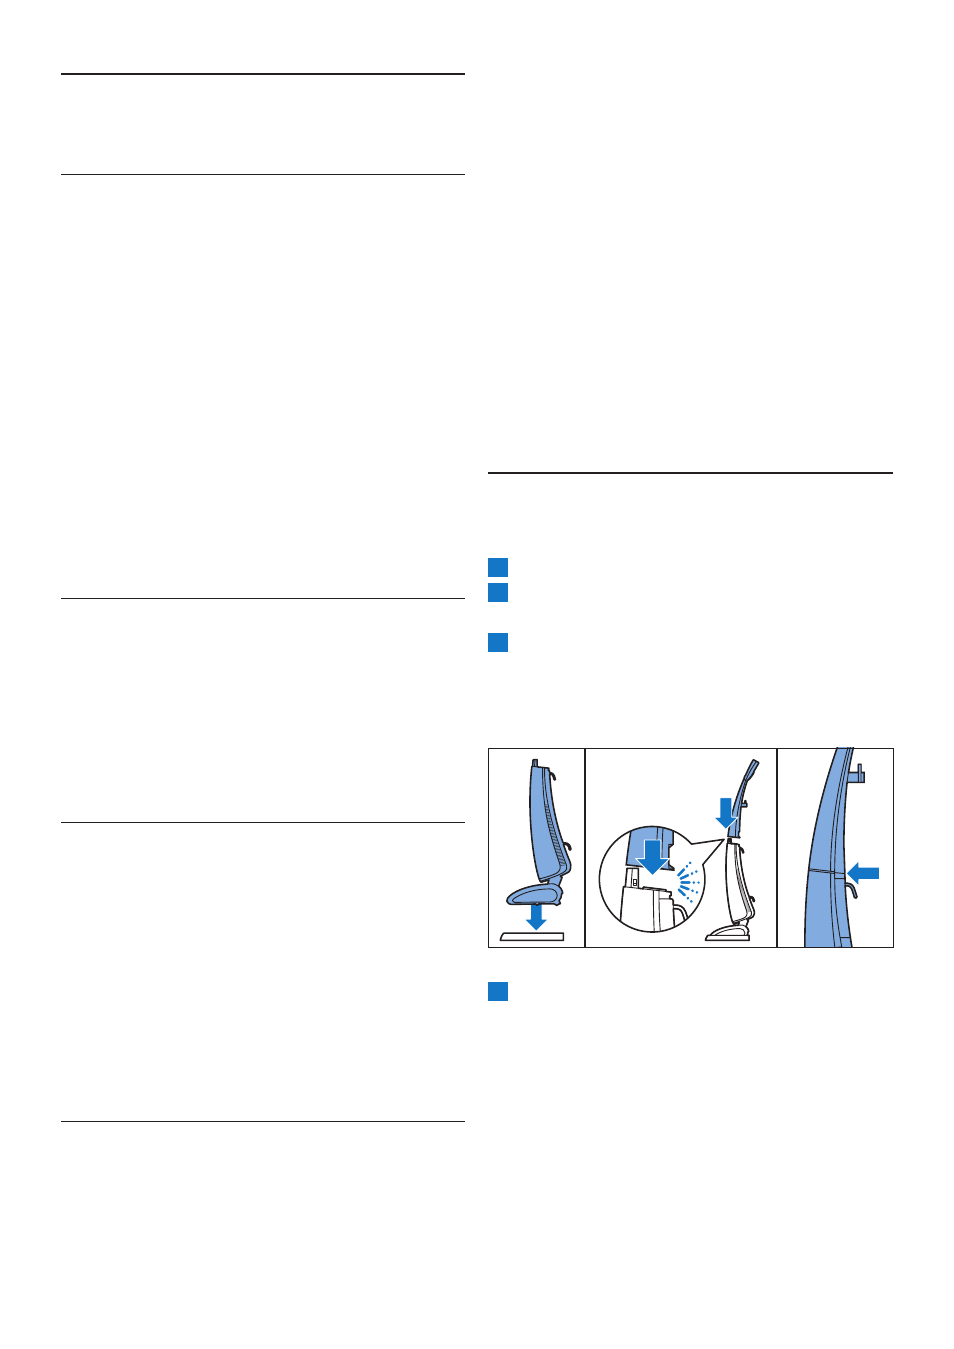
3 Before first use
1
Remove the plastic bags from the appliance.
2
Place the lower body on the flushing tray to
prevent it from rolling away.
3
Place the upper body on the lower body.
Make sure that the recesses of the upper
body fit exactly on the projections of the
lower body.
4
Press the upper body down on the lower
body until it locks into position with a click.
This requires some force!
The blue back of the upper body has to fit
onto the lower body without any gap.
B
Warning:
Never use the appliance when the upper body
is not placed on the lower body properly. Never
disassemble the upper body from the lower
body after assembly.
2 Your AquaTrio
2.1 Introduction
Congratulations on your purchase and welcome
to Philips! To fully benefit from the support that
Philips offers, register your product at www.philips.
com/welcome.
The new Philips AquaTrio simultaneously vacuums,
mops and dries hard floors in one go. Using the
AquaTrio saves up to 50% of your time and effort
compared to traditional vacuum cleaning followed
by wet mopping. Fast-rotating microfibre mopping
brushes thoroughly remove dirt, stains and liquids
in one pass and give you perfect results quickly
and easily. In this user manual we give you some
tips to make the cleaning job as easy and efficient
as possible. We hope that you enjoy using this
appliance as much as we enjoyed creating it.
2.2 What is in the box
1 Lower body
2 Upper body
3 Flushing tray
4 User manual
5 Quick start guide
6 Guarantee leaflet
7 Registration card
2.3 Front of AquaTrio
1 Unlock slide
2 Upper body
3 Tank full/tank empty light
4 Lower body
5 Mopping nozzle
6 Mopping nozzle lid release slide
7 Mopping nozzle lid
8 Mopping brush cover with handgrip
9 Mopping brushes
10 Ventilation openings
2.4 Back of AquaTrio
1 Cord fixing hook
2 Handgrip
3 Power-on button