Auditioning your style and adding more tracks, Recording – Roland E-60 User Manual
Page 156
Programming Styles (Style Composer)
156
r
E-60/E-50 Music Workstation
There is one last thing we need to set:
(19) Specify how long the count-in should be before
recording starts by pressing the [COUNT-IN] field
and using the [DATA÷ENTRY] dial or the [DEC]/[INC]
buttons to select one of the following options:
Recording
(20) Press the [START÷STOP] button. Depending on the
count-in setting, the metronome now counts
down, then recording starts.
Note: You can also start recording using an optional foot-
switch connected to the FOOTSWITCH/EXPRESSION jack. See
“Start/Stop” on p. 55.
You could start by playing only the bass drum part. If
you specified the track length (see above) before
recording, the Style Composer jumps back to the
beginning of the pattern after the set number of
measures. The second time around you could add the
snare drum, the third time the HiHat, and so on.
When recording another part (ABass~Acc6), do
everything you would do during a live performance:
add modulation, Pitch Bend and to use an optional
hold pedal connected to the SUSTAIN jack.
(21) Press [START÷STOP] again to stop recording.
The display changes to:
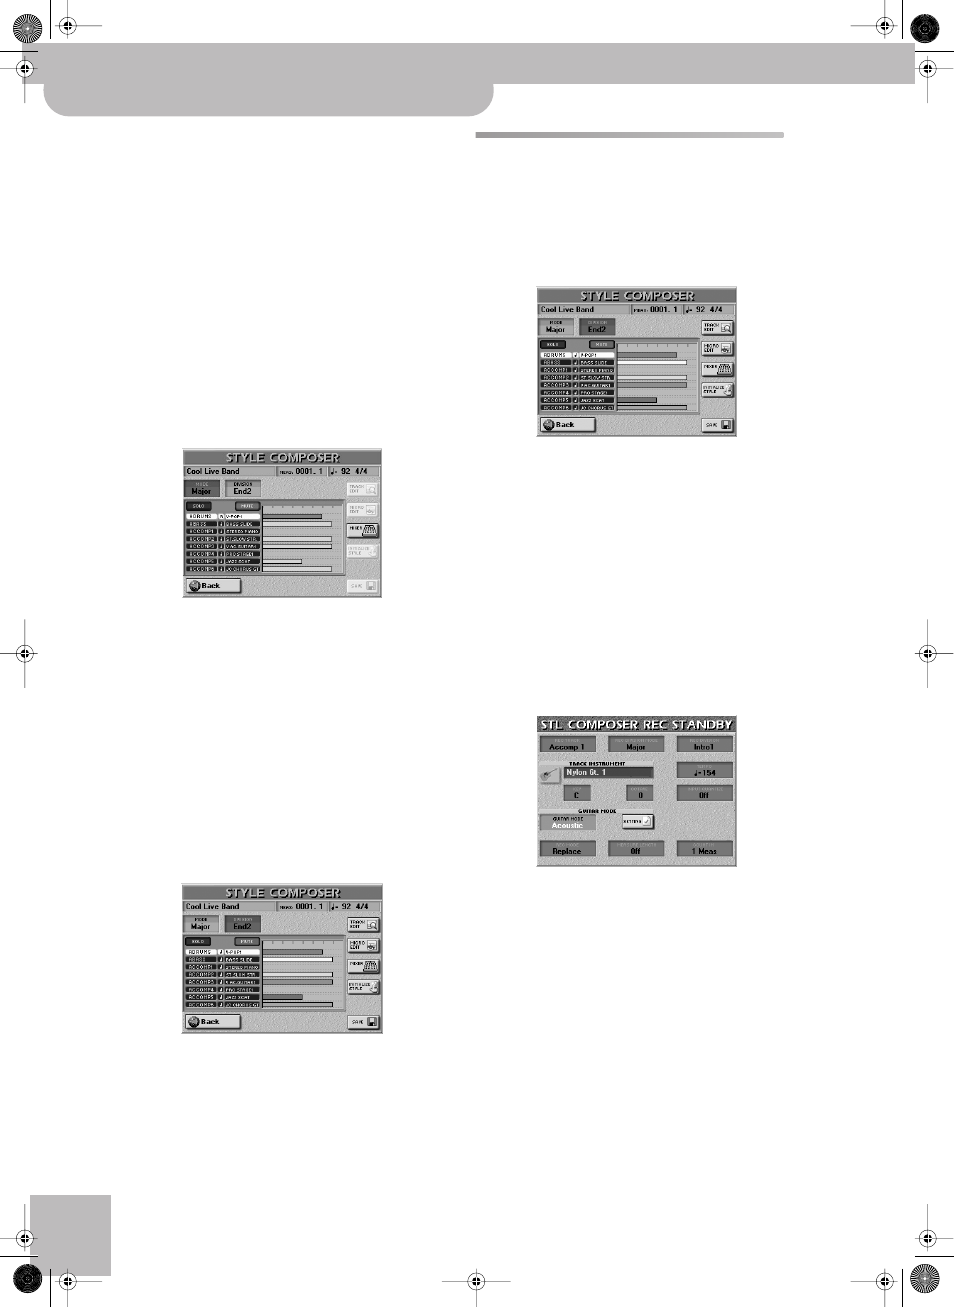
Auditioning your Style and adding
more tracks
(1) Press the [START÷STOP] button again to listen to
your track.
The STYLE COMPOSER page contains two fields that
allow you to select the pattern you want to audition.
Here’s how to select it:
(2) Press the [MODE] field and use the [DATA÷ENTRY]
dial or the [DEC]/[INC] buttons to select “Major”,
“minor” or “7th”.
Only one mode can be selected for playback.
(3) Press the [DIVISION] field and use the [DATA÷ENTRY]
dial or the [DEC]/[INC] buttons to select one of the
Divisions (Intro 1~4, Main 1~4, Intro 1~4, Fill Dwn
1~3, Fill Up 1~3, End 1~4).
Only one Division can be selected for playback.
If you like your drum part, continue with “Saving
your Style”. If not, record a new version:
(4) Press the [REC¥∏] button to jump to the following
page:
(5) Select the Mode and Division you want to redo.
(6) Press the [REC¥MODE] field and select…
(7) Continue with step (16) on page 155.
Off: No count-in. Recording starts as soon as you
press the [START÷STOP] button (while [REC¥∏]
flashes).
1 Meas: Recording starts after a 1-bar count-in.
2 Meas: Recording starts after a 2-bar count-in.
Wait Note: Recording starts as soon as you play a note on
the keyboard. (There will be no count-in.)
Replace: To replace the previous recording with new
data.
Mix: To add notes you forgot to record the first time.
E-60_50_OM_UK.book Page 156 Thursday, June 22, 2006 10:06 AM