Menu description and navigation, Projector control – Runco VX-2c User Manual
Page 18
17
» PROJECTOR CONTROL
Once the VX-2c and DHD controller have been properly installed and connected, you are ready to perform set-up and
calibration procedures. All setup and calibration parameters are accessed and adjusted through the VX-2c fluorescent display
menu system.
The VX-2c/DHD system has been designed to incorporate setup and calibration standards established by the Imaging Science
Foundation (ISF). The ISF has developed carefully crafted , industry-recognized standards for optimal video performance and
has implemented a training program for technicians and installers to use these standards to obtain optimal picture quality from
Runco video display devices.
Accordingly, Runco recommends that setup and calibration be performed by an ISF certified installation technician.
The VX-2c menu system is organized to provide for a logical, step by step approach to both setup and operation.
To begin, press the “Menu” button on the rear panel of the VX-2c. This will bring up the fluorescent display menu and you
may then proceed as follows:
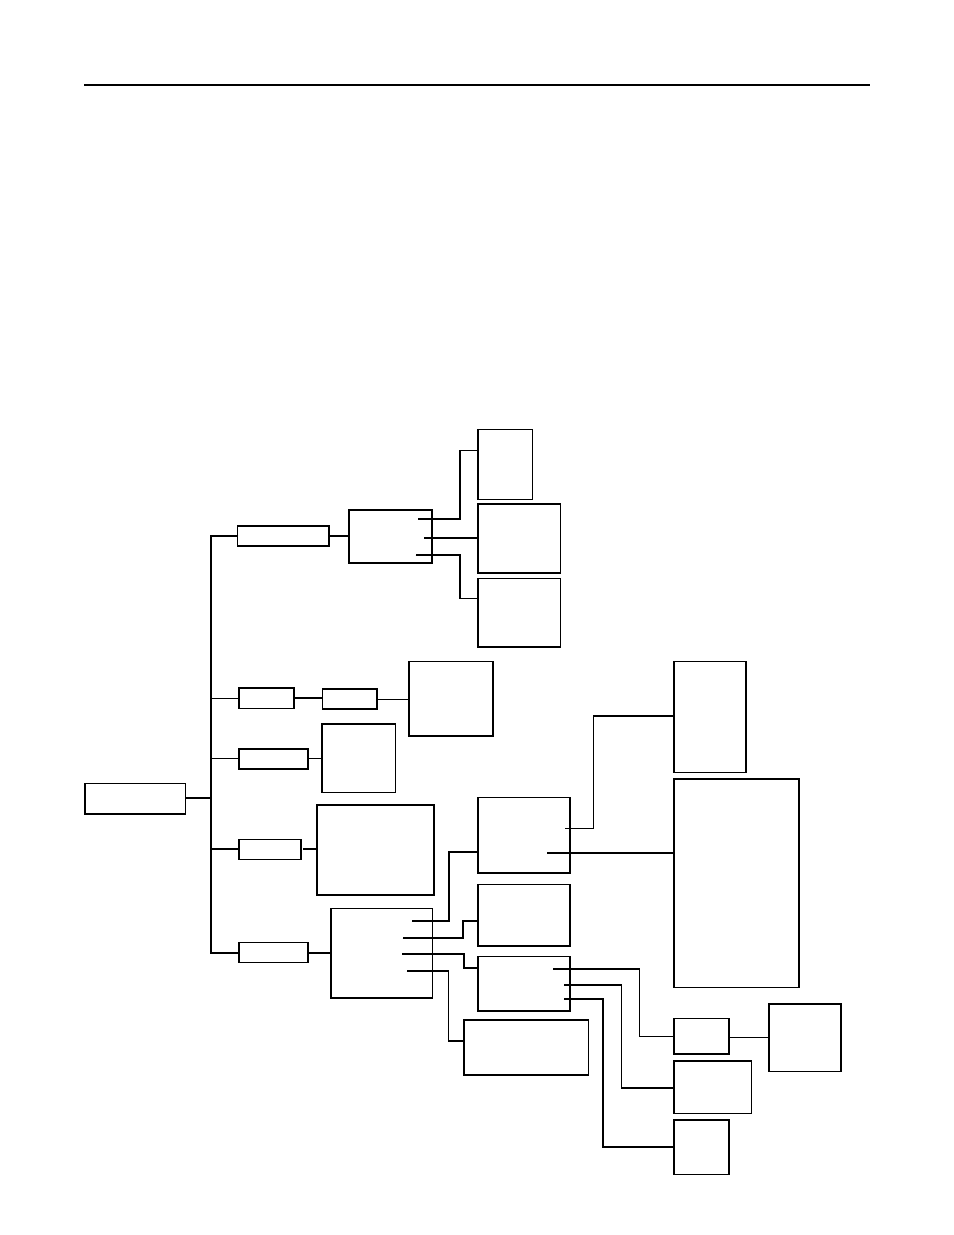
MENU DESCRIPTION AND NAVIGATION
MAIN MENU
Wt. Balance
Gain
Offset
Gamma
Default
Red
Green
Blue
Offset
Red
Green
Blue
Gamma
Red
Green
Blue
Orient
Floor F.
Ceiling F.
Floor R.
Ceiling R.
Shift L/R
Shift U/D
Lens Zoom
Lens Focus
Lens Adj.
Model
S/N
Hardware Revision
Firmware Revision
Error Code
Proj. Info
Diagnose
Lamp
Color
Service
Reset to Default
Advanced
Normal
Color Enable
Tests
Lamp Hours
Lamp S/N
Change Lamp
Gamut
Color Space
Color Temp
Power Cycle
Standby Time
No. of Lamps Used
Red
Green
Blue
Yellow
Cyan
Magenta
Color Bar 75 IRE
Color Bar 100 IRE
External H Ramp
Test Black
Test White
Test Green
Test Red
Test Blue
Check Board
Alignment
H Ramp
V Ramp
Manual
HD
SD NTSC
SD PAL
5000K
6500K
9300K
White
Red
Green
Blue
Orient