Installation – Regency E21-LP1 User Manual
Page 16
16
Regency E21 Gas Fireplace Insert
16) Attach clear label "This unit has been converted to Propane" near or
on the serial # decal. Attach white label "This valve has been converted
from NG to LPG using SIT conversion Kit Code 0.907.202" onto the
valve.
17) Replace yellow "Natural Gas" label with red "Propane" label
18) Check for gas leaks.
19) Check inlet and outlet pressures.
20) Check operation of fl ame control.
21) Check for proper fl ame appearance and glow on logs.
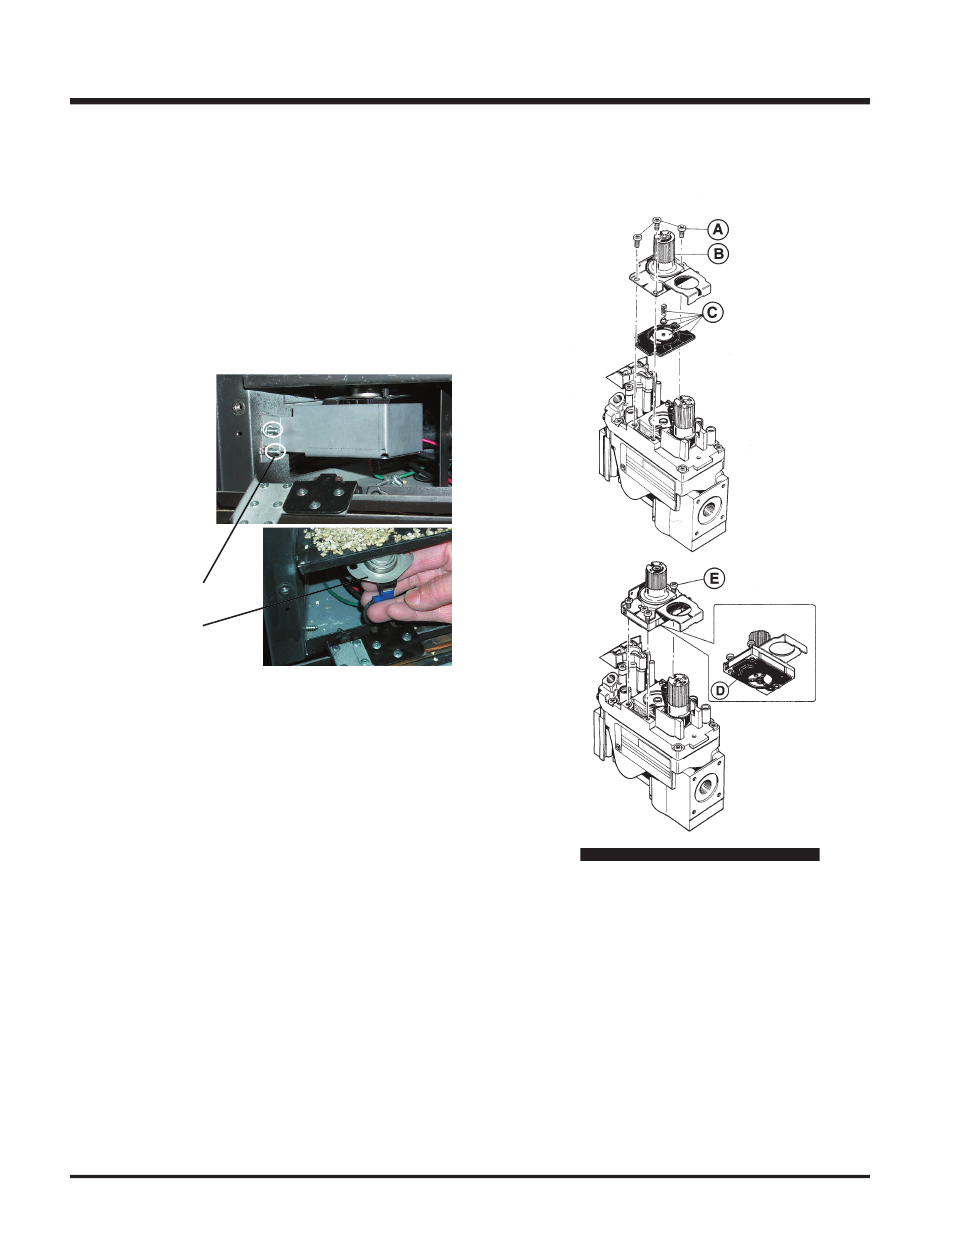
Remove the 2 nuts
holding the switch
box in place,
then pull the
thermosdisc out of
the bracket.
11) Remove and discard the 3 pressure regulator mounting screws (A),
pressure regulator tower (B) and diaphragm (C).
12) Insure that the rubber gasket (D) is properly positioned and install
the new HI/LO pressure regulator assembly to the valve using the
new screws (E) supplied with the kit. Tighten screws securely.
13) Replace Burner Tray and reverse steps 6) to 1).
14) Adjust the burner aeration setting from 1/8" to 3/16" as required for
the best fl ame picture.
15) Remove the switch cover from the left side of the body base and pull
the thermodisc out of the bracket under the left side of the fi rebox
bottom and replace with the Thermodisc supplied with this kit.
INSTALLATION