Installation, Bay louvers, Optional bay front – Regency E21-LP1 User Manual
Page 14: Flush louvers
14
Regency E21 Gas Fireplace Insert
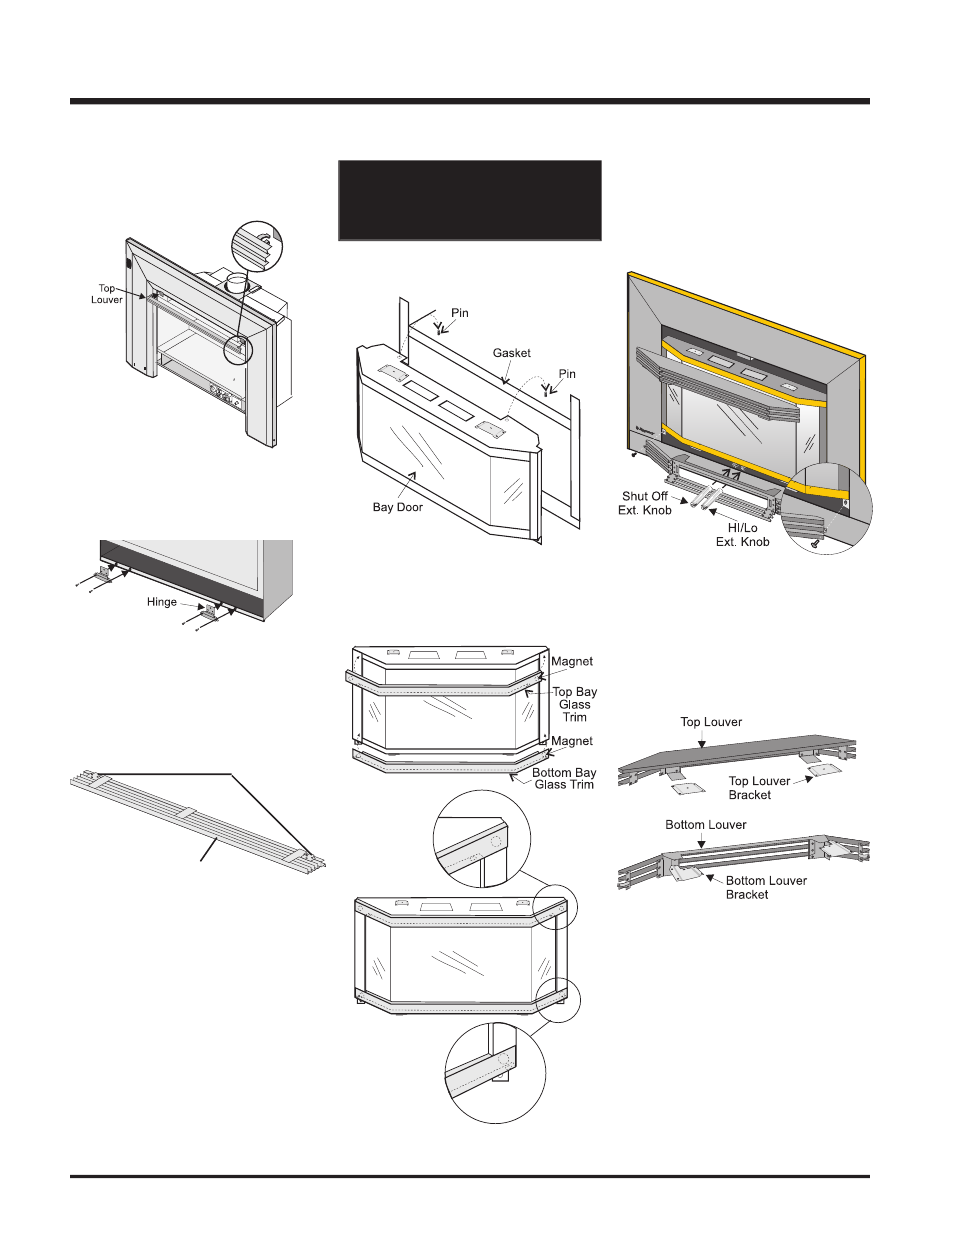
BAY LOUVERS
1) Install top louver by sliding the two bracket
clips into the brackets located on top of the
bay door. See below. The fi tted louver leaves
a small gap between faceplate bottom and
louver top.
Diagram 1
NOTE: The top and bottom trim pieces
are different.
OPTIONAL BAY FRONT
IMPORTANT
Flush glass must stay in place
when bay option is used. The bay
front is a decorative overlay only.
1) Place the bay door onto the 2 pins on the
top of the unit.
2) Position 2 magnets on the back of each trim
Position 2 magnets on the back of each trim
piece close to the ends. Place the top and
bottom trim pieces on the bay front.
3) Install top and bottom louvers.
Note: Top and bottom louvers and brackets
are different. See diagram below.
2) Install bottom louver by sliding the two
bracket clips into the brackets located
underneath the bay door and secure with
2 screws into the bracket on the bottom of
the Bay Front as per diagram 1.
INSTALLATION
FLUSH LOUVERS
1) The Top Louver is held in place by Spring
Clips. Push into place as shown.
2) Install the Spring Hinges on the left and right
side of the bottom of the Firebox using 2
screws per hinge.
3) Place the Bottom Louver near the hinge. Flip
hinge over the Bottom Louver and secure
using 3 screws.
Bottom Louver
Hinge
Location