5fixing instructions – Roberts Radio RDK-2 User Manual
Page 6
5
Fixing instructions
Please read the following installation procedure and familiarise yourself
with each of the steps before starting work. This will help ensure that the
installation proceeds smoothly and without error. You should also read the
cautions on page 40 of this booklet.
1. Determine the desired location for the radio. This must be away from
sources of heat, steam and naked fl ames (away from kettles, toasters,
cooker hobs, and the like).
2. Check that DAB and FM reception is possible at the desired
location.
3. Adjust the aerial for optimal DAB and FM reception. For optimum
reception the aerial may need to run vertically rather than horizontally.
Try to avoid running the aerial near wiring, water pipes, or other metal
structures. You may need to experiment to determine the best position
for the aerial. Use adhesive tape as a temporary fi xing for the aerial,
since holding it may affect reception.
4. Check that the aerial and mains lead can be safely routed and secured
before fi tting the radio.
5. Loosen the thumb screws on the sides of radio to free the mounting
bracket. Lift the mounting bracket and tighten the thumb screws.
6. Offer the radio to the desired location to determine the precise location
of the mounting bracket against the underside of cupboard.
7. Using a soft pencil, mark the underside of the cupboard with the
location of the mounting bracket.
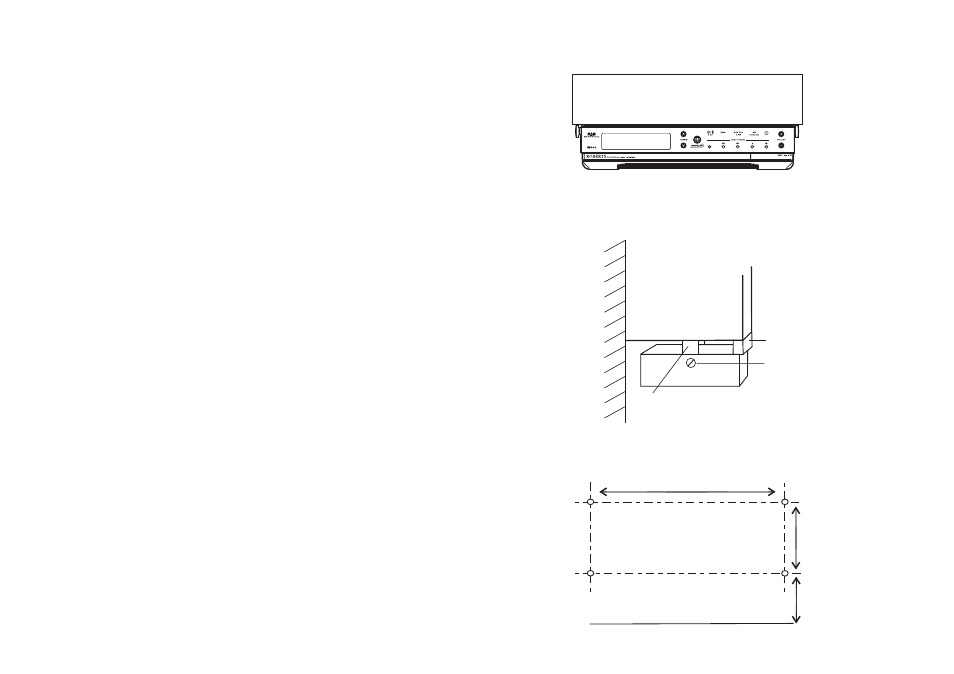
Cupboard
Wall
Cupboard
Facia
strip panel
Mounting
bracket
Radio thumbscrew
225mm
60mm
45mm
Front of radio
A. Front view of radio installed under a cupboard
B. Side view showing radio installed under cupboard which has a
facial panel
C. Mounting hole locations relative to the front of the radio.