Control panel – Ricoh LDD280 User Manual
Page 30
18
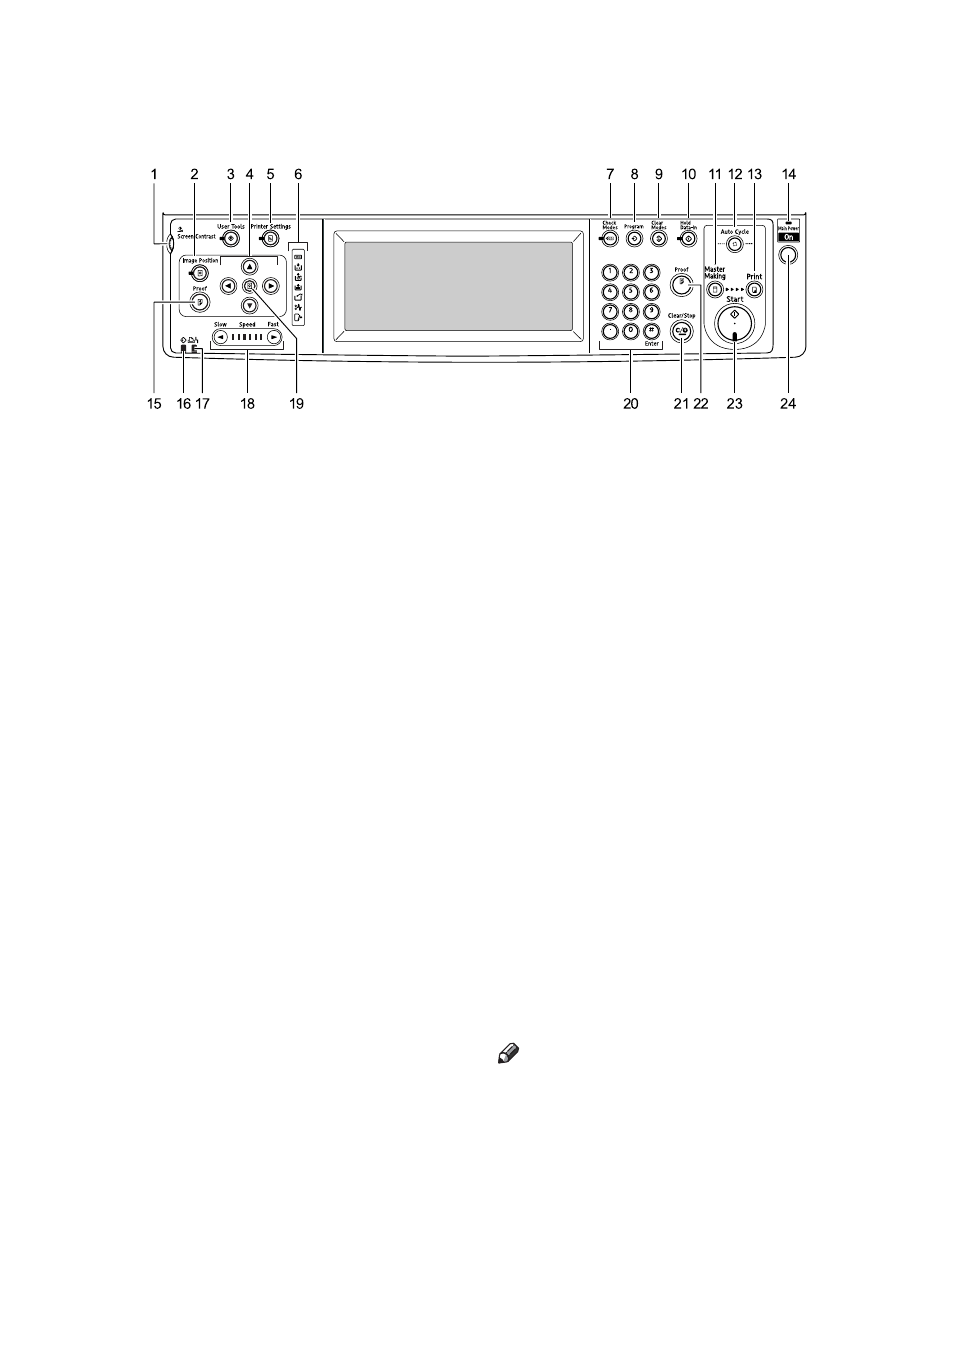
Control Panel
1.
Screen contrast knob
Adjusts the brightness of the display panel.
2.
{Image Position} key
Adjusts the position of printed images.
3.
{User Tools} key
Press to change the default settings to
meet your requirements.
4.
Position Setting keys
Adjusts the position of printed images.
5.
{Printer Settings} key
Press to change the default settings for
online printing.
6.
Indicators
M: Open Cover/Unit indicator. See p.145
“MWhen the Open Cover/Unit Indica-
tor Lights”.
Let you know the status of the machine.
j: Add Ink indicator. See p.128 “jAd-
ding Ink”.
C: Master End indicator. See p.130
“CReplacing the Master Roll”.
B: Load Paper indicator. See p.126
“BLoading Paper”.
k: Master Eject indicator. See p.146
“kRemoving the Used Master”.
x: Misfeed indicator. See p.132 “x
Clearing Misfeeds”.
7.
{Check Modes} key
Press this key to check settings.
8.
{Program} key
Press to register frequently used settings,
or to recall registered settings.
9.
{Clear Modes} key
Press to clear previously entered print job
settings.
10.
{Hold Data-in} key
Press to reject the online print temporarily.
11.
{Master Making} mode select key
Press to select the master making mode.
12.
{Auto Cycle} key
Press to make masters and prints in a single
operation. See p.46 “Basic Procedure”.
13.
{Print} mode select key
Press to select the print mode.
14.
Main power indicator
The main power indicator lights up when
the main switch is turned on.
15.
{Proof} key
Press to make a proof print.
Note
❒ Same as 22.
16.
Data In indicator (Green)
• On: Data waiting for Master Making is
in the machine.
• Blinking: Data is being received, or
Master Making is in progress.
• Off: Master Making are completed.
AJK401S