2) assembling the bottom hi-hat, Lm s – Roland VH-12 User Manual
Page 6
6
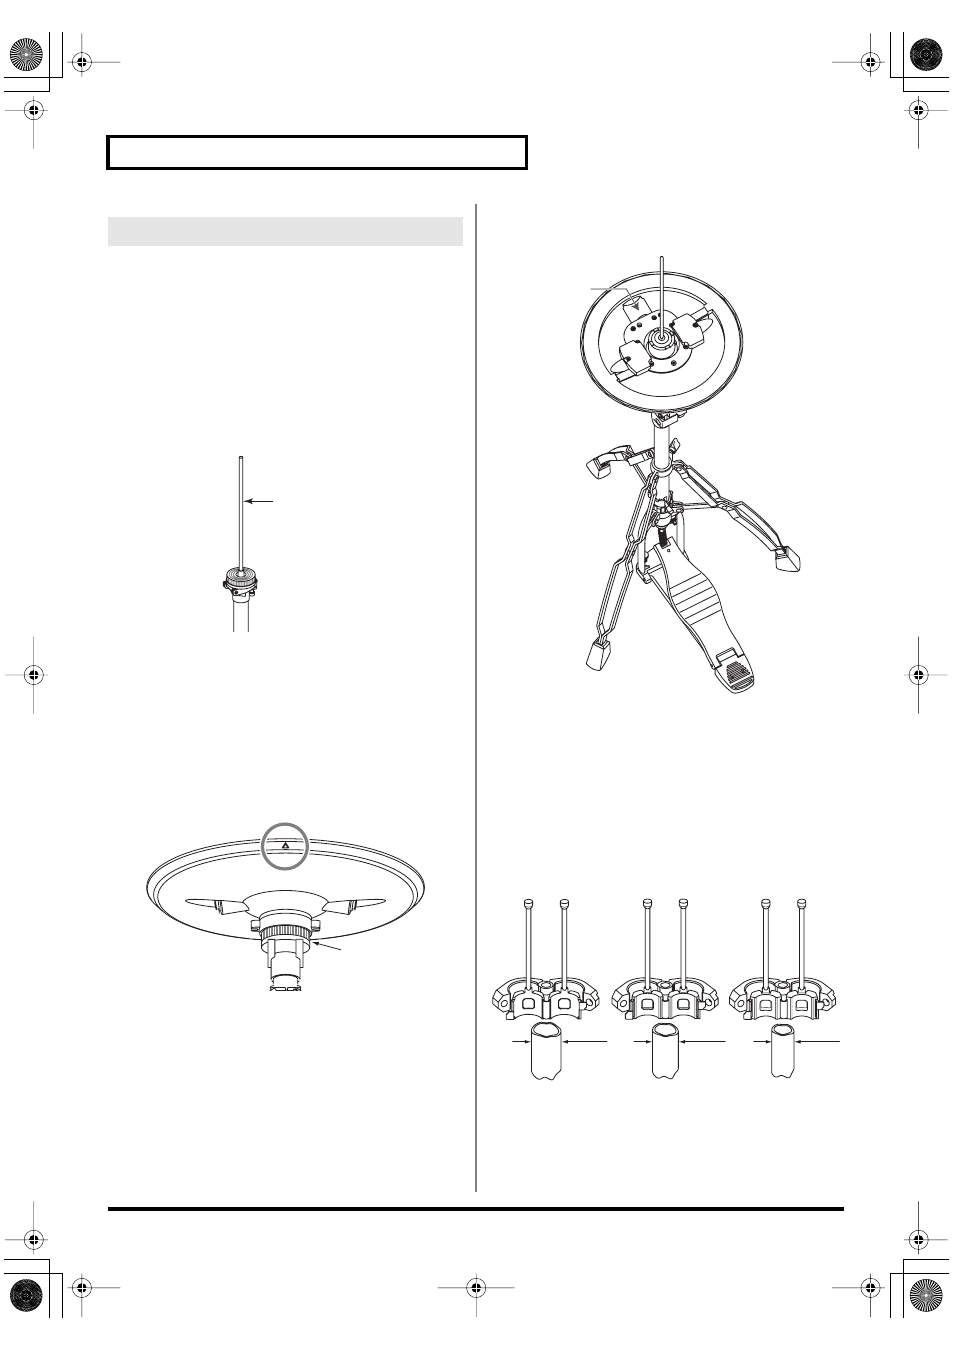
Mounting on the Hi-Hat Stand
1.
Remove the clutch included with the hi-hat
stand from the cymbal rod.
* The clutch included with the hi-hat stand will not be used.
* It is not necessary to remove the felt (or rubber) pad on the hi-
hat stand used for supporting the bottom cymbal.
2.
Confirm that the cymbal rod is firmly secured.
For instructions on tightening the cymbal rod, refer to the
owner’s manual for your cymbal stand.
* Looseness or play in the cymbal rod can make the top hi-hat
unstable, causing it to shake or turn, and prevent proper
functioning.
3.
Place the bottom hi-hat on the hi-hat stand with
the cymbal rod passing through the bottom hi-
hat hole.
At this point, position the “
▲
” mark so it’s facing the
performer.
fig.Bottom-00.e
At this point, position the LINK jack so it’s on the far side
of the unit, facing away from the performer.
fig.Bottom-01.e
4.
Select the holder that matches the diameter of
the pipe at the top of the hi-hat stand.
There are three holders to match different pipe diameters.
L:
25.4 mm (1")
M:
22.2 mm (7/8")
S:
19.1 mm (3/4")
5.
Remove the clamp bolt, then fit the holder and
the clamp so they are nested together.
fig.Bottom-02
(2) Assembling the Bottom Hi-Hat
Cymbal Rod
Hi-hat stand felt
(or rubber)
cymbal pad
LINK jack
L
L
M
M
S
S
25.4 mm
(1")
L
M
S
22.2 mm
(7/8")
19.1 mm
(3/4")
VH-12_e 6 ページ 2005年10月5日 水曜日 午前10時26分