Setting a scan area – Ricoh 3232 User Manual
Page 21
Placing Originals
13
2
Reference
For how to place two-sided docu-
m e n t s , s e e p .6 2 “T wo - S id e d
T ra n sm i s s io n ( D o ub l e - S i d e d
Transmission)”, Facsimile Reference
For acceptable types of originals,
see p.204 “Acceptable Types of
Originals”, Facsimile Reference
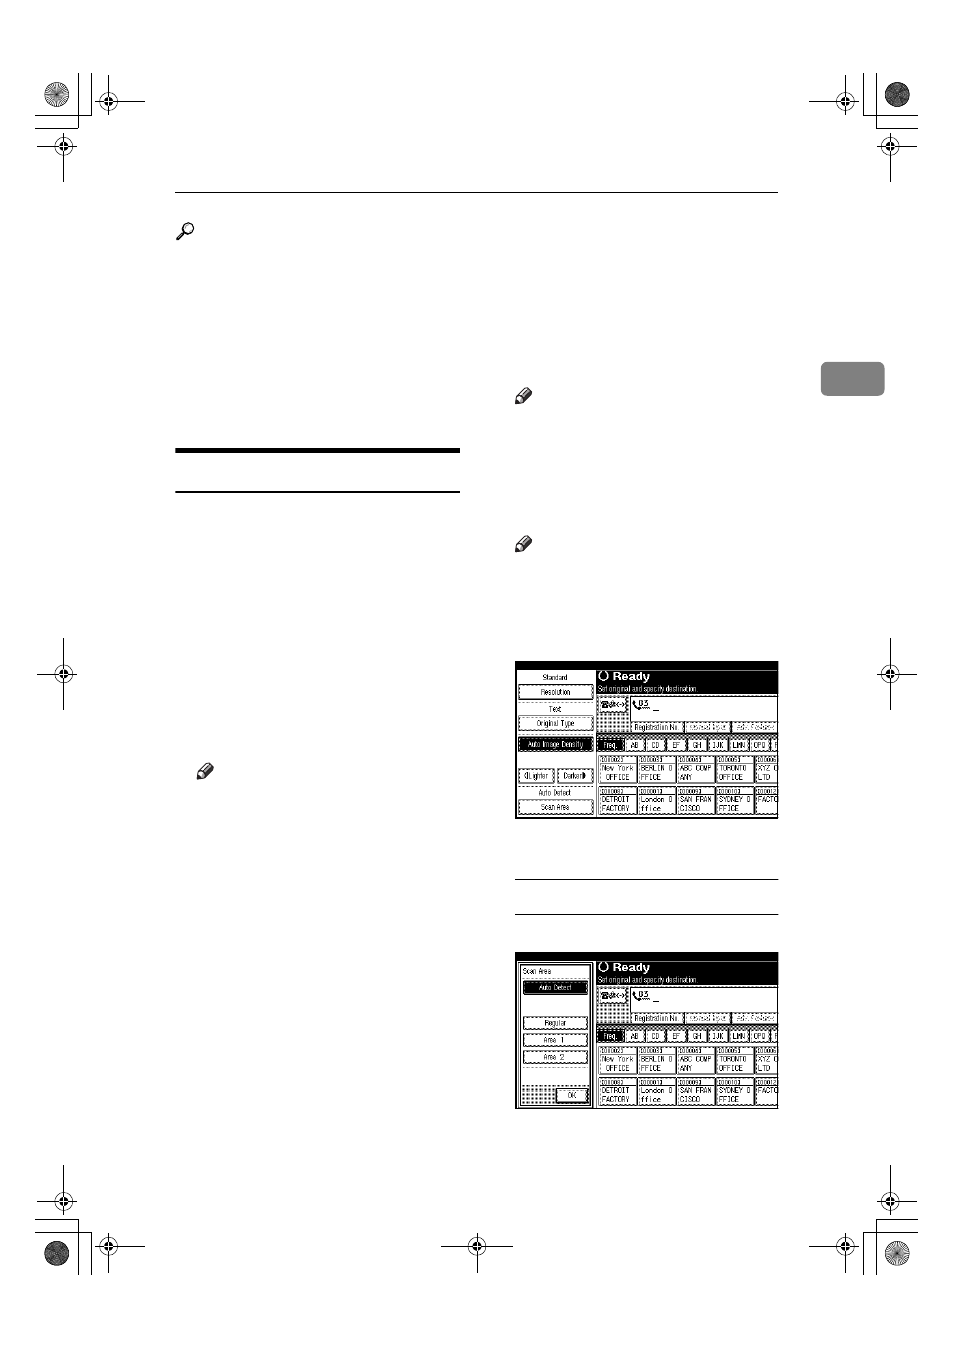
Setting a Scan Area
Normally, a placed document is
scanned according to the automati-
cally detected size. If a scan area is
specified, the document is scanned
accordingly. Thus, documents can be
sent without extra space or blank
margins. See p.208 “Original sizes
difficult to detect”, Facsimile Reference
❖
❖
❖
❖ Auto Detect
Detects the size of the first page
and scans all pages using that size.
Note
❒ If the machine cannot detect the
original size, a confirmation
message appears. Replace the
original.
❖
❖
❖
❖ Regular
The placed document is scanned
according to specified size regard-
less of actual size.
The sizes that can be specified are
A 4
K L , B4 JI S L , A3L ,
8
1
/
2
"
×11"KL, 8
1
/
2
"
×14"L, and
11"
×17"L.
❖
❖
❖
❖ Area
Enter the area to be scanned. Only
the area in the specified size is
scanned regardless of the actual
size of a placed document. See
p.158 “Programming, Changing
and Deleting a Scan Size”, Facsimi-
le Reference
Note
❒ To cancel the selected scan area,
select [Auto Detect]. See p.14
“Specifying Auto Detect”.
AAAA
Place the originals, and then se-
lect any scan settings you require.
Note
❒ Small-size originals may be sent
at a slight slant since they do not
match the document guide.
BBBB
Press [Scan Area].
CCCC
Select the scan area.
Specifying standard sizes
A Press [Regular].
ThemisC1_Fax_GB-F_FM.book Page 13 Wednesday, November 24, 2004 7:09 PM