Installation, Framing & finishing important – Regency P48 User Manual
Page 9
Regency P48 Zero Clearance Direct Vent Gas Fireplace
9
INSTALLATION
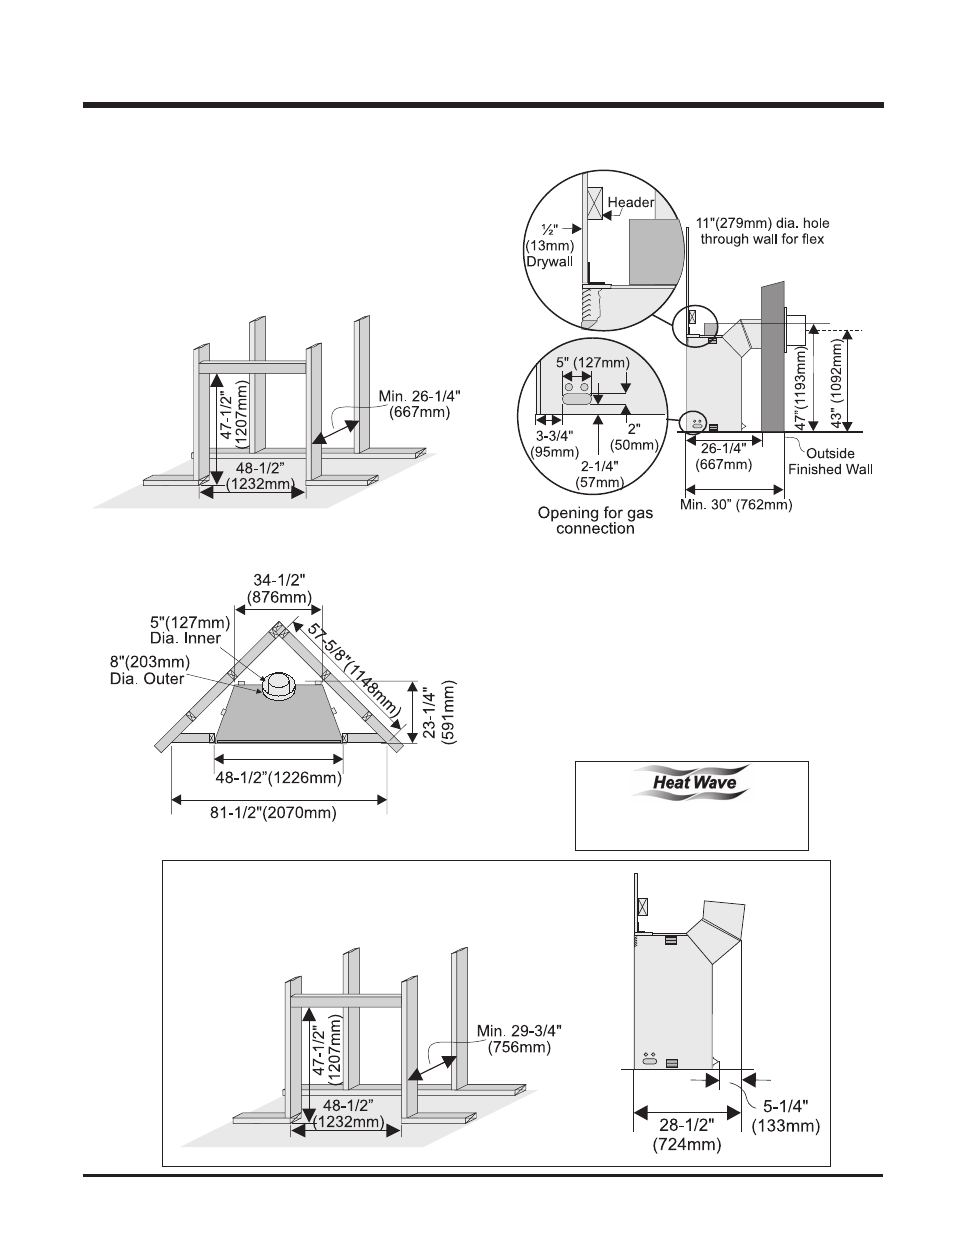
Note: 43" (1092mm) is the minimum height for flex termination
and Simpson Dura-Vent terminations.
Diagram 1
1) Determine the total thickness of facing material (eg. drywall plus
ceramic tiles) to allow the finished surface to be flush with the front
of the unit. Total facing thickness can vary from 1/2" (13mm) to
1-1/4" (32mm) thick.
2) Frame in the enclosure for the unit with framing material. The framed
opening for the assembled kit is 47-1/2" high x 48-1/2" wide x
26-1/4" deep (1207mm H x 1232mm W x 667mm D). See Diagram 1.
3) For exterior walls, insulate the enclosure to the same degree as the
rest of the house, apply vapour barrier and drywall, as per local
installation codes. (Do not insulate the fireplace itself.)
4) The unit does not have to be completely enclosed in a chase. The
clearance on top of the unit from the top standoffs is 0" so
combustible building materials can be laid directly on top of the
standoffs. You must maintain clearances from the vent to combus-
tible materials: See page 7. Combustible materials can be laid against
the side and back standoffs and the stove base.
FRAMING & FINISHING
IMPORTANT
When installing the unit with any vertical venting off the top of the
unit as shown, the minimum framing depth changes accordingly.
The HeatWave Duct Kit has different
clearance and framing requirements,
check the HeatWave manual for details.