Rimage Prism CDPR11 User Manual
Page 22
Rimage PrismPlus!
16
110635_G
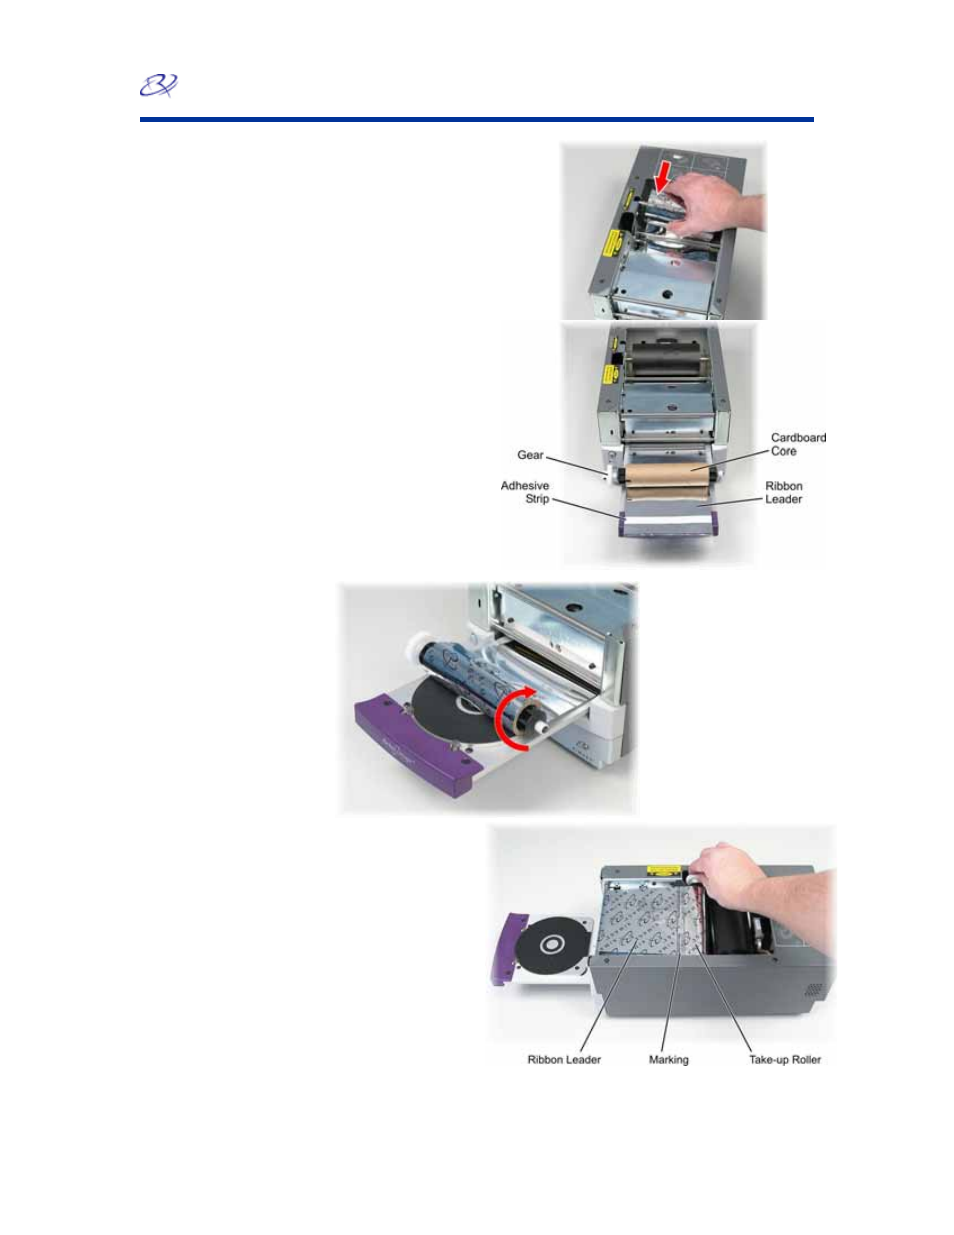
f. Install
the
supply roller as shown.
Leave some slack in the ribbon leader.
g. Press
the
operator button until the
printer tray comes out. The ribbon is
threaded to the front of the PrismPlus.
h. Remove the tape from the printer tray.
i.
Remove the adhesive strip from the
ribbon leader.
3. Load
the
take-up roller.
a. Place the new empty cardboard core
on the take-up roller. It is notched to fit
only one way.
b. Place
the take-up roller on top of the
ribbon leader as shown. The gear must
be on the correct side.
c. Pull
the
ribbon leader up over the
cardboard core and attach the adhesive
strip to the cardboard core so that the
edges on the ribbon leader are aligned
to the edges of the cardboard core. The
arrow illustrates the wrap direction.
d. Roll
the
ribbon leader so that it is
wrapped only once around the roller.
-
Important! Do not roll past the
marking on the leader that states
STOP - Wind Leader Onto Take-
up Core Stopping here.
e. Install
the
cardboard take-up roller in
the printer as shown. The ribbon
should be tight and there should be no
creases in the ribbon.