Installation, 1 hardware installation, 2 configuring your computer – NetComm N300 User Manual
Page 9: Netcomm gateway
YML9WMAXXN
ADSL2+ Wireless N300 Modem Router with VoIP User Guide
www.netcomm.com.au
9
NetComm Gateway
TM
Series - ADSL2+ Wireless N300 Modem Router with VoIP
Installation
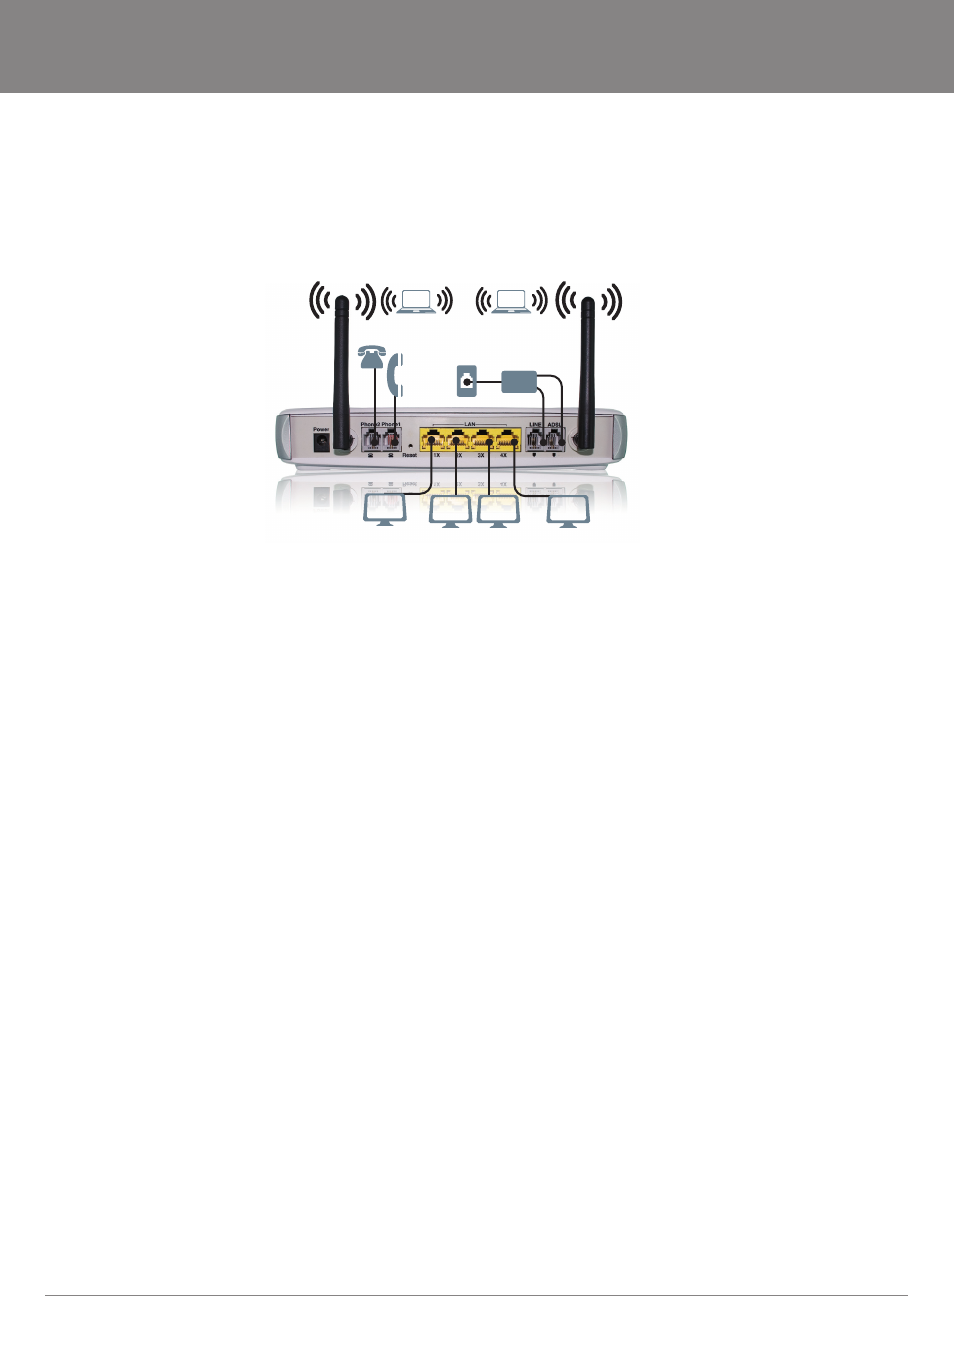
2.1 Hardware Installation
Follow the instructions below to complete the hardware installation.
1 or 2 Analogue/
Cordless Telephones
Computers connected
via Ethernet
Telephone
Socket
Laptop Computer
connected wirelessly
Phone
ADSL/Modem
Splitter
Connection to ADSL port
Connect to an ADSL2/2+ service with this RJ11 Port. This device contains a micro filter which removes the analog phone signal. If you
wish, you can connect a regular telephone to the same line by using a POTS splitter.
Connection to LAN ports
To connect to a hub or PC, use RJ45 Ethernet cable. You can connect the router to four LAN devices. The ports are auto-sensing MDI/X
and either straight-through cable or crossover cable can be used.
Connection to Phone ports
Connect up tp two standard analogue phones with an RJ11 cable to utilise a VoIP service
Connection to Power
Connect the power jack to the shipped power cord. Attach the power adapter to the wall outlet or other AC source. After powering
on, the router will perform a self-test. Wait a few moments and the router will be ready to operate.
Caution 1: If the router fails to power up, or if it malfunctions, first verify that the power supply is connected correctly. Then power it on again. If the problem persists, contact our
technical support engineers.
Caution 2: Before servicing or disassembling this equipment always disconnect all power cords and telephone lines from the wall outlet.
Reset Button
In the back panel, there is a reset button. Restore the default parameters of the device by holding down this button until the front panel LED
indicators start blinking simultaneously (about 10 seconds). If held down longer, the device may go into a firmware update state (CFE boot
mode). The user can then update the device from any web browser using the default IP address (http://192.168.1.1) without login.
2.2 Configuring your Computer
PC Network Adapter setup (Windows XP)
Set your network adapter to obtain an IP Address automaticly (See section on PC Network Adapter setup in this manual for details)
•
Click on [Start Menu] > select [Control panel] > select [Network Connections]
•
Select [Local Area Connection]) icon > select [properties]
•
Select [Internet Protocol (TCP/IP)] > Click [Properties]
•
Select the [General] tab
•
Please select both
-
Obtain an IP address automatically
-
Obtain DNS server address automatically