Netopia 6.3 User Manual
Page 88
88
Section 4
Configure
Ethernet
button on the Cayman Gateway Home page. When the Ethernet
window appears, click
Save
.
If you have previously saved your Cayman Gateway configuration, you can skip
this step.
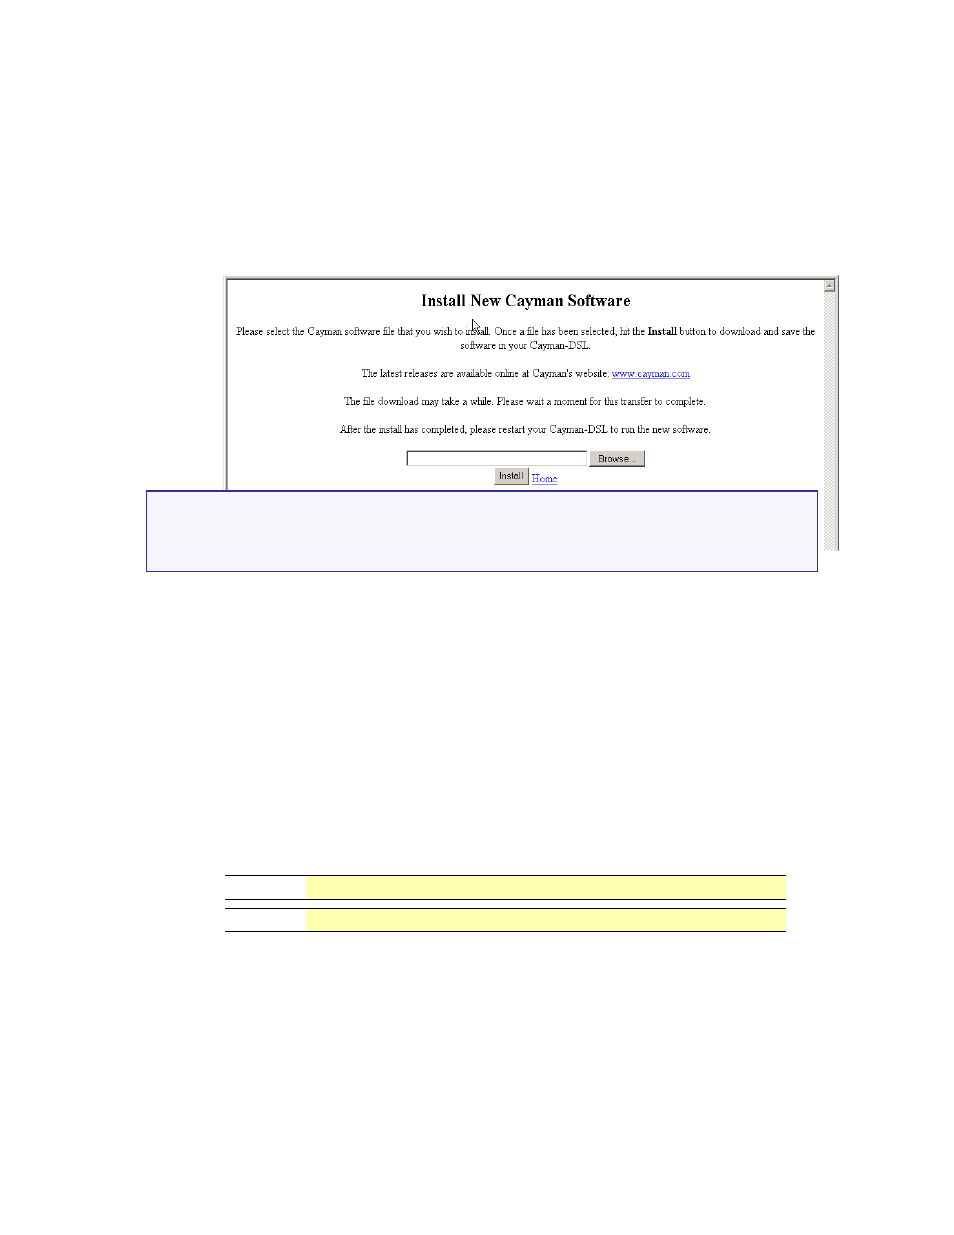
Step 3
Click the
Install Software
button on the Cayman Gateway Home page.
The Install New Cayman Software window opens.
Step 4
Enter the Updater filename into the text window with one of these
techniques:
The Updater file name starts with the letter “u“ (for “Updater”).
a. Click the
Browse
button, select the file you want, and click
Open
.
-or-
b. Enter the name and path of the update file you want to install in the text field.
Step 5
Click the
Install
button.
The Cayman Gateway copies the Updater file from your computer and installs it
into its memory storage. You see a series of dots appear on your screen as the
image is copied and installed. You have the following visual guide from your unit:
When the image has been installed, the message “successful install of
file
” appears at the bottom of the screen.
Step 6
When the “
Please Click Restart
”
message appears, click the
Restart
button and confirm
Restart
.
3220-H
DSL and Status LED indicators will blink.
2E-H
WAN LED indicator will blink.
This page is from a Cayman 3220-H Gateway (DSL WAN access).
The page for a Cayman 2E-H Gateway (Ethernet WAN access) is similar.