Task 5: make the tunnel details entries – Netopia 6.3 User Manual
Page 79
79
Section 4
Configure
Step 6
Ensure that the toggle checkbox
Enable
, which is
On
by default, remains
On.
Step 7
Click
Add
.
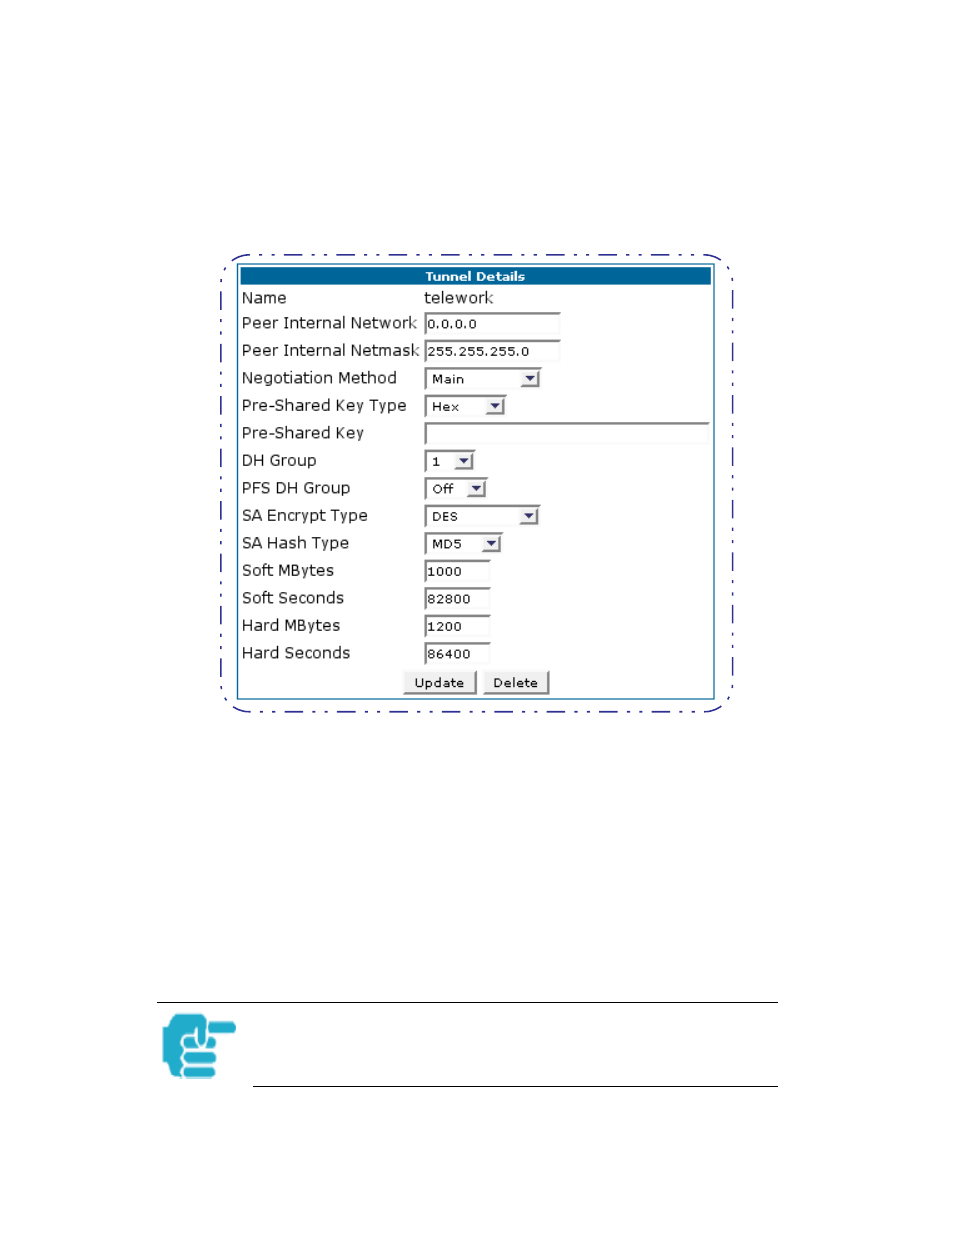
The Tunnel Details page appears.
Task 5: Make the Tunnel Details entries
Use the following steps:
Step 1
Enter or select the required settings.
Step 2
Click
Update
. The
Alert
button appears.
Step 3
Click the
Alert
button.
Step 4
Click
Save and Restart
.
Your SafeHarbour IPSec VPN tunnel is fully configured.
Tunnel sessions can only be initiated from the LAN client side.