Connect span ports to director, Confidential - do not distribute *** director, Port numbering for span dnm models figure 18 – Net Optics Smart Filtering none User Manual
Page 26: Span port connections figure 19
22
*** Confidential - DO NOT Distribute ***
Director
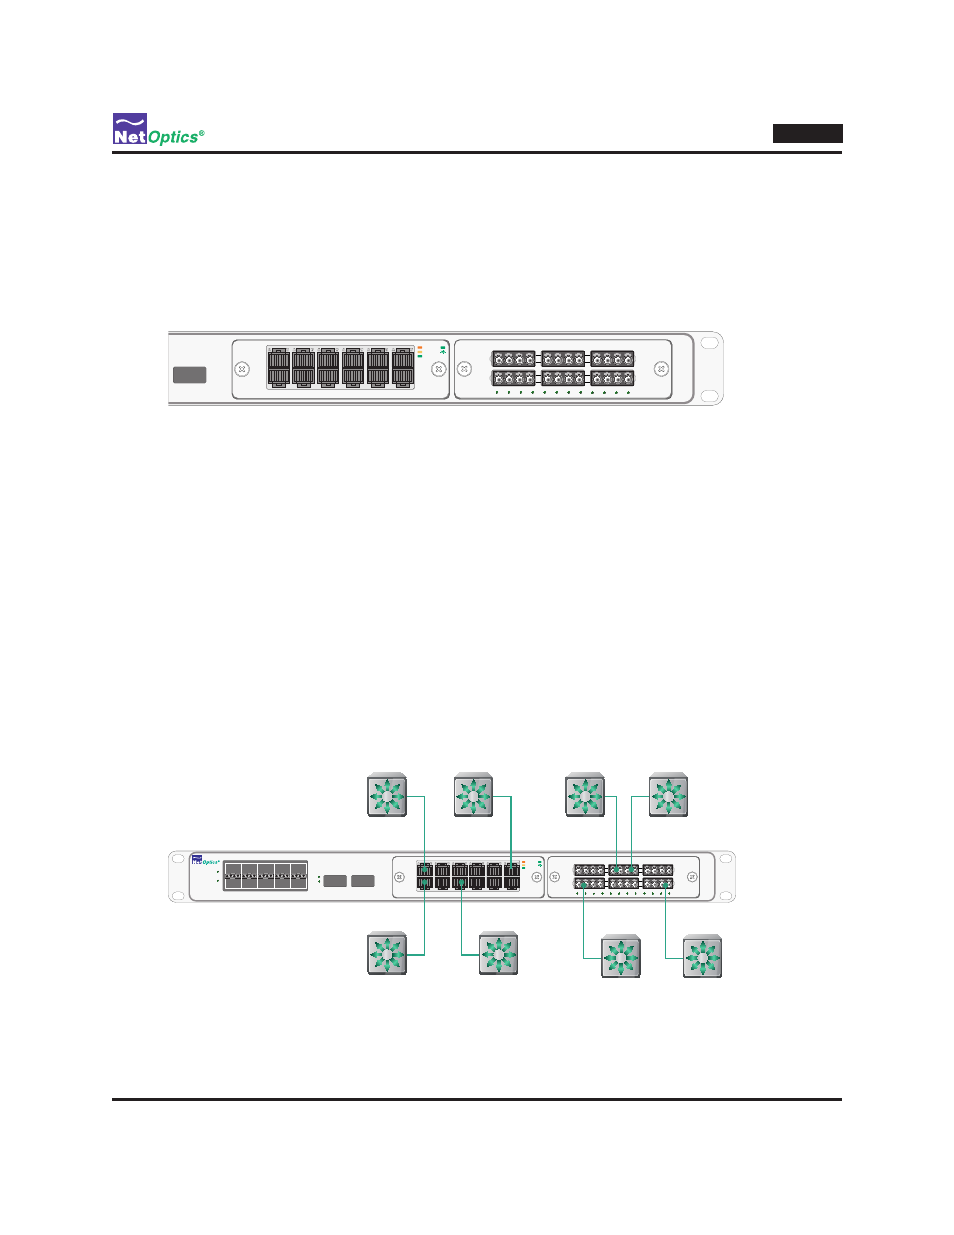
Connect Span Ports to Director
To connect Director to the network using Span ports, be sure that at least one of your DNMs is a Span model. Use ports
in that DNM to connect to the network.
Span port numbering is shown in the following diagram. It is the same for Span DNMs and in-line DNMs.
www.netoptics.com
™
Director
1
2
B
A
1
6
2
7
3
8
5
10
4
9
A
B
Span
10/100/1000
10
100
1000
LINK
ACT
Port # n2.1 .2 .3 .4 .5 . 6
Port # n2.7 .8 .9 .10 .11 .12
Span
GigaBit
1
2
3
4
5
6
7
8
9
10
11
12
Port numbers in purple
Port # n1.1 .2 .3 .4 .5 . 6
Port # n1.7 .8 .9 .10 .11 .12
Port numbering for Span DNM models
Figure 18:
Note: __________________________________________________________________________________________________
DNM 1 is on the left and DNM 2 is on the right. In the CLI, the Network ports are designated using the letter N
followed by the DNM number, a dot, and then the port number. For example, the Network port on the upper left is n1.1
and the Network port on the lower right is n2.12.
________________________________________________________________________________________________________
To connect a Span port:
Plug the appropriate cable into a Director Span port.
1.
Plug the other end of the cable into the span port of the switch. The Link LED for the port illuminates after a short
2.
delay to indicate that a link has been established. If the Span traffic bandwidth is greater than about 300 Mbps, the
two Link LEDs blink.
Repeat for all desired Span port connections.
www.netoptics.com
™
Director
1
2
B
A
1
6
2
7
3
8
5
10
4
9
A
B
Spn
10/100/1000
10
100
1000
LINK
ACT
Span
GigaBit
1
2
3
4
5
6
7
8
9
10
11
12
Span port connections
Figure 19: