Pitney Bowes ADDRESSRIGHT DA300 User Manual
Page 4
4
○ ○ ○ ○ ○ ○ ○ ○ ○ ○ ○ ○ ○ ○ ○ ○ ○ ○ ○ ○ ○ ○ ○ ○ ○ ○ ○ ○ ○ ○ ○ ○ ○ ○ ○ ○ ○ ○ ○ ○ ○ ○ ○ ○ ○ ○ ○ ○ ○ ○ ○ ○ ○ ○ ○ ○ ○ ○ ○ ○ ○ ○ ○ ○ ○ ○
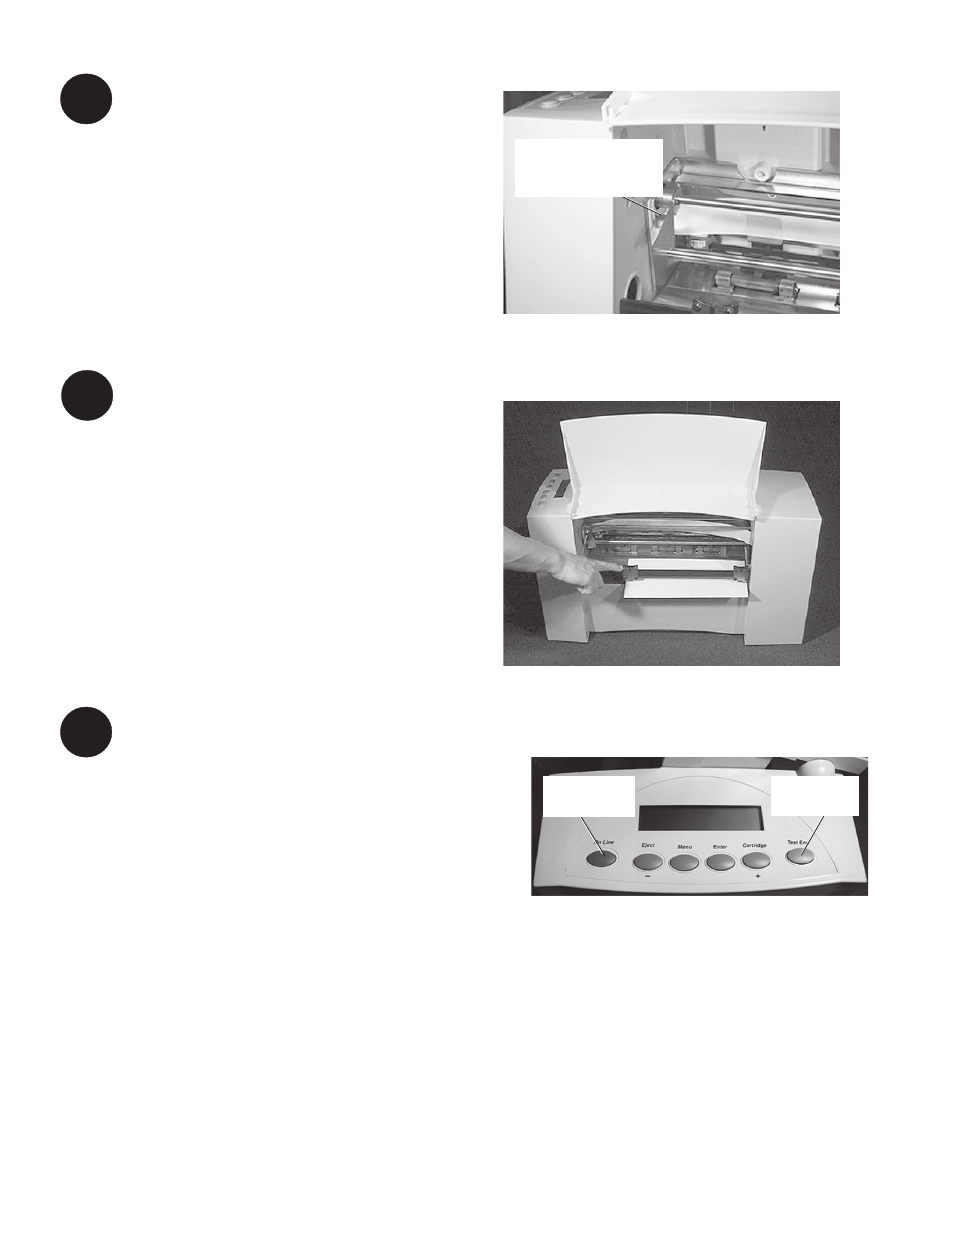
7
Adjust the Media Thickness Lever
1. Set the media thickness lever to its mid
position.
2. You’ll readjust the lever in step 9 to get
the best print quality.
Adjust the Exit Rollers
1. Adjust the exit rollers so they overlap the
left and right edges of the material by 1/
4". Slide the rollers from side to side to
make the adjustment.
2. Make sure the rollers don’t touch any
printed area of the material. This can
cause smudging and unwanted printing.
○ ○ ○ ○ ○ ○ ○ ○ ○ ○ ○ ○ ○ ○ ○ ○ ○ ○ ○ ○ ○ ○ ○ ○ ○ ○ ○ ○ ○ ○ ○ ○ ○ ○ ○ ○ ○ ○ ○ ○ ○ ○ ○ ○ ○ ○ ○ ○ ○ ○ ○ ○ ○ ○ ○ ○ ○ ○ ○ ○ ○ ○ ○ ○ ○ ○
Print a Test Piece
1. Make sure the material stack is loaded
properly. (Or you can use a single test
piece if you'd like to check that your
setup adjustments are okay.)
2. Turn the printer ON. The On/Off switch is
located on the interface panel at the rear
of the machine.
3. Press the On Line button on the printer
control panel until the LCD display reads
OFF LINE.
4. Press the Test Env. button as shown. A
single envelope will feed and a sample
address should print.
5. Check the print quality. If the address is
light, lower the media thickness lever
(step 7); if dark and indistinct, raise the
lever. Run another test piece to check
print quality.
8
9
Lower lever to darken
printing; raise it to
lighten printing
Press here
to run test
Press here
to go off line