Pitney Bowes ADDRESSRIGHT DA300 User Manual
Page 3
3
○ ○ ○ ○ ○ ○ ○ ○ ○ ○ ○ ○ ○ ○ ○ ○ ○ ○ ○ ○ ○ ○ ○ ○ ○ ○ ○ ○ ○ ○ ○ ○ ○ ○ ○ ○ ○ ○ ○ ○ ○ ○ ○ ○ ○ ○ ○ ○ ○ ○ ○ ○ ○ ○ ○ ○ ○ ○ ○ ○ ○ ○ ○ ○ ○ ○
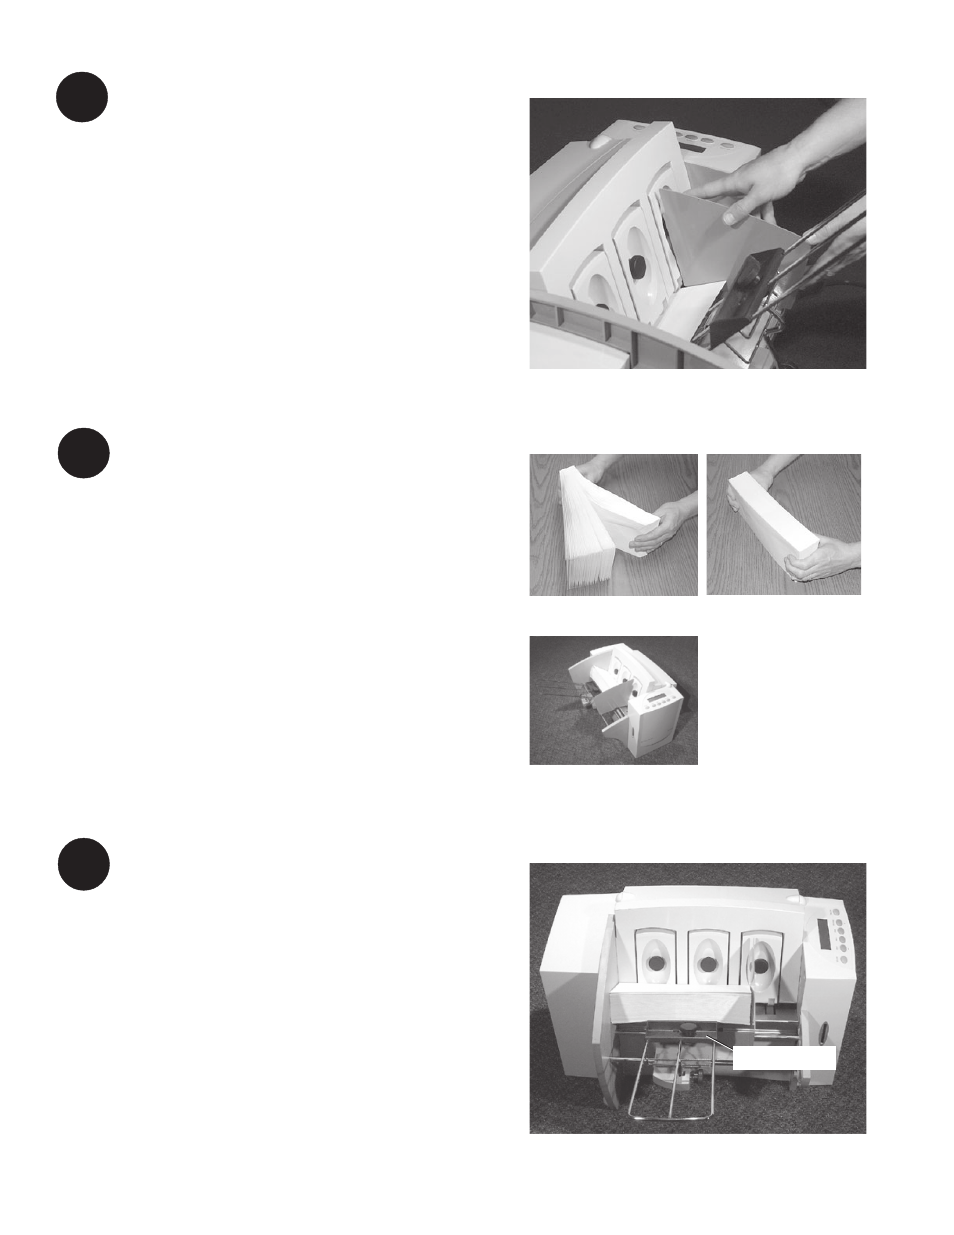
Load Material
l.
Make sure the input area is free of dust and
other matter.
2. Take a stack of material and while holding it as
shown, fan all sides of the material. This step
helps keep misfeeds to a minimum.
3. Tamp the material on a flat surface, making
sure that the stack is square.
4. Load envelopes so the side to be printed faces
up. Flaps should be down with the flaps away
from the feed roller (flaps trailing). Begin with
just a few envelopes to start the stack and get
the proper contour, then add several more
pieces. Then add the remainder of the stack.
○ ○ ○ ○ ○ ○ ○ ○ ○ ○ ○ ○ ○ ○ ○ ○ ○ ○ ○ ○ ○ ○ ○ ○ ○ ○ ○ ○ ○ ○ ○ ○ ○ ○ ○ ○ ○ ○ ○ ○ ○ ○ ○ ○ ○ ○ ○ ○ ○ ○ ○ ○ ○ ○ ○ ○ ○ ○ ○ ○ ○ ○ ○ ○ ○ ○
Position the Feed Fence
1. Place a sample piece of material in the input
area.
2. Slide the fence until it almost touches the
stack.
3. Check that there's about 1/16" clearance (the
thickness of a dime) between the fence and
the stack.
NOTE: Proper clearance is very important. If
you push the fence tight up against the stack,
it could slow feeding and cause jams. If the
clearance is too great, pieces could skew as
they feed into the printer.
4
5
Adjust the Position of the
Material Prop
With a stack of material loaded:
1. Loosen the lock knob that holds the
prop in position.
2. Lower the prop until its top is even
with the top of the stack.
3. Tighten the material prop's lock knob
to hold it in position.
6
Fan
Tamp
Load
Material Prop