Identifying the rail kit components, Attaching the inner rail extensions – PowerFile Active Archive Appliance A3 User Manual
Page 24
16
Installing the Archive Engine
Active Archive Appliance (A3) v6.5
PowerFile Confidential
Racking and Installation Guide
Identifying the Rail Kit Components
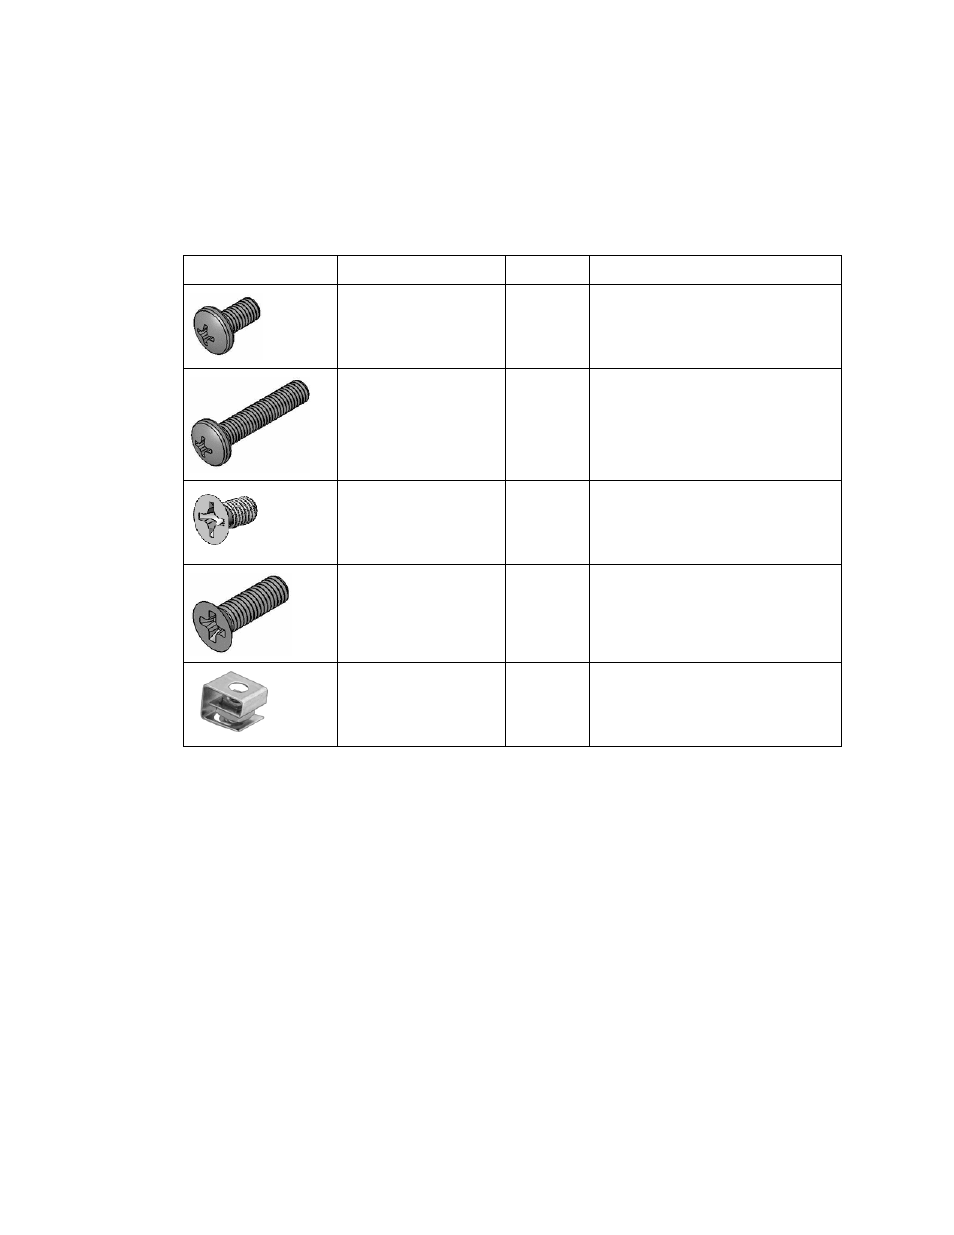
identifies the rail kit hardware for the Archive Engine (Generation 2).
Attaching the Inner Rail Extensions
If you are installing the Archive Engine in a server rack, attach the inner rail extensions to
stabilize the chassis within the rack. The first section of the inner rails are pre-attached and
nothing needs to be done to them.
If you are not using a rack, you do not have to install the inner rail extensions. The pre-attached
section of the inner rail will not interfere with normal use of the chassis.
Table 3-3
Archive Engine (Generation 2) Rail Kit Hardware
Hardware
Name
Quantity
Use
M5x10 Phillips Pan
Head Screw
4
Attach the extension bracket to the
short bracket
M5x24 Phillips Pan
Head Screw
2
Hold the server in the rack.
M3x6 Phillips Flat Head
Screw
4
Secure the inner rail extension to the
Archive Engine.
M5x16 Phillips Flat
Head Screw
8
Secure the brackets to the front side
of the rack.
M5 Cage Nut
10
Attach server to rack using screws
and cage nuts, as needed.