Printek 8000 User Manual
Page 39
D A I L Y O P E R A T I O N
33
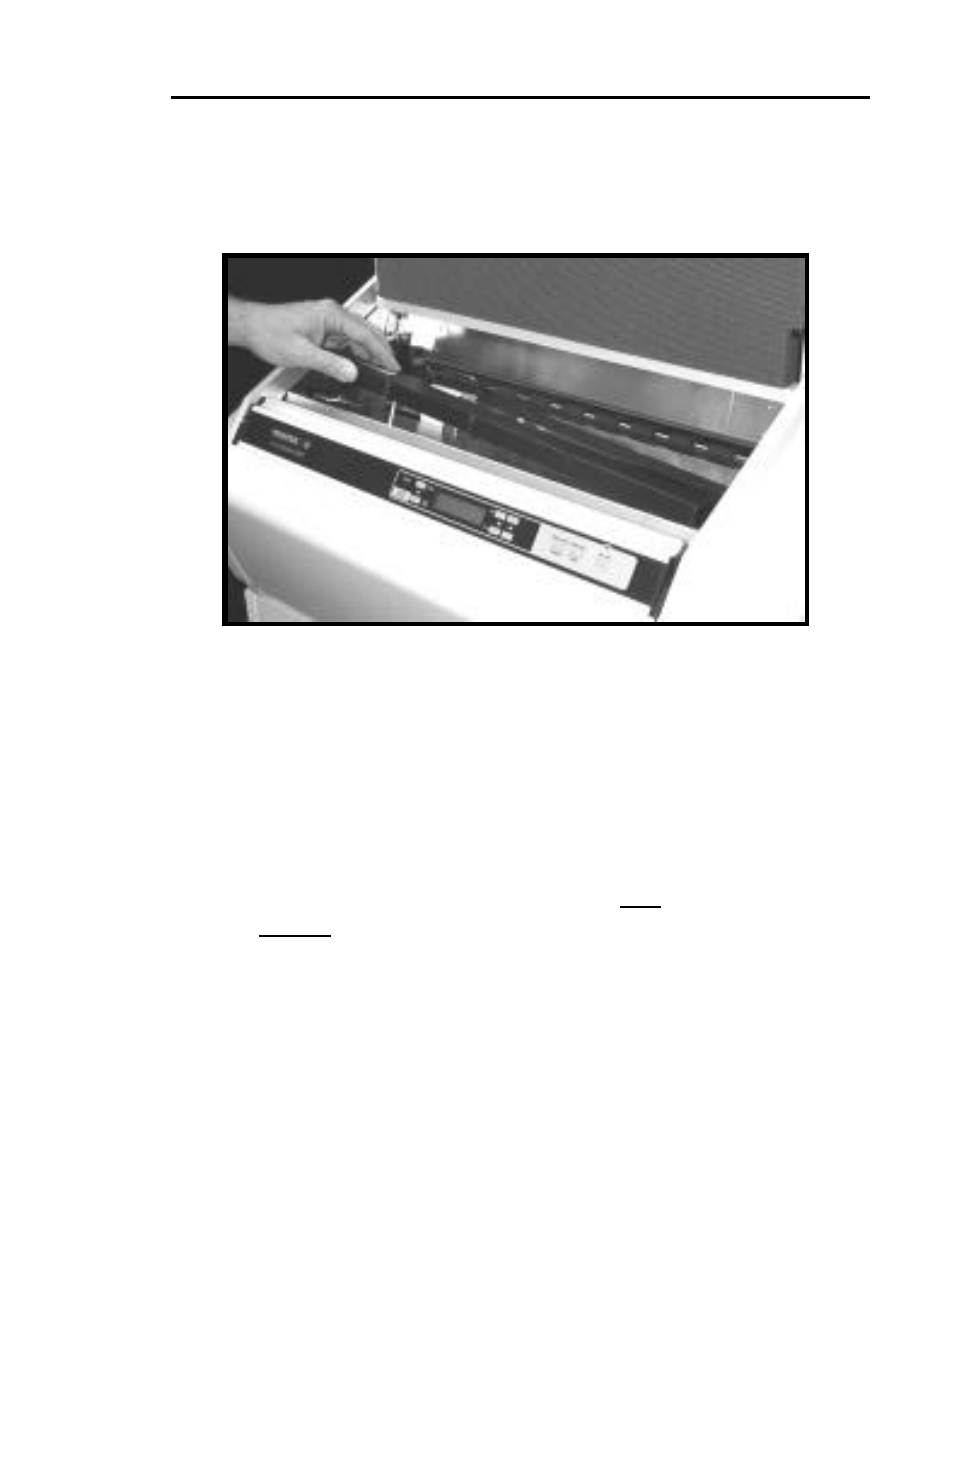
2. Grasp the left end of the ribbon cartridge and lift it up and toward the
rear of the printer as shown below
Removing the Old Ribbon Cartridge
3. Lift the right end of the ribbon and remove the ribbon from the
printer.
Installing the New Ribbon Cartridge.
Note: The use of Printek brand ribbons is recommended for increased
ribbon life and print head life. The use of
only
Printek brand ribbons
is
required
for the extended print head warranty. For details, see
“Why Use Only Printek Brand Ribbons” in the “Getting Started”
chapter.
4. Remove the new ribbon from its plastic bag and make sure the ribbon
fabric is taut by turning the knob on top of the ribbon cartridge in a
counterclockwise direction as indicated by the arrow on the cartridge.
5. Install the new ribbon by reversing the above removal process. For a
more detailed installation description, see “Installing the Ribbon
Cartridge” on page 8
6. Close the ribbon lid and place printer back on line.