Using the menu screen – Panasonic SV-P20U User Manual
Page 13
13
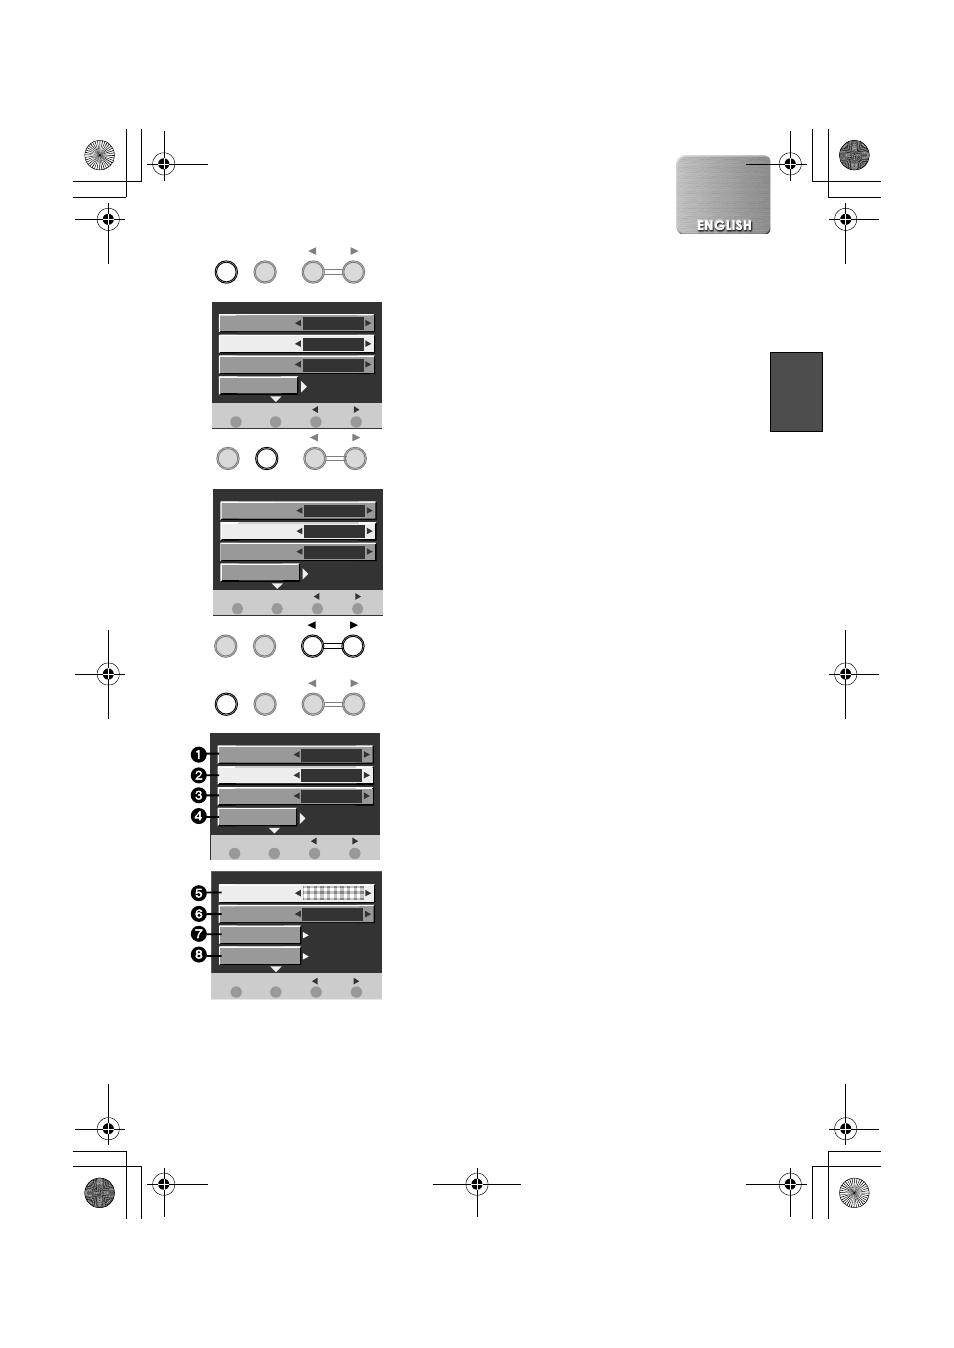
Using the Menu Screen
Use the Menu Mode as follows.
1
Turn the printer on. (
l
l
l
l 12)
2
Press the [MENU] button.
≥The Menu screen is displayed.
3
Press the [DISPLAY] button to select the
item to be set.
≥With each press of the [DISPLAY] button, the
next item is highlighted.
4
Press the [
2 1
] button to set the
selected item to a desired mode.
≥When adjusting the quality of printed images or
LCD monitor, press [
1] to display the setting
screen. (
l 23, 24)
5
Press the [MENU] button.
≥The setting selected on the Menu screen will be
cancelled when the printer is turned off.
ª
Menu Interface
1 Print style (
l
l
l
l 14)
2 Number of copies (
l
l
l
l 15)
3 Date print (
l
l
l
l 20)
4 DPOF (
l
l
l
l 22)
5 Frame (
l
l
l
l 19)
6 Trimming (
l
l
l
l 21)
7 Picture (
l
l
l
l 23)
8 LCD (
l
l
l
l 24)
2
3
4
5
MENU
DISPLAY
MENU
DISPLAY
MENU DISPLAY
MENU
DISPLAY
OK
SET
SELECT
Number of copies
Print style
DPOF
Date print
Standard
1
OFF
MENU 1/2
OK
SET
SELECT
Number of copies
Print style
DPOF
Date print
Standard
2
OFF
MENU 1/2
OK
SET
SELECT
Number of copies
Print style
DPOF
Date print
Standard
1
OFF
MENU 1/2
OK
SET
SELECT
Trimming
Picture
LCD
ADJUST
ADJUST
MENU 2/2
Frame
ON