Ge tt in g s tar ted – Panasonic DMP-BD50 User Manual
Page 13
13
RQT9184
(ENG)
In most cases, default settings can normally be used without making
any changes.
Please use this setting when instructed to by your Internet service
provider.
Press [SETUP].
Press [
, ] to select “Network” and press
[OK].
Press [
, ] to select “Proxy Server Settings”
and press [OK].
Press [
, ] to select “Proxy Address” and
press [OK].
pThe text entry screen is displayed.
Text field: shows the text you have entered
Press [, , , ] to select a character and
press [OK].
Repeat this step to enter other characters.
pPress [] to delete.
Press [w] when you complete the entry.
Press [, ] to select “Proxy Port Number”
and press [OK].
Enter numbers with the numbered buttons and
press [OK].
Press [, ] to select “Yes” and press [OK].
Setting the proxy server
RETURN
Proxy Server Settings
Reset to factory preset
Proxy Address
Proxy Port Number
OK
0
_
Proxy Address
Space
Finish
Delete
OK
RETURN
1
2
3
4
5
6
7
8
9
0
1
2
3
4
5
6
7
8
9
0
A B C
D E F
a
b
c
d
e
f
g
h
i
j
k
l
/
= %
+
-
*
# $ &
< > @
m n o
[
]
_
p
q
r
s
(
)
t
u
v
{
}
\ I
w
x
y
z
“
’
:
;
`
A
.
,
?
!
J
K
L
M N O
P Q R S
T U V
W X Y Z
0 -- 9
G H I
~
0
Proxy Port Number
Please input Proxy Server Port Number and
press [OK]. Press [CANCEL] to delete the
selected character. The number will be set to
"0" if all characters are deleted and [OK] is
pressed.
Num
ber
0 - 9
TIPS
pThe specified ports may be blocked and not be able to
be used depending on the network environment.
In order to restore the default settings
After performing steps
–
1) Press [
, ] to select “Reset to factory preset” and
press [OK].
2) Press [
, ] to select “Yes” and press [OK].
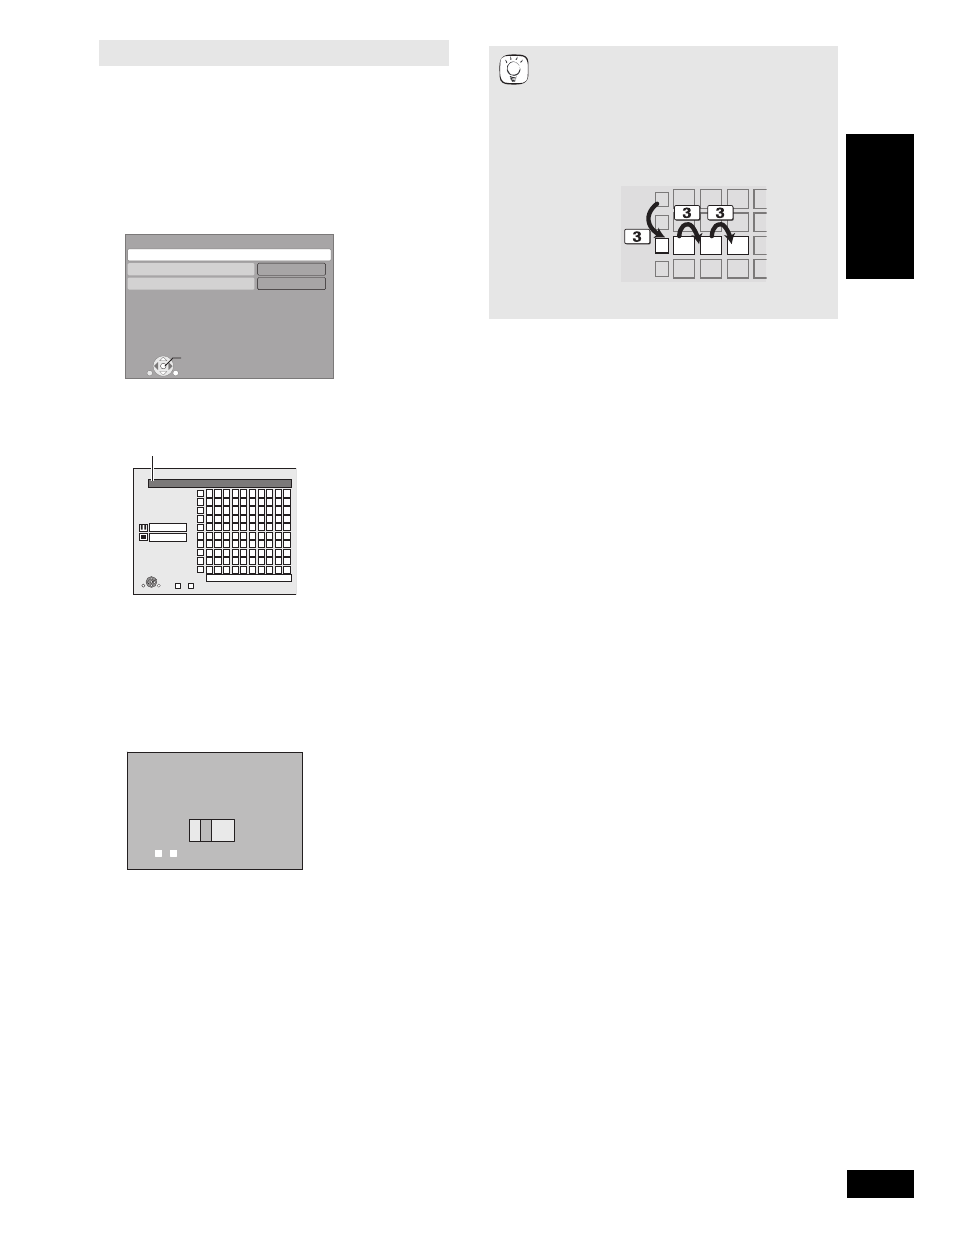
Using the numbered buttons to enter characters
e.g., entering the letter “F”
1) Press [3] to move to the 3rd row.
2) Press [3] twice to highlight “F”.
3) Press [OK].
#
$
%
&
'
(
)
*
+
G
e
tt
in
g
s
tar
ted