Programming a recording (without ’showview’) – Philips VR605A/58 User Manual
Page 23
D The programming information has been stored in a
TIMER block.
g
Make sure that the cassette you have put in can be
recorded on.
h
Switch off with
STANDBY/ON m
.
The programmed recording will only function when the
video recorder is switched off with
STANDBY/ON m
.
D If any of the TIMER blocks are in use, ’
k
’ will light up
on the video recorder display.
D While a programmed recording is being made, you
cannot operate your video recorder manually. If you
want to cancel the programmed recording, press
STANDBY/ON m
.
D If the video recorder is switched on a few minutes
before a programmed recording is supposed to
begin, ’SWITCH TO STANDBY- TIMER
RECORDING’ will flash on the TV screen.
D If you reach the end of the cassette during a
recording, the video recorder will automatically
eject the cassette.
D If you forget to load a cassette, ’NO CASSETTE’
will appear on the TV screen and ’
k
’ will flash on the
video recorder display.
D If you have put in a cassette which cannot be used
for recording, the video recorder will automatically
eject it.
D If ’ALL TIMERS OCCUPIED’ appears on the TV
screen when you press
TIMER k
, you have used up
all the available TIMER blocks. If you want to clear
or check a TIMER block, select it with
;P q
or
rP =
.
D Programme numbers ’E1’ and ’E2’ are for
recordings from other sources (through scart socket
AV1 EXT1
or
AV2 EXT2
).
Programming a recording
(without ’SHOWVIEW’)
a
Switch on the TV set and select the programme number
for the video recorder.
b
Press
TIMER k
on the remote control twice . The free
TIMER block will be highlighted.
c
Press
TIMER k
. The information will appear on the
screen.
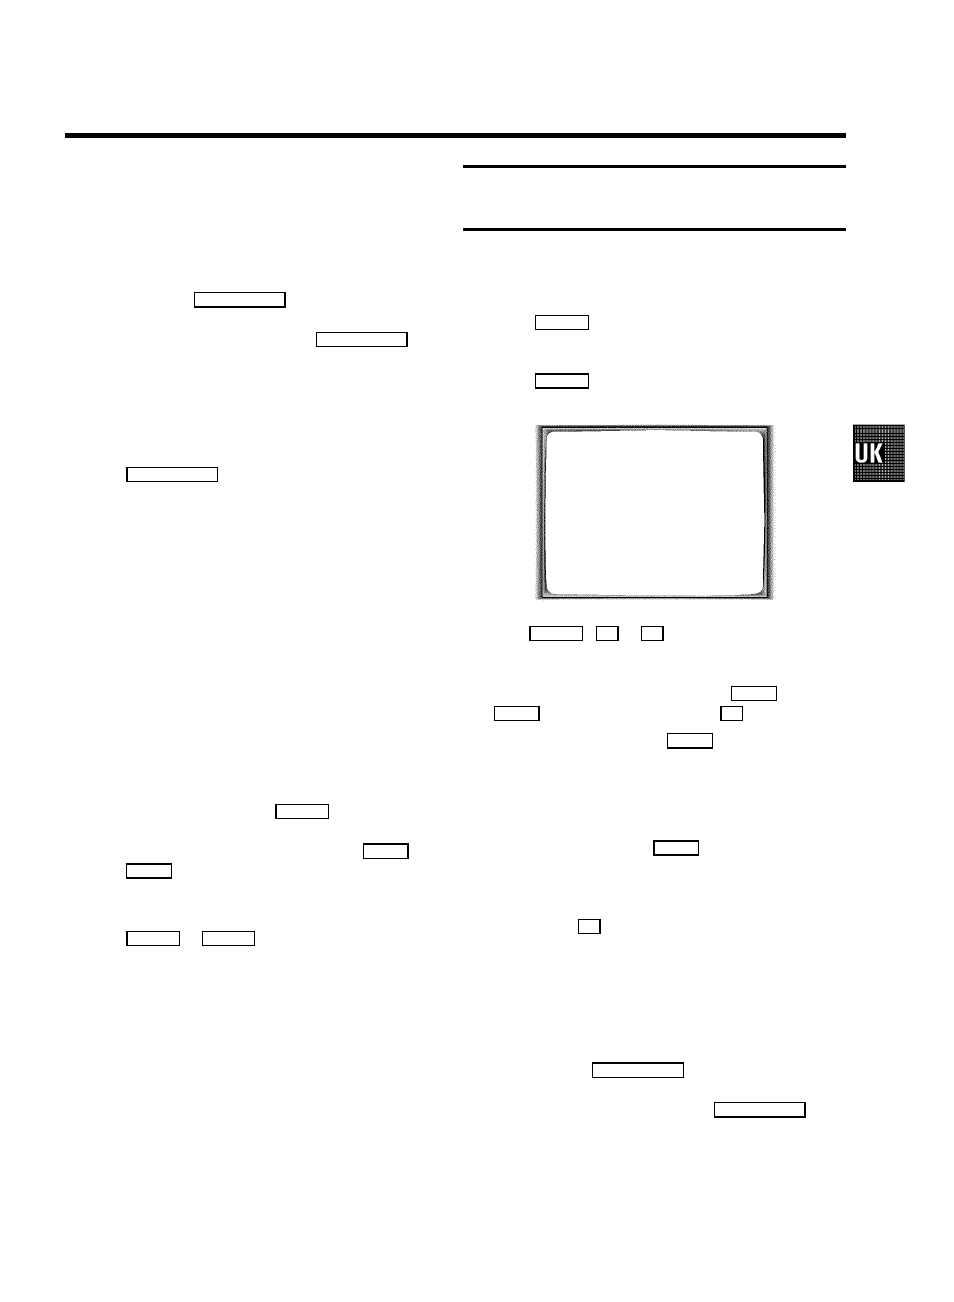
TIMER
VPS
DATE REP. PROG. START PDC
END
21 MO-FR
01
20:00
]
21:30
________________________________
STOREpOK
d
With
TIMER k
,
P
or
Q
you can select ’DATE’ (date),
’PROG.’ (programme number), ’START’ (start time) and
’END’ (end time).
Enter or change your information with
;P q
or
rP =
, or with the number buttons
0-9
.
D Under ’DATE’, use the
SELECT
button to select daily
or weekly programming.
’ONCE’: Recording once
’MO-FR’: Recording from Monday to Friday.
’WEEK.’: Recording every week on the same day.
D Under ’START’, use
SELECT
to switch ’VPS/PDC’ on
or off. If ’]’ appears in the display, ’VPS/PDC’ has
been switched off.
e
Confirm with
OK
when the information is correct.
D The programming information has been stored in a
TIMER block.
f
Make sure that the cassette you have put in can be
recorded on.
g
Switch off with
STANDBY/ON m
The programmed recording will only function when the
video recorder is switched off with
STANDBY/ON m
.
D If any of the TIMER blocks are in use, ’
k
’ will light up
on the video recorder display.
21