Pfaff 1540 User Manual
Page 49
47
23. Replacing the zigzag-stitch unit on Pfaff 1540
Removal:
z
Disconnect the machine's mains plug.
z
Remove the housing covers as described in this manual.
z
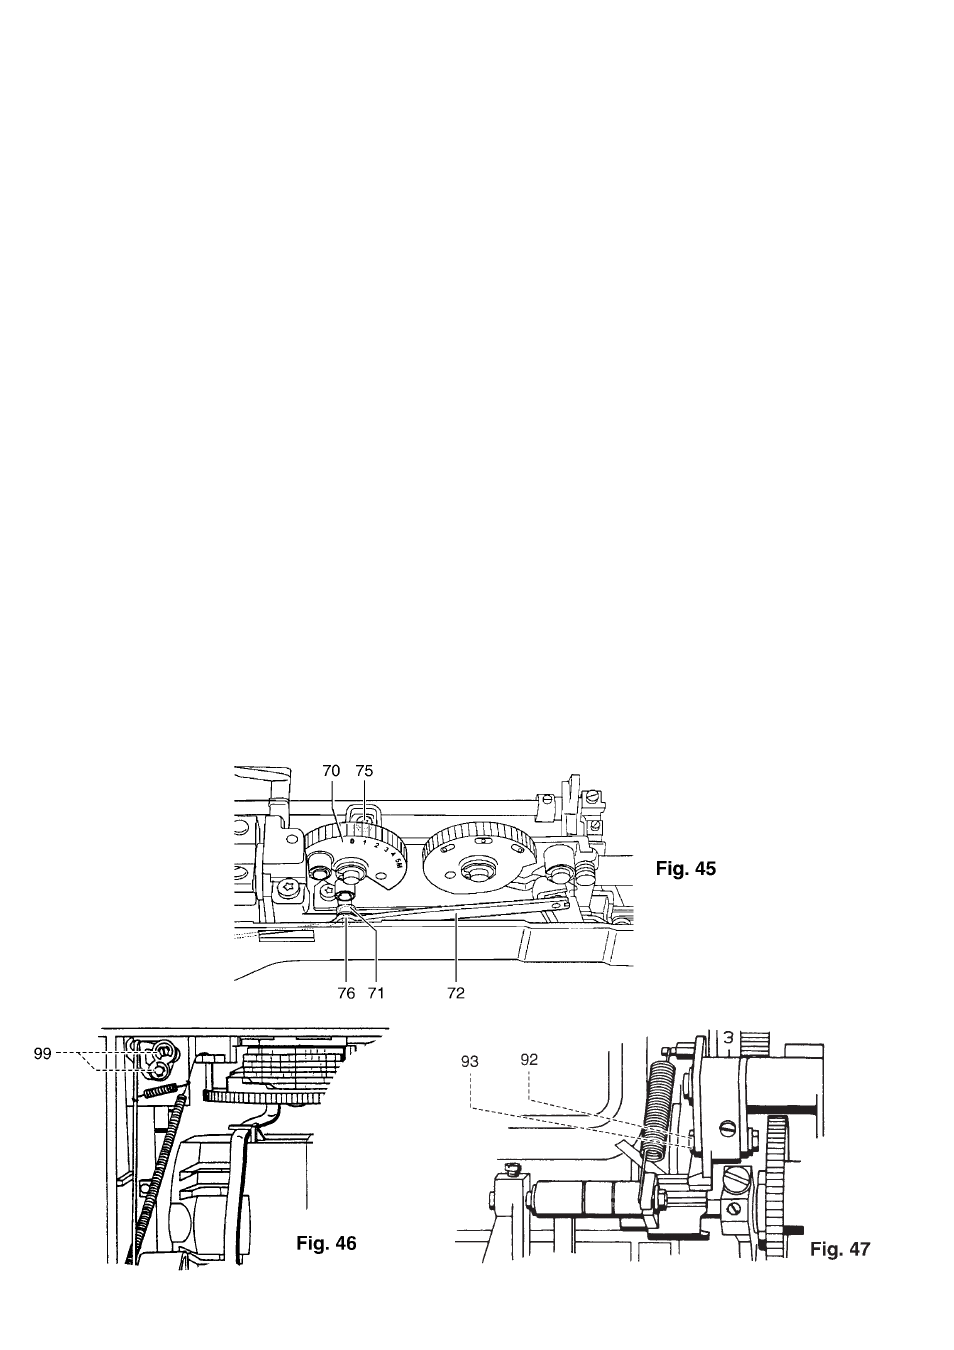
Set stitch width adjustment dial 70 to "0" (fig. 44).
z
Remove circlip 71 from connecting rod 72.
z
Remove circlip 92 (fig. 46).
z
Detach pull rod 93 and remove it from the top.
z
Remove the two circlips 99 (fig. 45).
z
Remove plastic angle lever 100 from the front.
z
Loosen fastening screws 75 (fig. 45).
z
Carefully remove the zigzag-stitch unit from the machine.
Fitting:
z
Insert bolt 76 of connecting rod 72 into joint piece 77 on the zigzag-stitch unit (fig. 44).
z
Fit the zigzag-stitch unit in the machine inserting at the same time connecting rod 72 with sliding block
78 into the crank.
z
Position the zigzag-stitch unit parallel to the arm shaft and gently tighten fastening screws 75.
z
Replace circlip 71.
z
Insert plastic angle lever 100 together with pull rod 93 (fig. 45).
z
Refit the two circlips 99.
z
Re-attach pull rod 93 and refit circlip 92 (fig. 46).