Pella Impervia 80YW0102 User Manual
Page 4
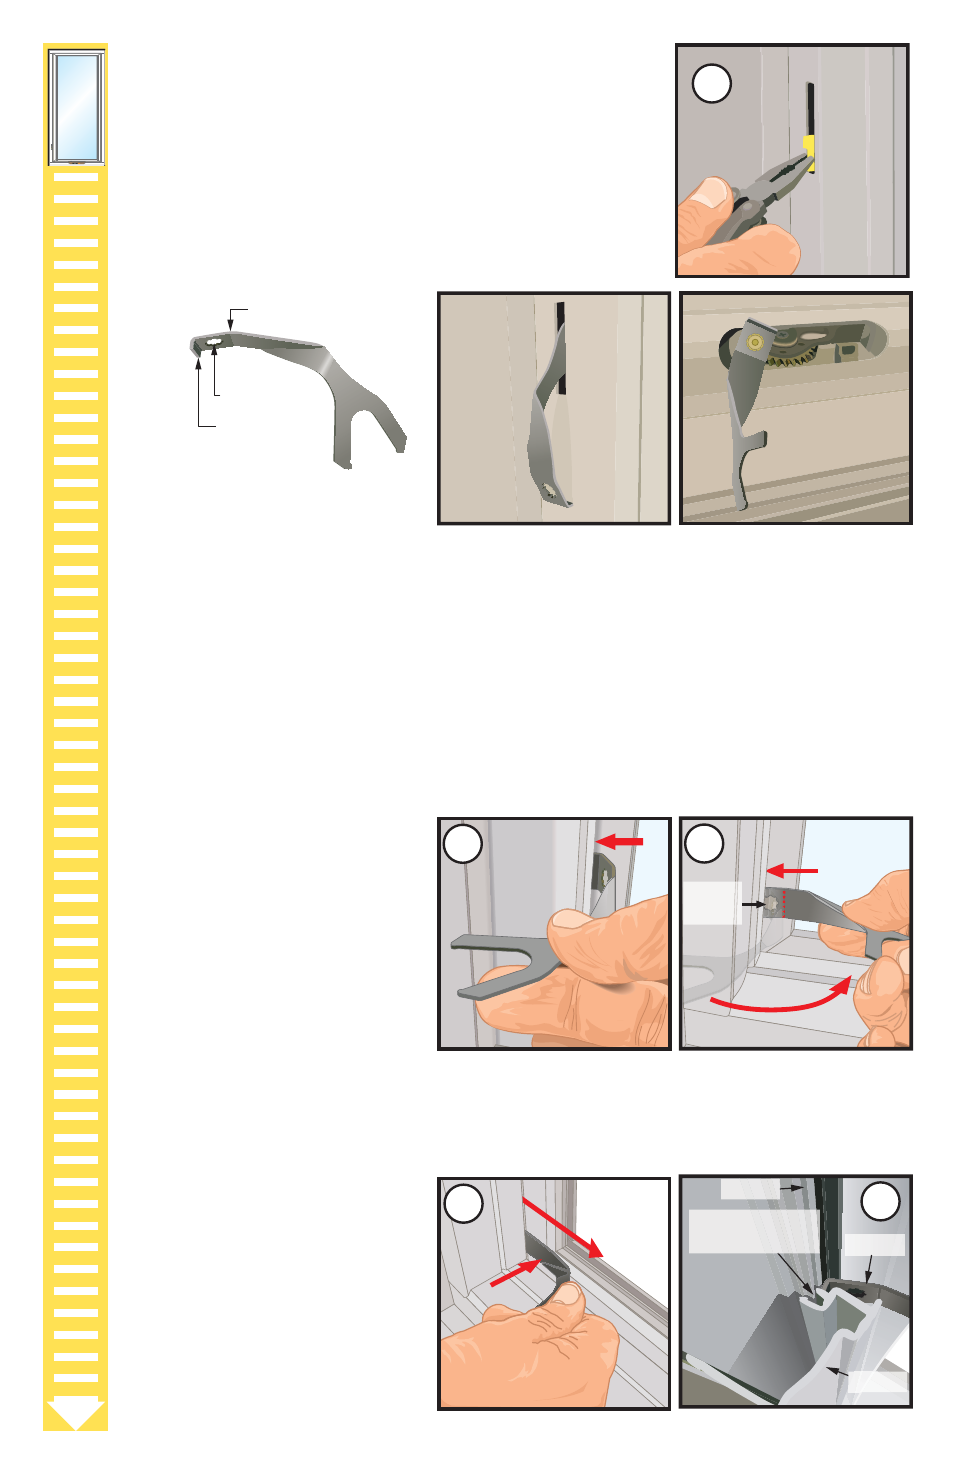
A. Prepare the Window.
5HPRYHWKHVFUHHQDQGVHWDVLGH
)PPL
4QMJOF)PMF
#FOEJO5PPM
$POTUSVDUJPO)BOEMF5PPM
3&'&3&/$&%&4$3*15*0/
8VHSOLHUVWRUHPRYHWKHSOXJVIURPWKHORFN
KDQGOHORFDWLRQV
5HPRYHWKHFRQVWUXFWLRQKDQGOHWRROIURPWKH
handle package.
"
Construction Handle Tool may be used as a
lock handle or crank handle.
#
#
4QMJOF
IPMF
#
B. Remove Interior Frame Cover #1,IDQ,QWHULRU)UDPH&RYHUKDVD4XLFN5HOHDVH
%DQGDURXQGWKHFRYHUSXOOWKHEDQGWRKHOSUHPRYHWKHFRYHU
The cover on vent units where the lock handle slot is located and the cover on the opposite
frame side.
Note: Interior Frame Covers #1 are jamb covers on Casement, Fixed Awning/Casement
and Large Awning units. On Standard Awning units, Interior Frame Covers #1 are the head
and sill covers.
$SSUR[LPDWHO\IURPWKH
ERWWRPHQGRIWKHFRYHULQVHUW
WKHKRRNHGHQGRIWKHWRRO
between the cover and the sash.
5RWDWHWKHWRROWRZDUGWKHVDVK
and continue to insert the tool
past the spline hole up to the
point where the bend in the
tool is aligned with the edge
of the cover.
Note: When the tool is inserted with the bend aligned with the cover edge there
will be a slight gap between the tool and the face of the sash.
3XVKWKHWRROŶDWDJDLQVW
WKHVDVKQRWDORWRIIRUFHLV
QHHGHGWRUHOHDVHWKHEDFN
cover barb from the frame
kerf behind the cover. While
keeping tension on the tool,
pull the tool away from the
frame to start releasing the
cover barbs from the
frame kerfs.
$SPTT4FDUJPOPG
*OUFSJPS'SBNF$PWFSXJUI
5PPM1MBDFNFOU%FUBJM
#BSCSFMFBTFE
GSPNLFSG
#
4BTI
5PPM
$PWFS
"8/*/(
$"4&.&/5