Prepare the receiver collar, Step, Static correction and battery test feature – Petsafe IN-GROUND FENCE PIG00-10773 User Manual
Page 16
16
Customer Care Center 1-800-732-2677
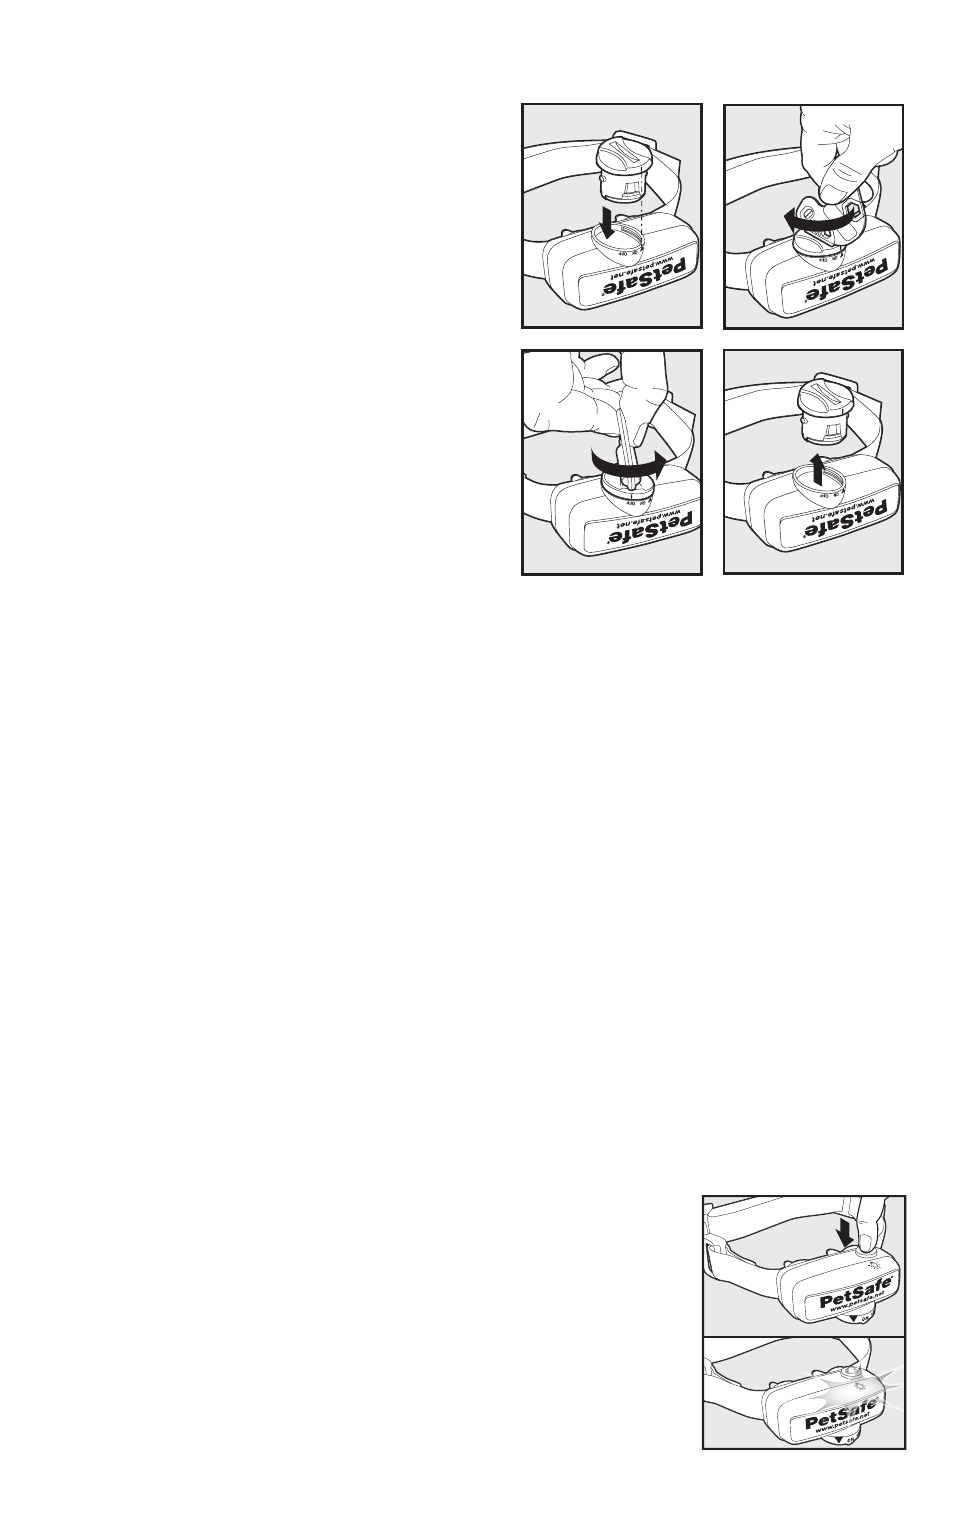
Prepare the Receiver Collar
To Insert and
Remove the
Battery
Note: Do not install the battery while
the Receiver Collar is on your pet.
This Receiver Collar utilizes a
replaceable PetSafe
®
battery
(RFA-188). This unique battery
is designed to make battery
replacement easier and increase water
protection.
To activate the collar, insert the
battery module (5A). Using the edge
of the Test Light Tool as shown, turn
the battery clockwise until the vertical
line on the battery is pointed to the
“ON” position (5B). If the PetSafe
®
Receiver Collar is not going to be
used on the pet immediately, leave it
in the “OFF” position.
5A
5B
5D
5C
To remove the battery, turn the battery counter-clockwise using the edge of
the Test Light Tool as shown (5C, 5D). DO NOT attempt to cut into or pry
open the battery. Be sure to discard the used battery properly.
A replacement PetSafe
®
battery can be found at many retailers. Contact the
Customer Care Center or visit our website at www.petsafe.net to locate a
retailer near you.
Static Correction and
Battery Test Feature
When the RFA-188 Battery Module is first installed in the Receiver, the red LED
will flash the current correction level setting (1-5). For the next 30 seconds, the
receiver will monitor the battery status and will either flash the green LED once
every 5 seconds to indicate a good battery, or flash the red LED once every 5
seconds to indicate a low battery condition.
After the 30 second battery test period, the green LED will cease to flash if the
battery is good. If the battery was low during the test period, the red LED will
continue to flash at a rate of 1 flash every 20 seconds to indicate a low battery
condition. In this situation, battery replacement is recommended.
To Set the Static Correction Level
Read all steps before attempting to set the Static
Correction Level.
1. With the battery installed, press the Correction Level
Button and release when the Receiver Indicator Light
illuminates red (5E).
2. The Receiver Indicator Light will emit a number of red
flashes representing the Static Correction Level (5F).
3. Increase the Static Correction Level by pressing and
releasing the Correction Level Button within 5 seconds
of the previous flashes.
5E
5F
Step
5