Liebert UPSTATION GXT 2U User Manual
Page 14
10
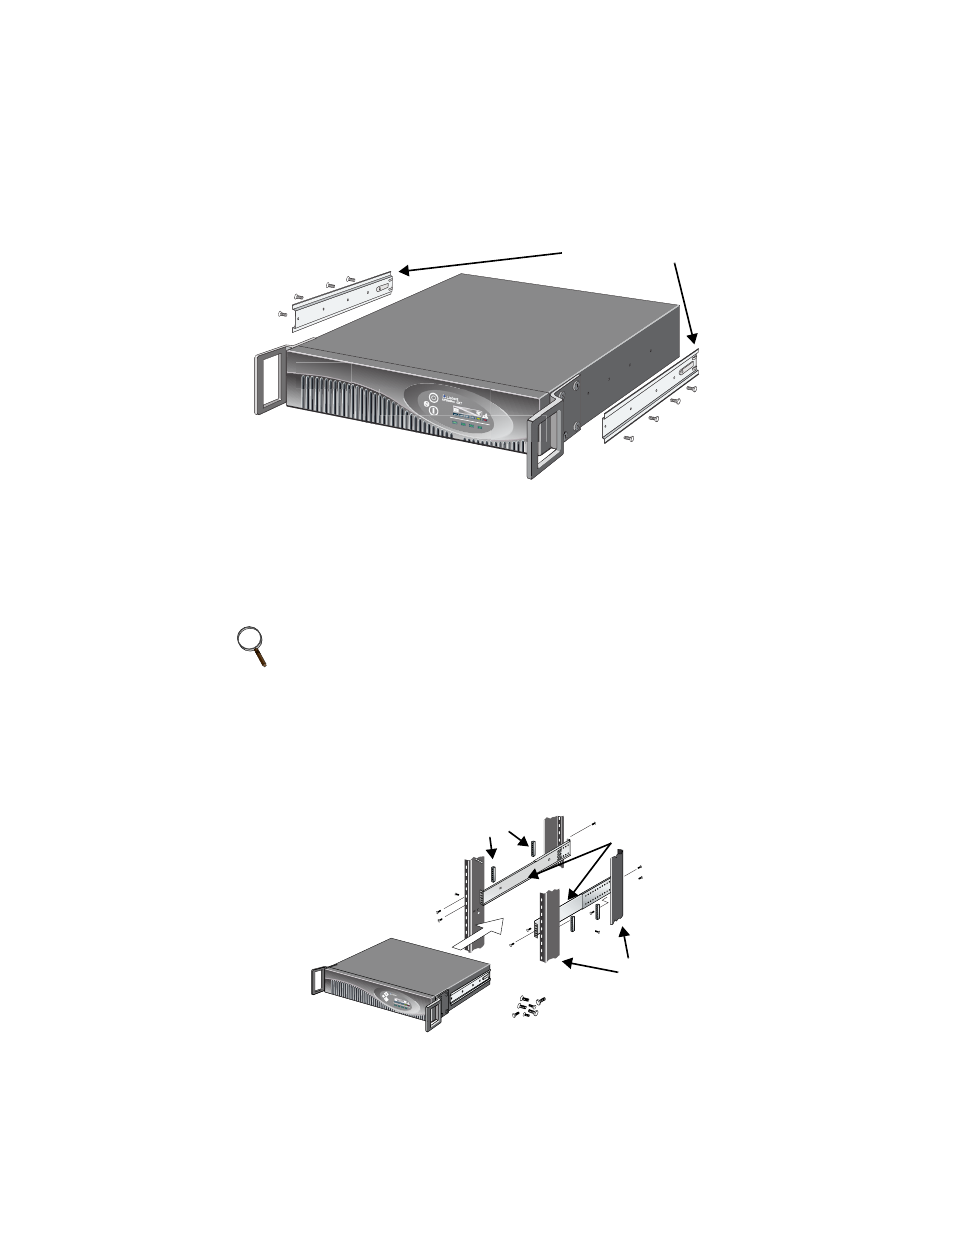
3. Fasten the inner members from Step 2 to the UPS on both sides (see
below) with eight screws provided in the accessories box of the UPS.
4. Attach the two mounting brackets to the rack’s mounting rails. The
brackets allow adjustment of up to eight inches of the slide assembly
mounting position, front-to-back, on the rack mounting rails. Deter-
mine which adjustment holes to use on the bracket, and attach it to
the slide assembly on the stationary outer member using the bar nuts
and #10-32 binding head screws provided in the slide assembly kit.
Insert two screws from the inside of each slide assembly.
5. Install the slide assemblies, with brackets attached in Step 4 into the
the rack enclosure. The return flanges on the mounting brackets and
outer members fit to the inside of the rack mounting rails.
6. Insert the eight screws loosely (finger-tight). Make sure the slide
assemblies are in the same alignment position on all four rack mount-
ing rails. After checking alignment, TIGHTEN ALL SCREWS.
NOTE
Bar nuts may not be required on all installations, depending
on the type of racks being used.
AC INP
UT B AT
T ERY
UP S O
N
BY PA SS
Inner members
UPSta
tion G
XT
Rack
mounting
rails
Bar nuts
Slide assemblies