Cleaning print nozzles – Lexmark Z53 User Manual
Page 29
MMMM
aaaa
iiiinnnn
ttttaaaa
iiiinnnn
iiiinnnn
gggg
yyyy
oooo
uuuu
rrrr pppp
rrrriiiinnnn
tttteeee
rrrr
•
•
•
•
•
Maintaining your printer
25
25
25
25
Cleaning print nozzles
Cleaning print nozzles
Cleaning print nozzles
Cleaning print nozzles
1111 Load plain paper in the printer.
2222 From the Control Program’s Cartridges
Cartridges
Cartridges
Cartridges tab, select Clean
Clean
Clean
Clean
Print Nozzles
Print Nozzles
Print Nozzles
Print Nozzles. For help, see page 21.
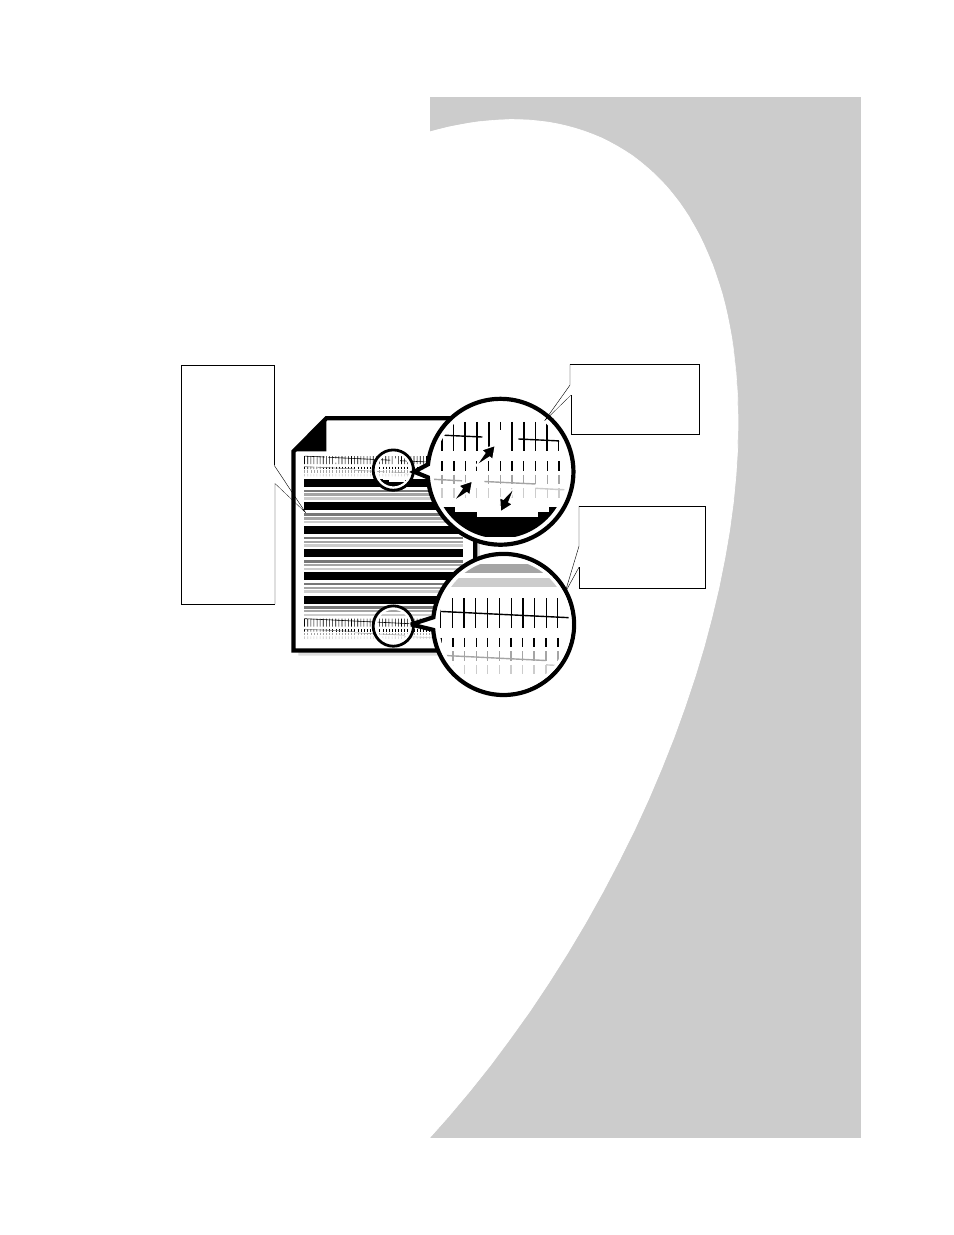
The printer feeds a sheet of paper and prints a nozzle test
pattern, similar to the one shown:
3333 Compare the diagonal line above the printed bars to the
diagonal line below the printed bars.
Look for a break in the diagonal lines above the printed
bars. A broken line indicates clogged nozzles.
If the bottom line still has breaks, run the test up to two more
times.
•••• If the print quality is satisfactory after running the test
three times, the print nozzles are clean. You do not
need to complete the remaining steps.
•••• If the print quality of both lines is not satisfactory after
running the test three times, continue with step 4.
4444 Remove and reinstall the print cartridges.
Broken lines at the
top of the page
indicate clogged
nozzles.
Unbroken lines at the
bottom of the page
indicate the nozzles
were cleaned.
Cyan, magenta,
yellow, and
black purge
lines (shown
here in black
and white) print
when ink is
forced through
the print
nozzles. If any
of these colors
do not print,
you may need
to replace your
print cartridge.