Lexmark Z53 User Manual
Page 17
PPPP
rrrriiiinnnn
ttttiiiinnnn
gggg
bbbb
eeee
yyyyoooo
nnnn
dddd
tttthhhh
eeee
bbbb
aaaa
ssssiiiicccc
ssss
•
•
•
•
•
Printing beyond the basics
13
13
13
13
4444 Customize the Printer Properties for printing handouts:
The screen graphic changes as you make selections,
showing how the printed page will look.
5555 To print your handout on one side of the paper, click OK
OK
OK
OK.
To print your handout on both sides of the paper:
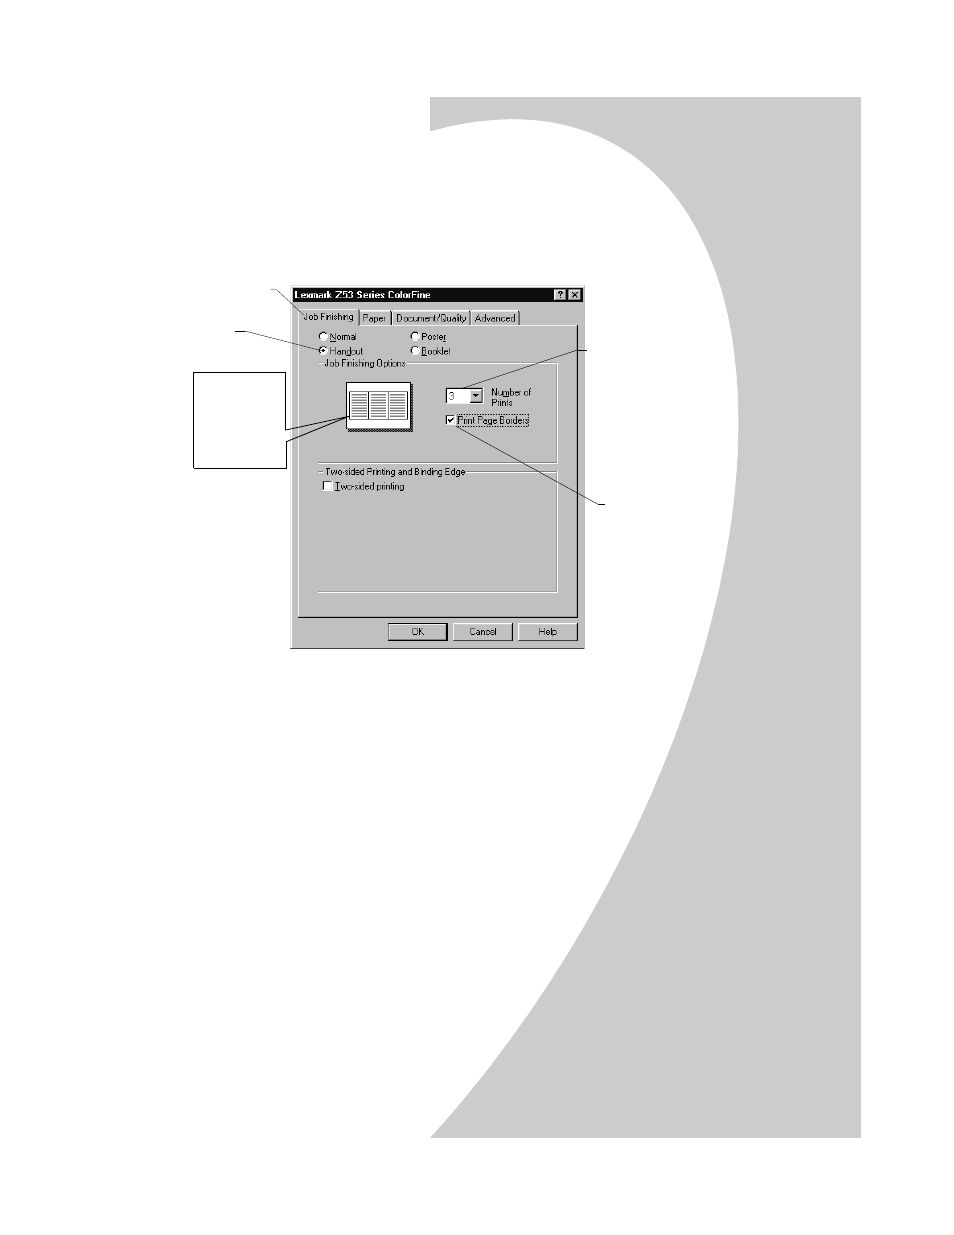
aaaa Select Two-sided printing
Two-sided printing
Two-sided printing
Two-sided printing.
bbbb To receive paper reloading instructions, select Print
reloading instructions after the first side prints
reloading instructions after the first side prints
reloading instructions after the first side prints
reloading instructions after the first side prints.
cccc Click Long Edge Binding
Long Edge Binding
Long Edge Binding
Long Edge Binding or Short Edge Binding
Short Edge Binding
Short Edge Binding
Short Edge Binding.
dddd Click OK
OK
OK
OK.
cccc Select the
Number of Prints
Number of Prints
Number of Prints
Number of Prints
(page images) to
print on a single
sheet.
dddd To print a
representation of
the paper edges
for each page
image, select
Print Page
Print Page
Print Page
Print Page
Borders
Borders
Borders
Borders.
aaaa Click the Job
Job
Job
Job
Finishing
Finishing
Finishing
Finishing tab.
bbbb Select
Handout
Handout
Handout
Handout.
The graphic
shows three
Portrait
Portrait
Portrait
Portrait-
oriented page
images with
Page Borders
Page Borders
Page Borders
Page Borders.