Back view, Bottom view, Back view 2 bottom view 2 – Linksys E1550 User Manual
Page 5
2
Product overview
Linksys E1550
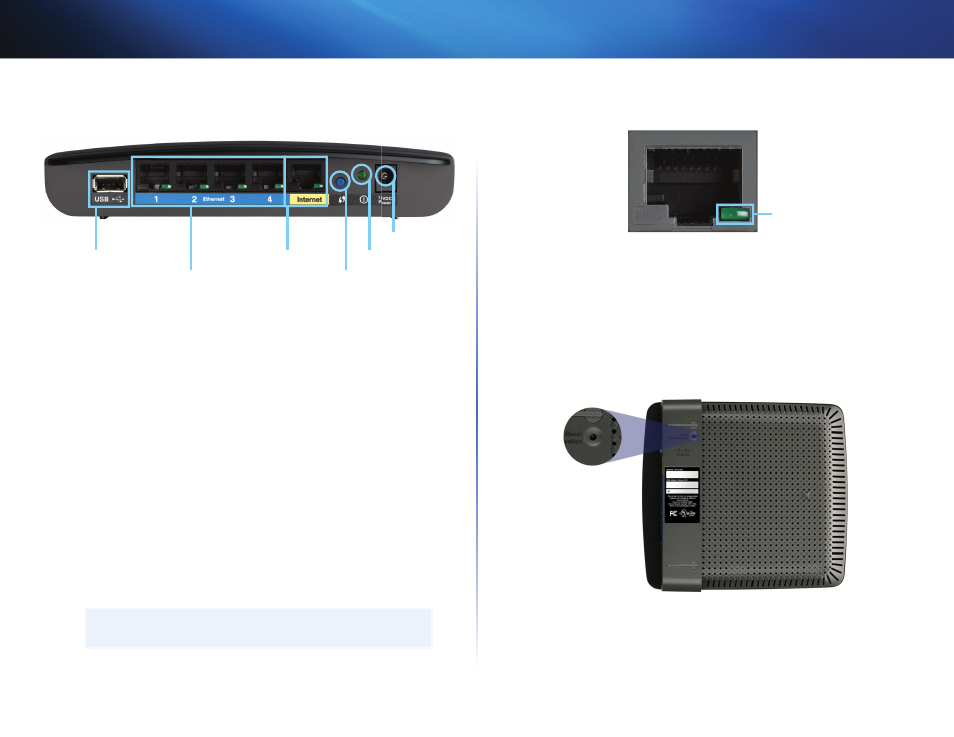
Back view
Ethernet ports
USB port
Wi-Fi Protected Setup button
Internet port
Power port
Power indicator
•
USB port— To easily share disk storage with other users on your network
or on the Internet, connect a USB drive to this port For more information,
see “Using an External Drive” on page 32
•
Ethernet ports—Connect Ethernet cables (also called network cables)
to these Fast Ethernet (10/100) ports, color coded blue, and to other
wired Ethernet network devices on your network
•
Internet port—Connect an Ethernet cable (also called a network or
Internet cable) to this port, color coded yellow, and to your modem
Wi-Fi Protected Setup™ button—Press this button to easily configure
wireless security on Wi-Fi Protected Setup-enabled network devices
For more information, see “How to set up wireless security using Wi-Fi
Protected Setup” on page 28
•
Power indicator—Stays on steadily while power is connected and
following a successful Wi-Fi Protected Setup connection Flashes slowly
during bootup, during firmware upgrades, and during a Wi-Fi Protected
Setup connection Flashes quickly when there is a Wi-Fi Protected Setup
error
•
Power—Connect the included AC power adapter to this port
CAUTION
Use only the adapter that came with your router
Port activity indicator
Green network activity indicator
Network and Internet port
•
Green activity indicator—On Ethernet ports, stays on when a cable
connects the port to another Ethernet port On the Internet port, stays
on while connected to a modem On both port types, it flashes while
transferring data
Bottom view
•
Reset button—Press and hold this button for 5-10 seconds (until the
port lights flash at the same time) to reset the router to its factory defaults
You can also restore the defaults using the browser-based utility For
more information, see “How to restore factory defaults” on page 43