Linksys ETHERFAST 10/100 User Manual
Page 33
60
Linksys Instant EtherFast
®
Series
59
EtherFast
®
10/100 LAN Cards
3. If the Configuration box has a component called Dial-Up Adapter, skip for-
ward to step 5. If it doesn’t, continue with step 4.
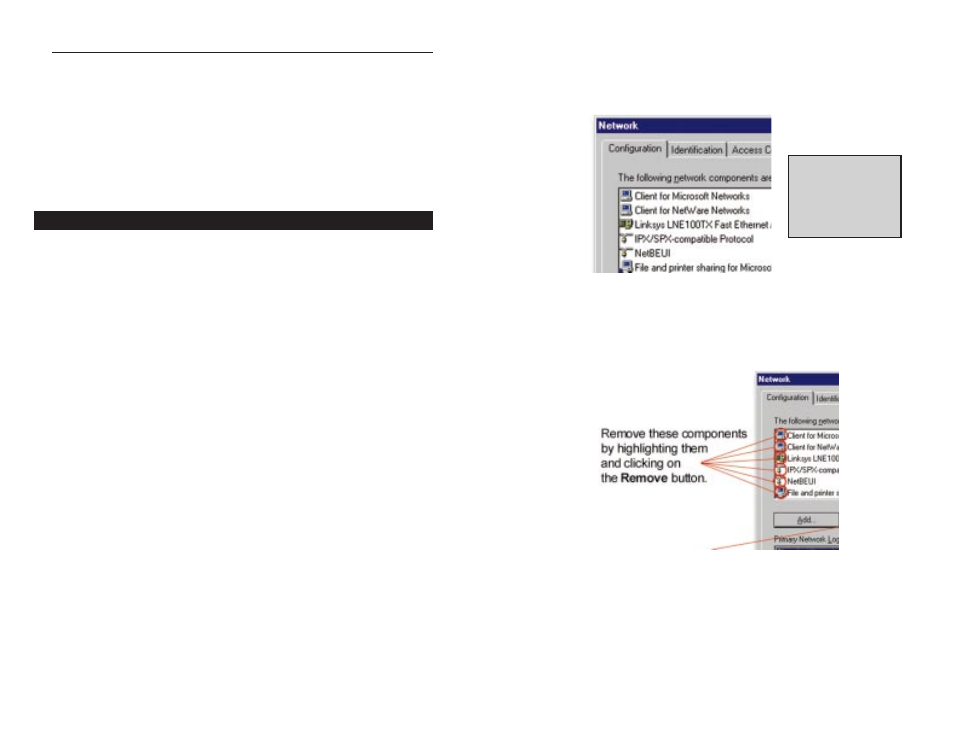
4. Remove any instance of the name Linksys in the box. This includes
IPX/SPX…Linksys, NetBEUI…Linksys, and TCP/IP…Linksys. Also remove
Client for Microsoft Networks, Client for NetWare Networks, and File and
Printer Sharing for Microsoft Networks.
In some cases, removing one of these components may in turn automatical-
ly remove other components as well. If this happens, skip ahead to step 6.
N
No
otte
e:: The screen shots
on this page, and the
ones on the next three
pages, are examples
only. They may differ
from system to system.
3. Optional: Click on the Access Control tab. Make sure that Share-level
access control is selected; do not choose User-level access control. If Access
Control is grayed out and cannot be selected, refer to the Troubleshooting
section.
4. When you’re done, click OK. When asked if you want to restart your PC,
choose to do so.
The NT portion of the Windows setup is complete.
If you experience installation difficulties, you may need to re-install all of the
Windows networking components from scratch. The instructions below explain
how to give your PC a clean sweep so that you can retry the EtherFast Card’s
software installation.
The following instructions are for Windows 95, 98 and Millennium. Those for
Windows 2000 follow.
Starting Over in Windows 95 & 98
1. At the desktop click on the Start Button, highlight Settings, click on
Control Panel.
2. Double-click on the Network Icon.
Starting Over in Windows 95, 98, ME or 2000