Navigating the multi-function recording mode menu – Konica Minolta DiMAGE F200 User Manual
Page 56
Basic
Custom1 Custom2
ExposureMode
Image size
Quality
WhiteBalance
Auto
Standard
2272 X 1764
Program
Sensitivity
Auto
56
M
ULTI
-
FUNCTION RECORDING
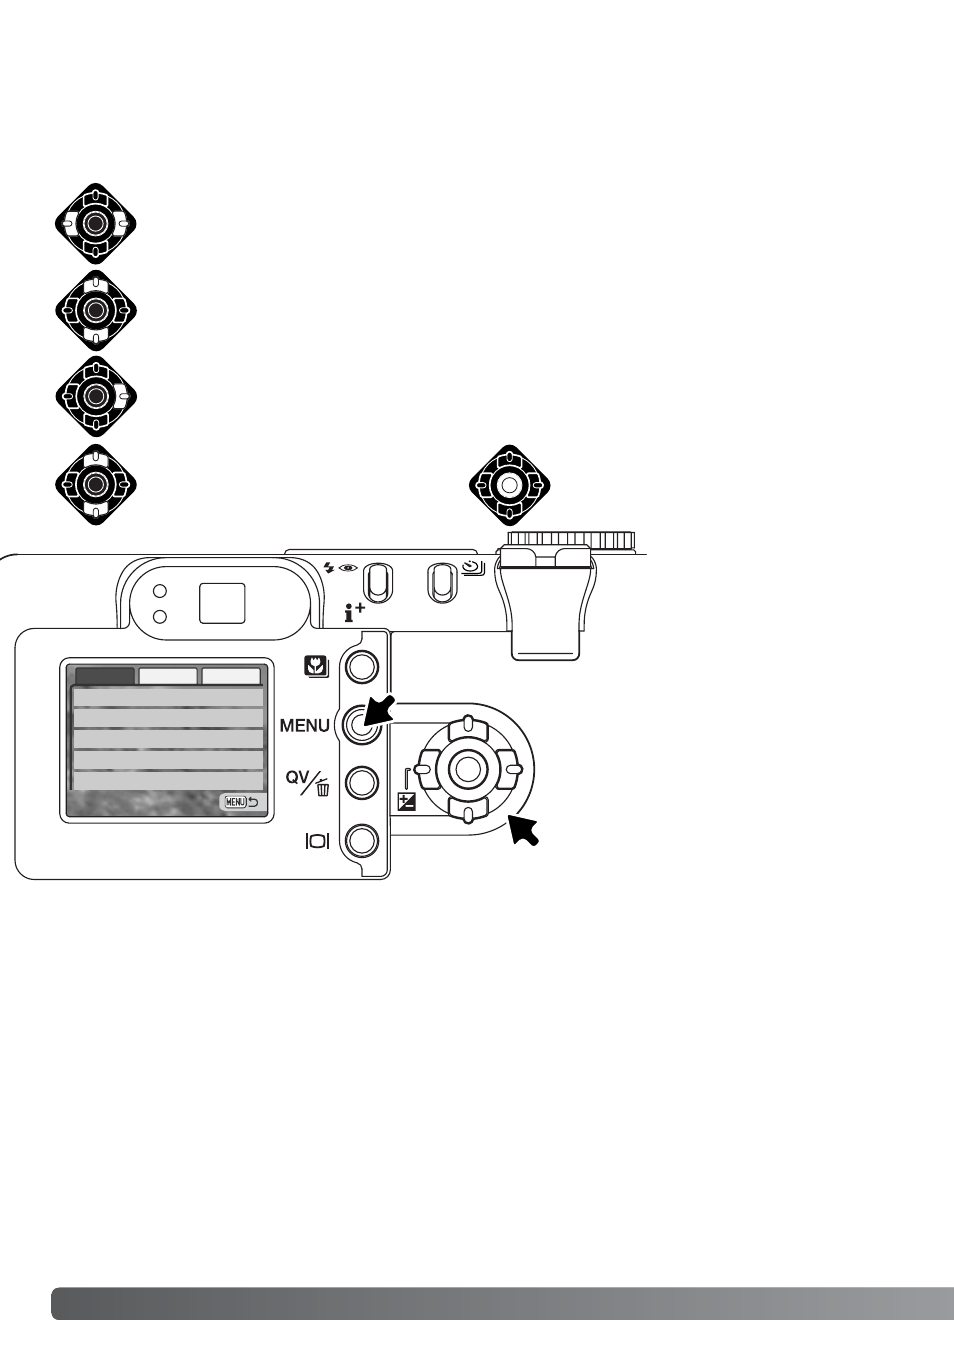
Press the central button of the
controller to select the highlighted
setting.
Activate the recording-mode menu with the menu button. The basic tab at the top of the
menu will be highlighted. Use the left/right keys of the controller to highlight the
appropriate menu tab; the menu will change as the tabs are highlighted.
In the multi-function recording mode, the menu button (1) turns the menu on and off. The left/right
and up/down keys of the controller (2) are used to move the cursor in the menu. Pressing the central
button of the controller will enter a setting.
When the desired menu section is displayed, use the up/down keys to scroll through the
menu options. Highlight the option whose setting needs to be changed.
With the menu option to be changed highlighted, press the right controller key; the
settings will be displayed with the current setting highlighted. To return to the menu
options, press the left key.
Use the up/down keys to highlight
the new setting.
Navigating the multi-function recording mode menu
Once a setting has been selected,
the cursor will return to the menu
options and the new setting will be
displayed. To return to the record-
ing mode, press the menu button.
Changes made to image size,
image quality, digital zoom, and
date imprinting will affect the auto-
recording mode.
1
2