7 - testing the system, 7 testing the system – KVH Industries TracVision R4 User Manual
Page 36
2-25
Installation
54-0157 Rev. H
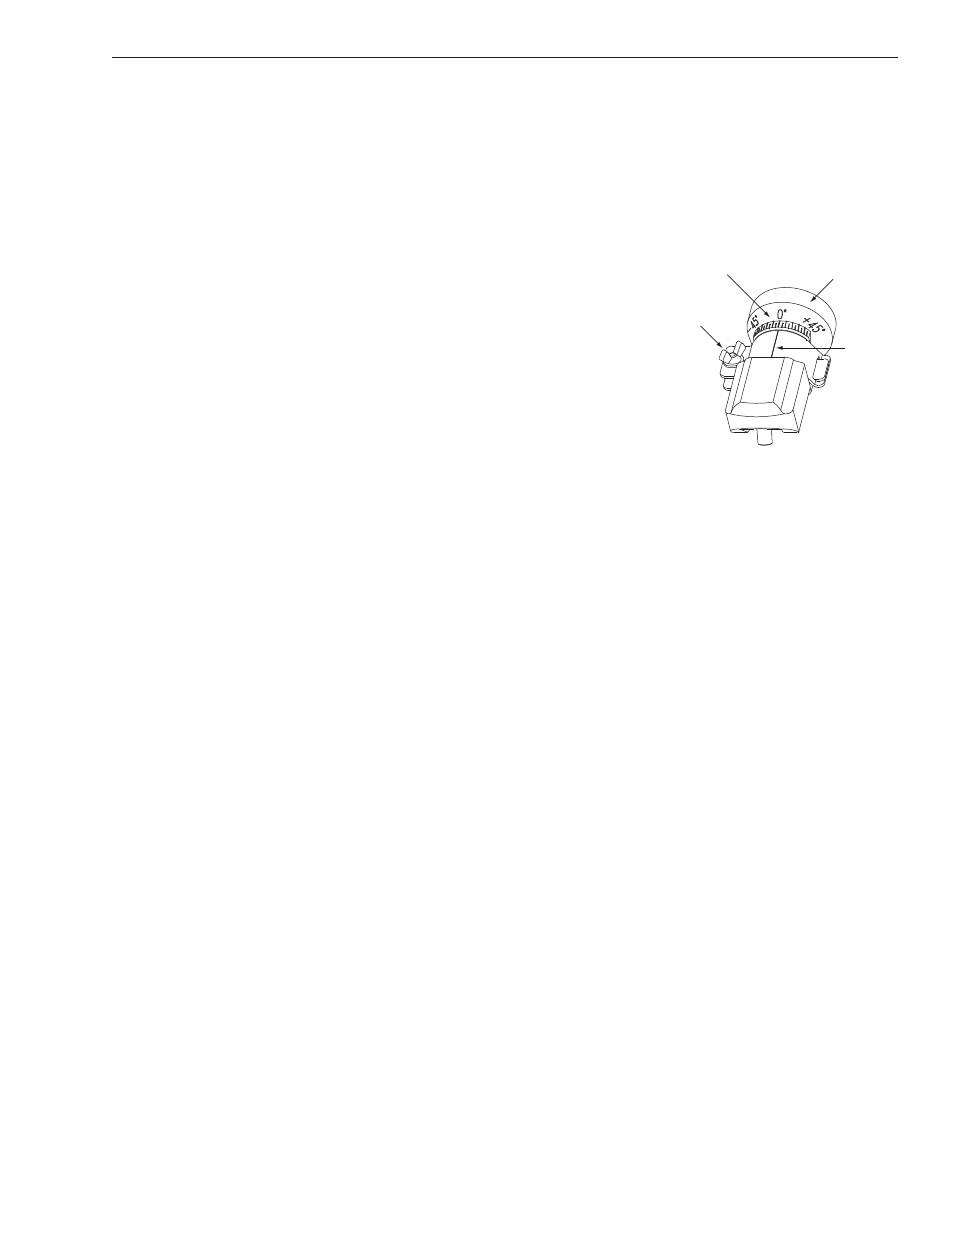
Skew Angles
LNB Clamp
& Wing Nut
Scribe
Mark
LNB
Figure 2-18
Skew Adjustment
4. Type
SKEWANGLE and press Enter. The system
will respond with the skew angle for whichever
satellite is currently selected.
Adjusting the LNB Skew Angle
1. Determine the skew angle for the selected satellite
and region.
2. Loosen the wing nut on the LNB clamp so that the
LNB can be moved.
3. Carefully rotate the LNB so that the scribe mark
on the LNB clamp is aligned with the proper angle
measurement.
4. Tighten the wing nut and LNB clamp to secure
the LNB.
2.7
Testing the System
Now all you need to do is turn the system on and ensure
everything works properly. Follow the steps below to test the
TracVision system.
1. Park the vehicle in a blockage-free area. The
antenna requires an unobstructed view of the
southern sky to receive satellite signals.
2. Turn on the receiver(s) and TV(s). For instructions
on operating the receiver, refer to the receiver’s
owner’s manual.
3. Turn on the TracVision antenna.
4. Within a few minutes, a picture should appear on
the TV.
5. (TracVision R5 only) Take a road test and verify that
the antenna tracks the satellite while the vehicle is
moving.
6. When you have finished testing, shut down the
system.