Konica Minolta DIMAGE-Z20 User Manual
Page 57
112
D
ATA
-
TRANSFER MODE
Paper size
The paper size of the print can be specified in section 2 of the
PictBridge menu. The printer-setup option uses the size set with
the printer.
Layout
The layout of the print can be set in section 2 of the PictBridge menu. The printer-setup option uses
the layout parameters of the printer. Borderless printing can be specified with the camera as well as
the number of images per page.
The following are the dimensions for postcard, L, and 2L paper sizes in both
millimeters and inches for your reference:
Printing Notes
Postcard
L
2L
100 X 148mm
89 X 127mm
127 x 178mm
3.9 X 5.9 in.
3.5 X 5.0 in.
5.0 X 7.0 in.
Data print
Print quality
Layout
Paper size
Printer setup
100mmX150mm
2” X 3” card
4” X 6”
L
Printer setup
Postcard
8” X 10”
2L
Letter
A4
Use the four-way key of the controller to highlight the
new paper size.
Press the central button of the controller to set the
paper-size.
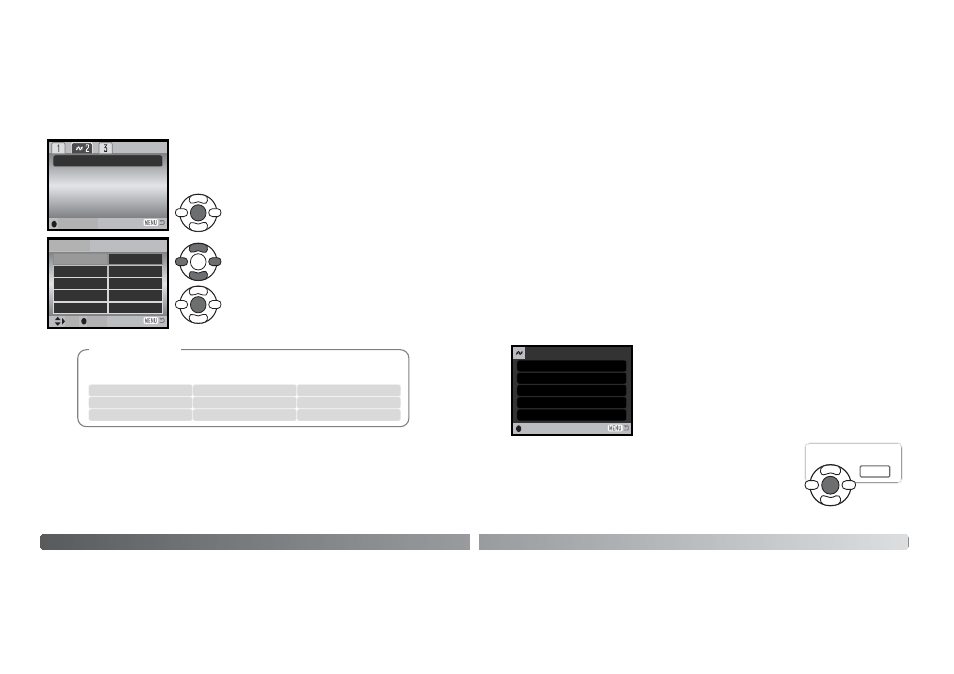
Highlight the current size setting in the menu and
press the central button of the controller to open the
paper-size screen.
Paper size
:enter
:sel.
:enter
113
Print quality
The print quality can be set in section 2 of the PictBridge menu. The printer-setup option uses the
quality set with the printer. The fine quality can be specified with the camera.
Data print
Data can be printed with the image. The printer-setup option uses the options set with the printer.
The date of capture and the file name can be selected for printing. Data printing can also be dis-
abled with the menu.
DPOF print
DPOF print in section 3 of the PictBridge menu allows still images and an index print selected with
the DPOF printing options in section 3 of the playback menu to be printed from a DPOF compatible
PictBridge printer. Simply select the start option from the menu to begin the routine.
The number of prints in the print run are displayed; an index print
is counted as one. Press the central button of the controller to
begin printing, or press the menu button to return to the PictBridge
menu.
Once printing begins, the operation can be canceled by pressing the
center of the controller. The printing-finished message indicates the end
of the operation; press the center of the controller and turn the camera
off to end the routine.
No. of prints:
Print size:
Data print:
7
Printer setup
Printer setup
Printer setup
Printer setup
Print quality:
Layout:
:Start
Printing finished.
OK