Assembly, Before startup – Karcher BDP 1500 User Manual
Page 14
14
English
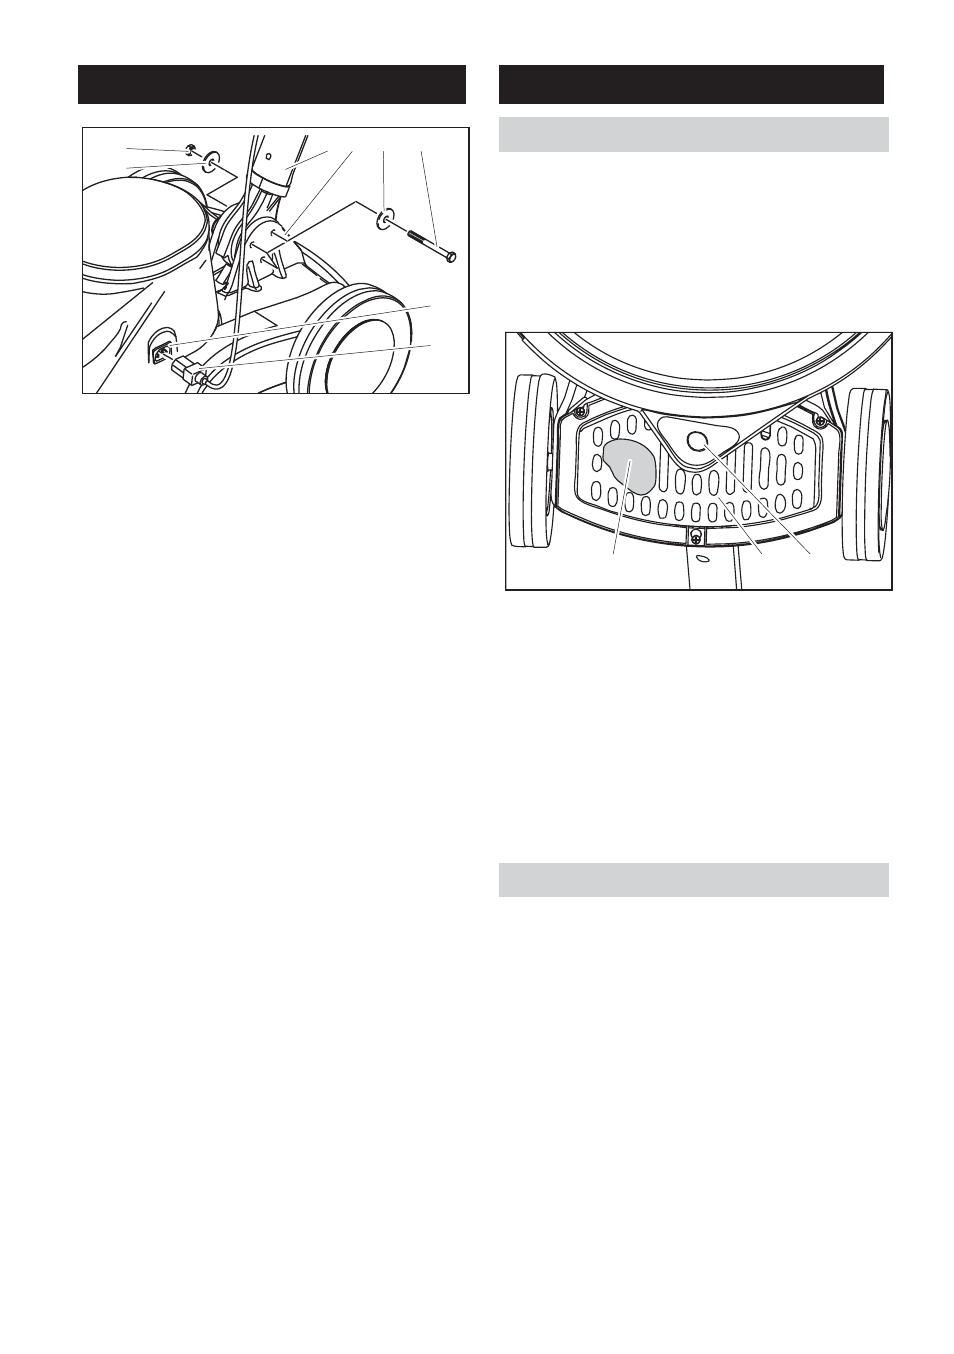
1
Nut
2
Disc
3
Handle
4
Appliance base
5
Hexagonal screw
6
Female connector control line
7
Male connector control line
Î Unpack the appliance.
Î Remove the cable ties from the bottom
end of the handle.
Note
Ensure that the toothed wheel does not fall
out of the opening.
Î Hold the handle over the appliance base
upright and with the cable hook to the
back.
Î Insert the bottom end of the handle be-
tween the two tabs of the appliance
base.
Î Align the borings.
Î Connect the handle and the appliance
base using the 3 enclosed screws, 6
washers and 3 nuts as shown in the illus-
tration above.
Î Tighten the screws using the enclosed
open end wrench.
Î Insert the plug of the control line into the
female connector of the control line.
Î Disconnect the mains plug from the
socket.
Î Pull the lever for level adjustment and
bring the handle in a vertical position.
Î Tilt the appliance backward and store it
on the handle.
1
Filter bag
2
Cover
3
Connection neck, vacuum apron
Î Slide the cover downward/to the rear and
remove it.
Î Insert the filter bag into the appliance
and place over the connection neck of
the vacuum apron.
Î Replace cover.
ṇ
Caution
Risk of damage!
Do not store the appliance with inserted pad.
Always remove the pad after every use.
Î Disconnect the mains plug from the
socket.
Î Pull the lever for level adjustment and
bring the handle in a vertical position.
Î Tilt the appliance backward and store it
on the handle.
Assembly
1
2
3 4 2
5
6
7
Before Startup
Inserting a filter bag
Attach the pad
1
2
3