Step 4, Step 5, Step 6 – Star Trac S-UBX User Manual
Page 14: Step 7
14
620-7992 Rev 001
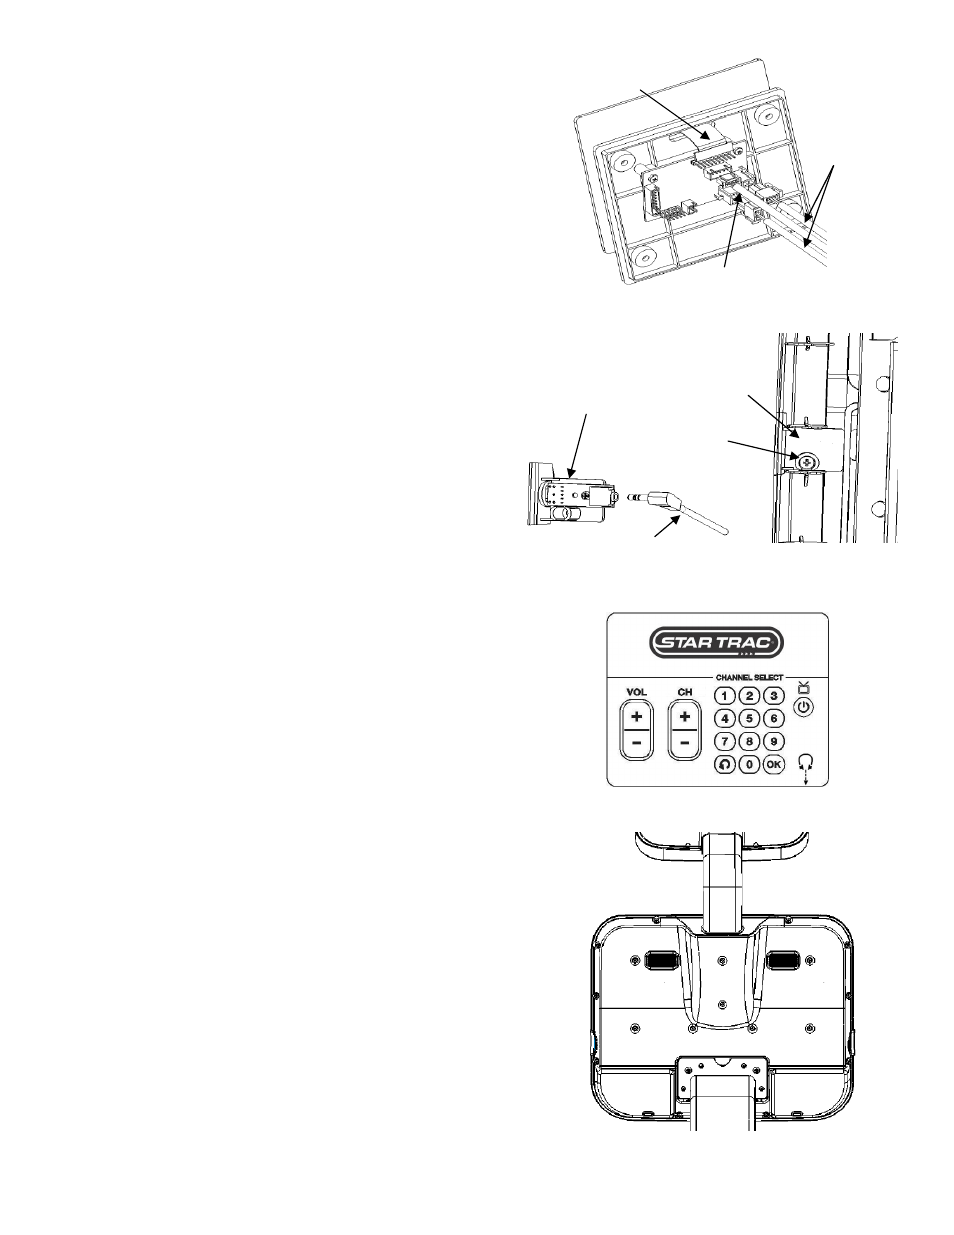
STEP 4.
Insert the keypad cable into the oblong hole of the
console, and plug it into the board (as shown on
the right figure).
Plug in the Interface remote control cable (5-
contacts), power-in cable (2-contacts), and power
-out cable (2-contacts) to each header as shown
on the right figure.
STEP 5.
Using a #2 Phillips screwdriver, remove the screw
that holds in the blank headphone jack cap at the
lower front of the display. Retain the screw (You
will no longer need the cap and, if desired, you
can store it away for any possible future use).
Now take the Entertainment headphone jack from
the PVS hardware kit, and plug in the headphone
cable to the jack. Use the previously retained
screw to reinstall the headphone jack. Tighten
snugly.
STEP 6.
Install the center console back to the front display
cover and secure with the (4) screws removed in
step 3.
Remove the protective paper on the back side of
the keypad, and attach it to the console plastic.
Be sure to make good alignment between the
console plastic and keypad, also Make sure there
are no air bubbles trapped between the keypad
and the console plastic.
Interface control
cable (5-contacts)
Power-in and
power-out cables
(2-contacts)
Keypad cable
Blank Cap
Screw
Headphone
Jack
Headphone
Cable
STEP 7.
Replace the top back cover. Using a #2 Phillips
screwdriver, insert (19) screws, retained from ear-
lier step, into the plastic cover. Do not tighten
screws yet.
Check the cap with the neck and grommet. Make
sure the cap is flush with the top back plastic, and
adjust if necessary. Tighten screws to secure the
back plastics.
This completes the installation of the PVS on the S-TRc treadmill.
If
you have an S-TRx continue to next section to install the power supply
.