9xj`z:fekifcj – Woodstock W1814 User Manual
Page 22
-20-
N(/(+Fne\ijDXelXcD]^%('&'/"
FG
<
I
8
K@FEJ
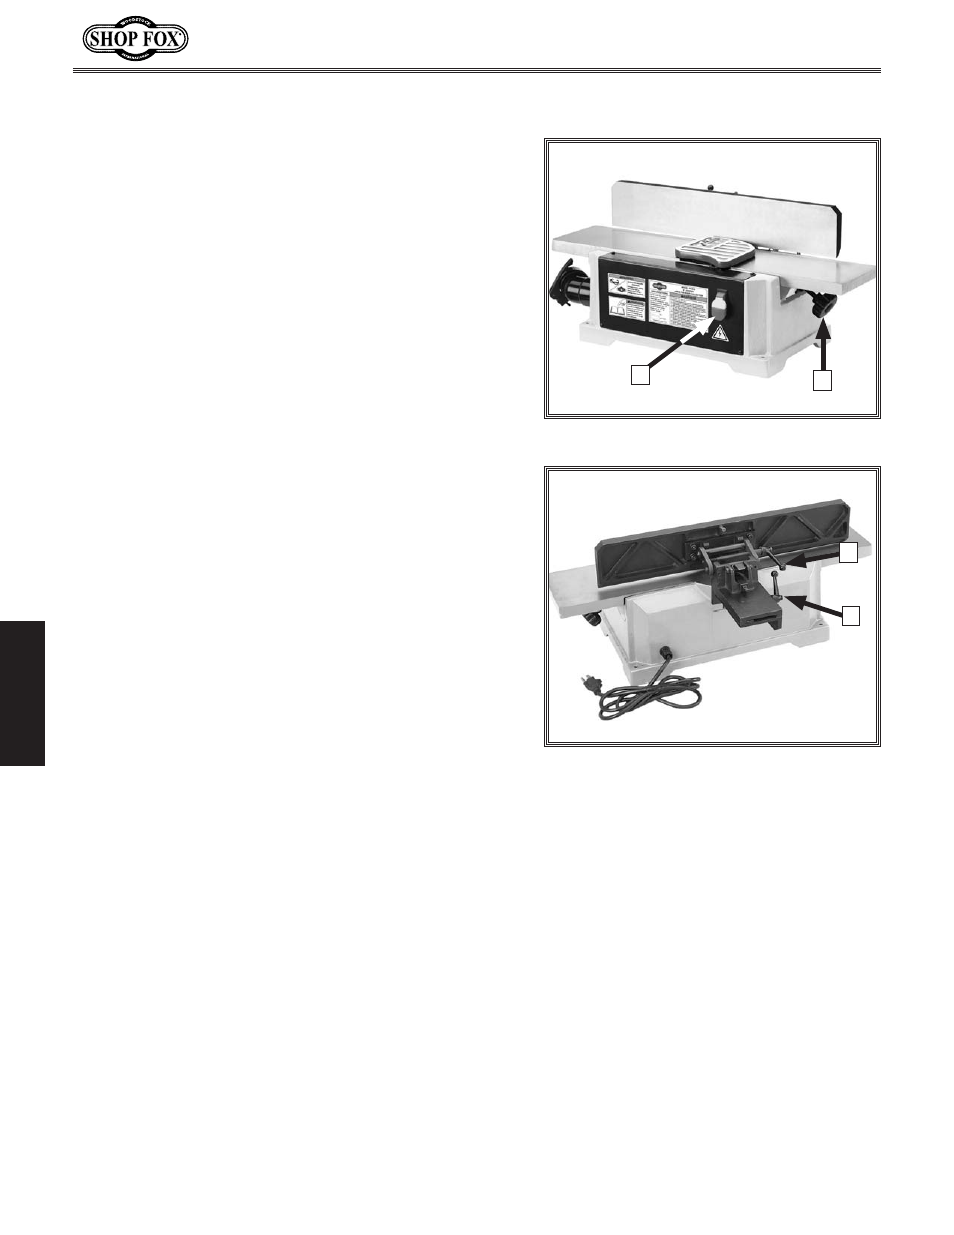
This section covers the basic parts and controls used
during routine operations. Refer to
=`^li\j),Xe[)- for
basic parts and control locations.
8% FE&F==Jn`kZ_1This paddle switch starts and stops
the cutterhead rotation.
The yellow part of the switch is a safety device.
When you remove this part, the switch locks in
the
F==position. Always remove this yellow key
when you leave the jointer work area. Removing
the key prevents unsupervised persons in your shop
(especially children) from easily or accidentally
starting the jointer.
9% ;\gk_f]:lk8[aljkd\ekBefY1 Allows you to
change the height of the infeed table to control the
depth of cut.
:% =\eZ\K`ck`e^?Xe[c\1Lets you change the angle of
the fence and lock it where desired. The fence can
be quickly set to 90° (perpendicular to the tables),
45° inward, and 45° outward by setting and using
the fence stops on the bracket assembly.
;% =\eZ\Jc`[`e^?Xe[c\1This handle lets you adjust
and lock the position of the fence across the tables.
8CN8PJ firmly tighten the sliding handle before
you begin operations. The position of the fence
determines the maximum width of the cut as you
pass your workpiece over the spinning cutterhead.
E
is exposed on the work area.
9Xj`Z:fekifcj
=`^li\25. W1814 basic controls in front.
A
B
=`^li\26. W1814 basic controls in back.
C
D