9. replacing and adjusting the switching regulator, 9-1. replacing the switching regulator – Sony PFV-L10 User Manual
Page 14
1-8 (E)
PFV-L10
1-9. Replacing and Adjusting the Switching Regulator
1-9. Replacing and Adjusting the
Switching Regulator
After replacing the switching regulator, be sure to adjust
the power supply voltage.
To adjust the power supply voltage, require the power
supply tool.
1-9-1. Replacing the Switching Regulator
c
Turn off the power of the power supply unit requiring the
switching regulator replacement and unplug the power
plug from the outlet before starting the replacement.
1.
Remove the front panel. (Refer to Section 1-2.)
2.
Remove the power supply unit that contains the
switching regulator to be replaced.
(Refer to Section 1-6.)
3.
Remove the six screws.
4.
Release the two harnesses (AC and DC) from the two
wire clampers, then disconnect them from the
switching regulator.
5.
Disconnect the harness GND from the switching
regulator.
Wire clamper
Wire clamper
Harness DC
Harness AC
PSW 3
x
6
PSW 3
x
6
Harness GND
PSW 3
x
6
B 3
x
6
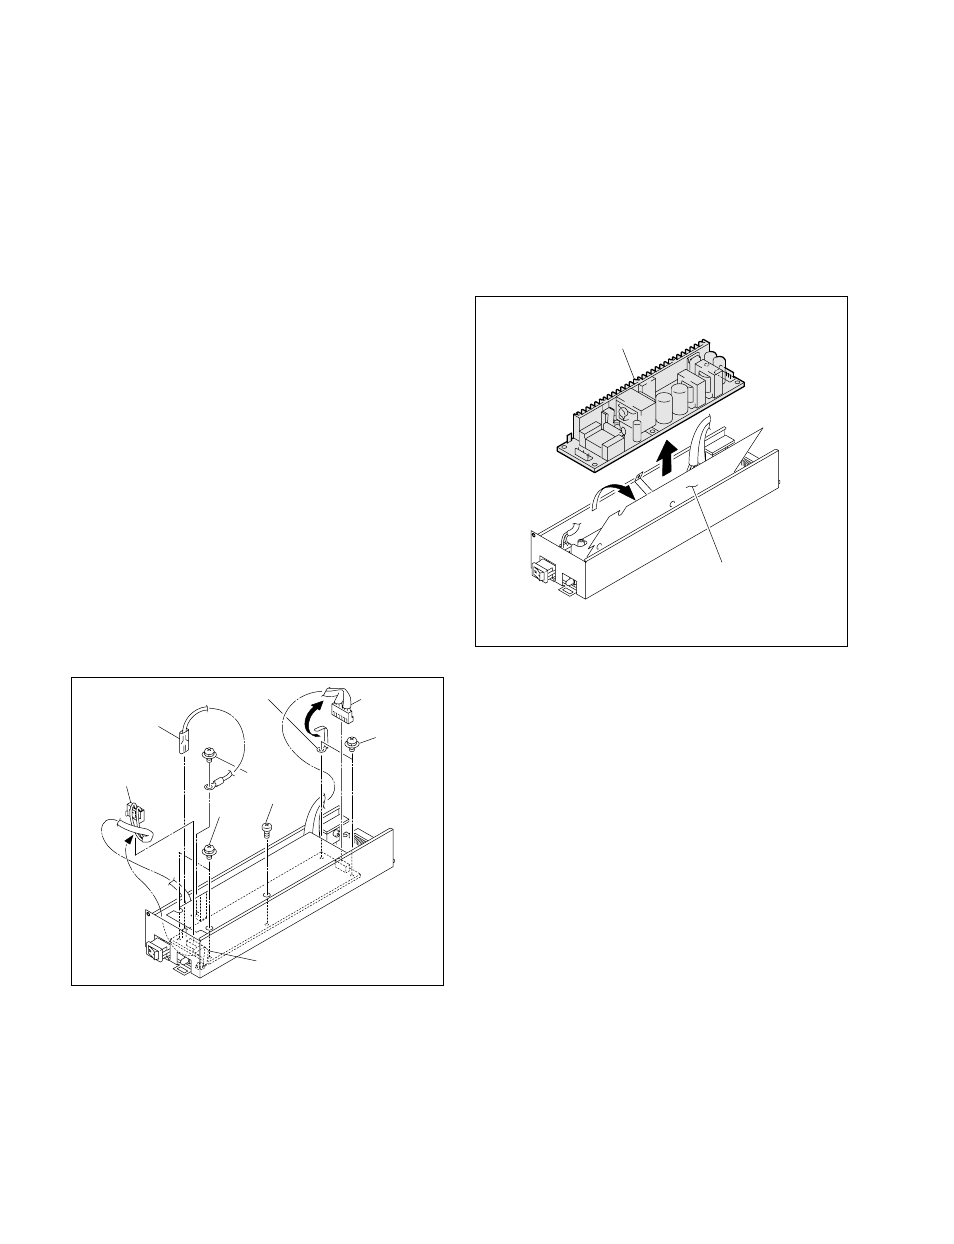
6.
Open the insulated plate and then remove the
switching regulator.
7.
Install a new switching regulator in the reverse order
of steps 3 to 6.
8.
Adjust the power supply voltage.
(Refer to Section 1-9-2.)
9.
Reinstall the adjusted power supply unit in the
PFV-L10 and then reattach the front panel.
Switching regulator
Insulated plate