8-3. dus-213 board, 8-4. ps-571 board – Sony PFV-L10 User Manual
Page 13
1-7 (E)
PFV-L10
Insulated plate
PSW 3
x
6
PS-571 board
PSW 3
x
6
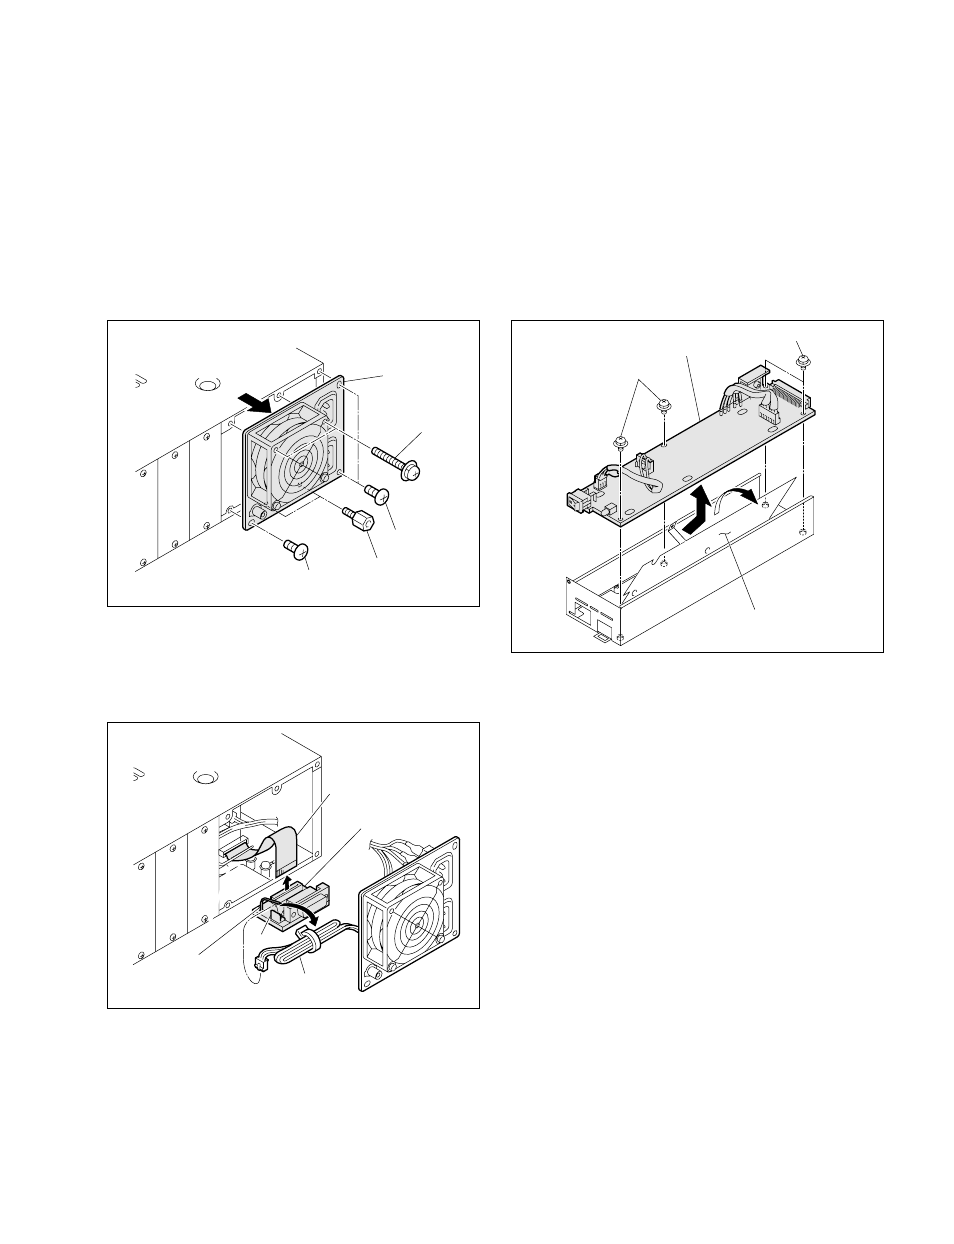
1-8-3. DUS-213 Board
1.
Remove the five screws and then carefully pull out the
rear panel.
n
The rear panel cannot be removed because it is
connected inside the PFV-L10 using the harnesses.
2.
Remove the two screws fixing the D-sub connector (on
the DUS-213 board).
1-8. Replacing the Boards
DUS-213 board
Flexible card wire
Harness (FAN)
CN2
Coating lead pin
B 2.6
x
6
PSW 3
x
35
Screws (D-sub)
Rear panel
B 2.6
x
6
3.
Release the harness (FAN) from the coating lead pin
and then disconnect it from connector CN2.
4.
Disconnect the flexible card wire from the DUS-213
board. (Refer to Section 1-5.)
5.
Install a new DUS-213 board in the reverse order of
steps 1 to 4.
6.
Attach a new PS-571 board in the reverse order of
steps 4 and 5.
7.
Reattach the switching regulator.
8.
Reinstall the power supply unit.
9.
Reattach the front panel.
1-8-4. PS-571 Board
1.
Remove the front panel. (Refer to Section 1-2.)
2.
Remove the power supply unit that contains the
PS-571 board to be replaced. (Refer to Section 1-6.)
3.
Remove the switching regulator.
(Refer to Section 1-9-1.)
4.
Remove the four screws.
5.
Open the insulated plate and remove the PS-571 board.