Preparing the built–in oven, Instructions for the installer – Smeg SC709XU User Manual
Page 4
Instructions for the Installer
6
3. PREPARING THE BUILT–IN OVEN
WARNING
EXCESSIVE WEIGHT HAZARD
- Use two or more people to move and install the oven
- Failure to do so can result in back or other injury.
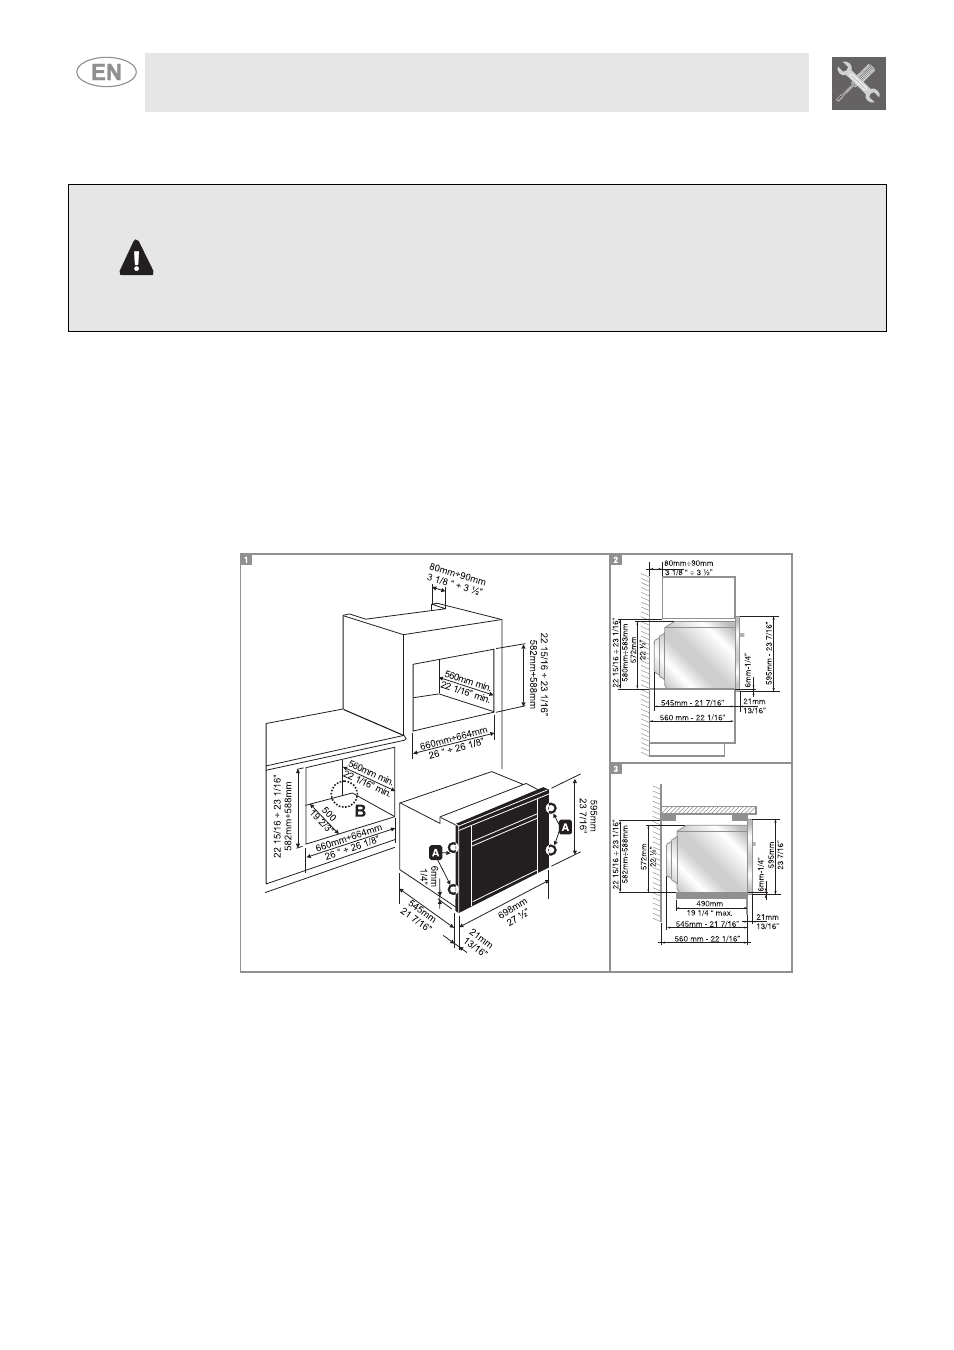
The oven is designed for installation into any type of cabinetry as long as it is heat-resistant. Proceed
according to the dimensions shown in Pictures 1, 2 and 3. For installing under a countertop, follow the
dimensions given in Picture 3. For installing under a countertop beneath a cooktop with controls
connected to the oven, ensure a minimum clearance from any side walls of at least 110 mm as shown in
Picture 1.
For installing in a column, follow the dimensions given in Picture 2 allowing for a clearance of 80 to 90
mm at the top and sides of the column. Tighten the four screws (ref. A) inside the frame to secure (Pic.
1).
For installing beneath a separate cooktop, allow for a rear and bottom clearance as shown in Picture 1
(ref. B). See instructions regarding fitting and securing the cooktop.
It is important to follow these instructions before and during the oven installation:
•
Decide on the final location of the oven. Locate the existing wiring to avoid drilling into or severing
wiring during installation.
•
To avoid damage to the floor, place the oven on cardboard prior to installation. Do not lift by the door
handle or any part of the frame or trim.
•
Remove the shipping materials and tape from the oven.
•
Remove the literature contained in the package.
•
Remove and set aside racks and other parts from inside the oven.
•
Move the oven on the cardboard close to the oven’s final location.
•
Remove the oven door (see paragraph “
9.2 Removing the door” in the Instructions for the User
booklet)
IMPORTANT: Use both hands to remove the oven door.