Burner & blower removal, Burner (cont) – State Industries GP650YTPDT User Manual
Page 13
ULTRA HIGH EFFICIENCY POWER VENT/POWER DIRECT VENT - SERVICE MANUAL
Technical Literature Department
12 of 52
Ashland City, TN © 2008
Servicing should only be performed by a Qualified Service Agent
BURNER (CONT)
Burner & Blower Removal
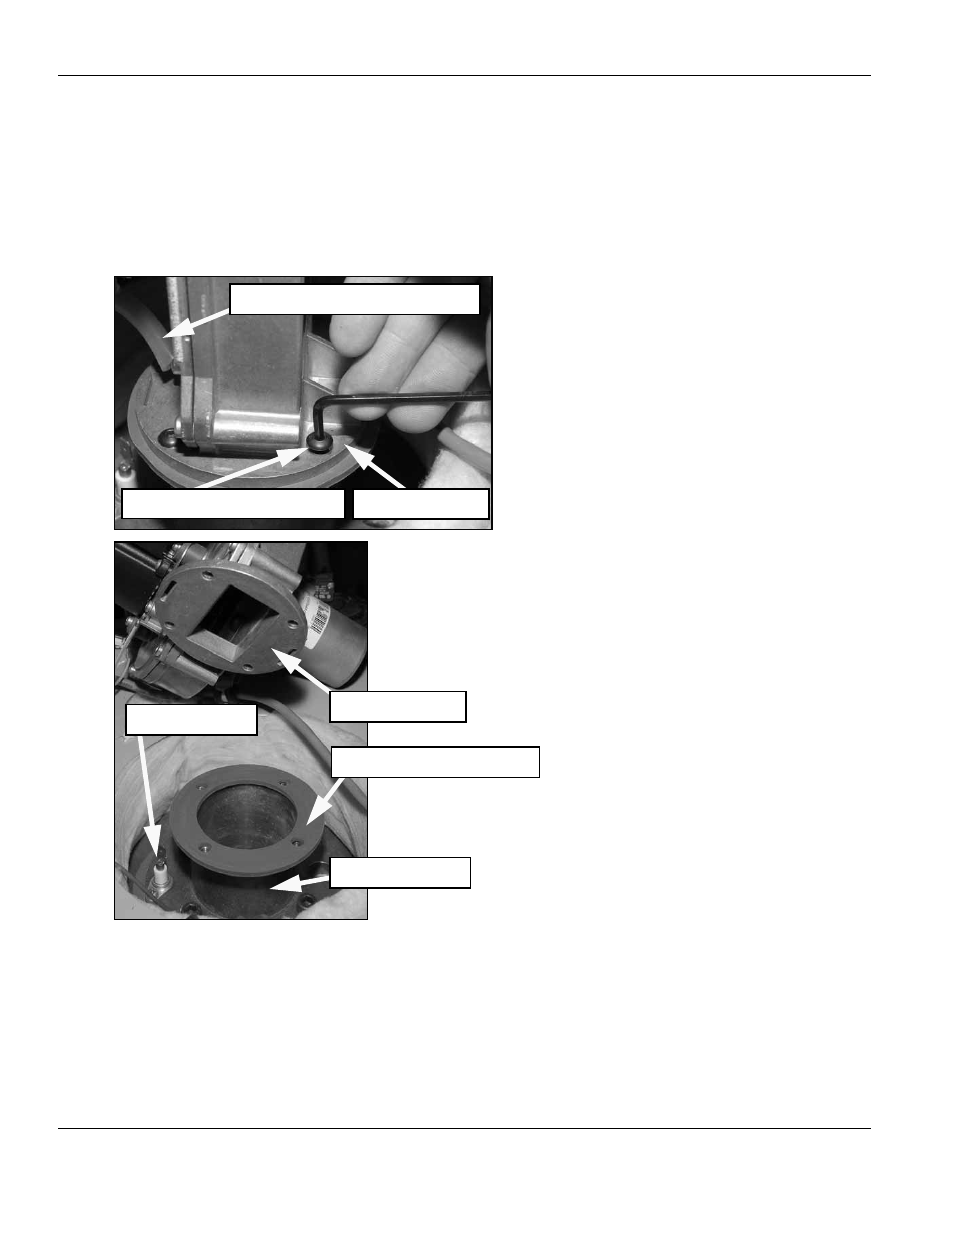
The burner should be removed and inspected whenever service is being performed for
rough operation or ignition failure. Radial fire burners like the one used on this water heater
can trap debris, see Service Notes - Venting on page 7.
The following images illustrate the burner removal procedure. Long T handle hex wrenches
(8-10”) will save considerable time when removing/installing the burner & blower.
BLOWER/BURNER REMOVAL PROCEDURE
1 Ensure power to the water heater is turned off.
2 The blower assembly must be removed first.
3 Disconnect the two wiring plugs from the blower
assembly sockets (see Service Notes - Blower
page 10).
4 Disconnect the Blower Prover air pressure switch
sensing tube.
5 Remove 4 blower flange mounting screws -
1/8” hex. Using long T handle hex wrench will
save considerable time.Do not over tighten when
reinstalling - torque should not exceed 40 inch
lbs.
6 Remove the blower assembly from the blower
adapter.
7 Remove the blower flange gasket. Gasket may be
reused if not damaged or showing signs of
excessive wear.
8 Remove the flame sensor - 1 Phillips head screw.
CONTINUED ON NEXT PAGE
Blower Flange
Blower Adapter
1/8” Hex Machine Screws
Blower Flange
Blower Flange Gasket
Flame Sensor
Blower Prover Sensing Tube