Sleep number, Mattress installation – Select Comfort Precision Comfort Adjustable Foundation User Manual
Page 13
Precision Comfort™ Owners Manual
13
Sleep Number
®
MATTRESS INSTALLATION
IMPORTANT: Wash hands before
beginning installation. Residue on
hands will easily transfer to cloth
covered bedding components.
A
B
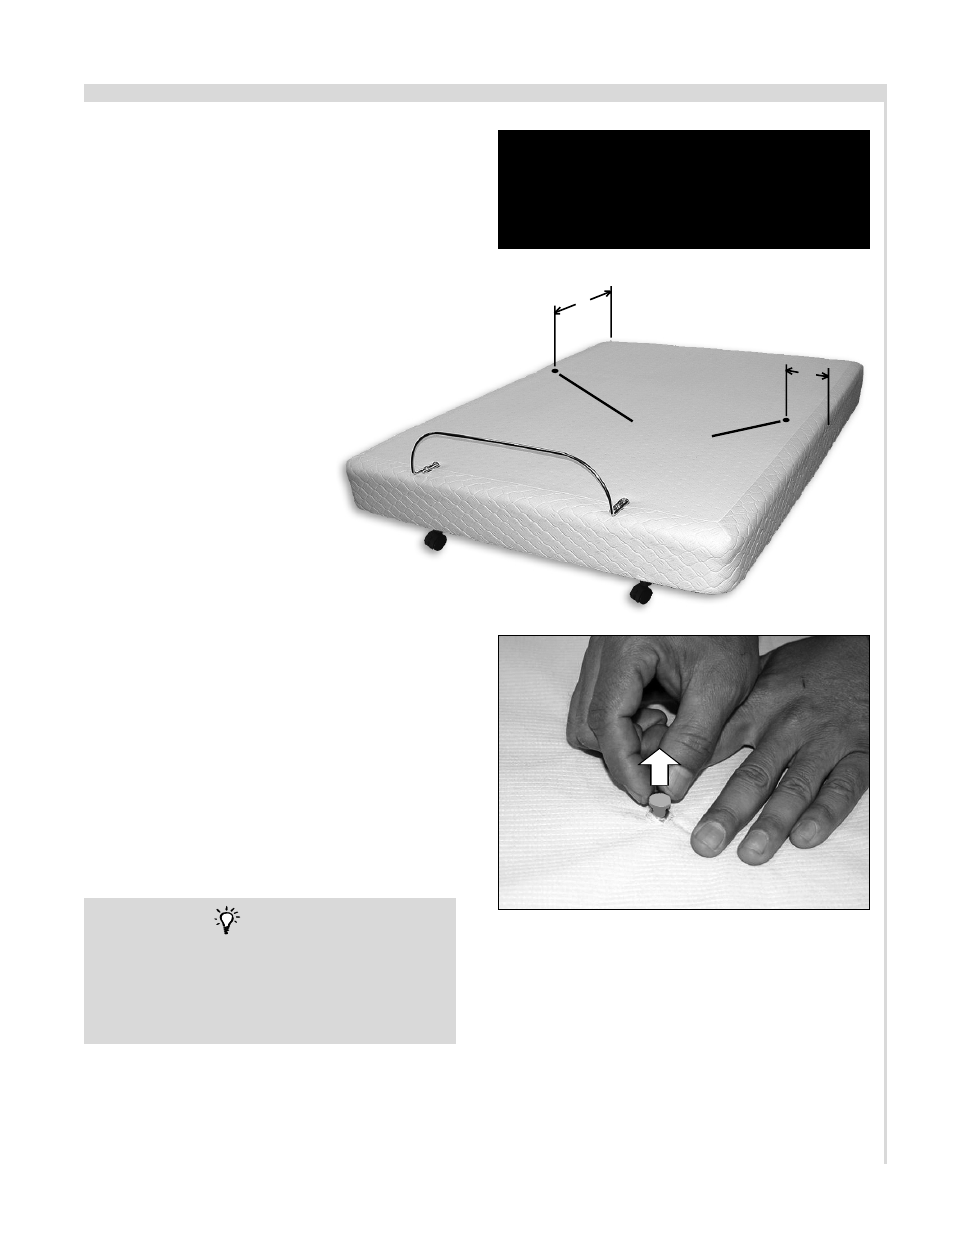
“A” = 32-1/2” (approx.)
“B” = 6” (approx.)
FIGURE 13
APPROXIMATE
LOCATOR PIN
POSITION
FIGURE 14: Locator pin removal.
PULL OUT EACH PIN FROM
THE THREADED LUGS.
INSTALLATION INSTRUCTIONS
Tools required—utility knife, Phillips
®
head screwdriver.
Install the Sleep Number
®
mattress, per
the following procedure:
1. Verify Precision Comfort
®
adjustable
foundation setup is complete.
2. Identify and remove (2) locator pins in the
adjustable foundation (FIGURES 13 and
14).
Note: approximate locator pin
position is 32-1/2” from the top and 6”
from the side of the adjustable
foundation. Locator pins mark threaded
lug location used for Sleep Number
®
mattress attachment.
3. Unzip the top panel of the
Sleep Number
®
mattress
cover and set the panel
aside.
4. Position the bottom of the
Sleep Number
®
mattress on top
of the adjustable foundation.
5. Insert foam border walls and
corner locks into the mattress cover per
the Sleep Number
®
mattress installation
instructions.
6. Align the Sleep Number
®
mattress cover
flush against the adjustable foundation
mattress retainer bar (at the foot end of the
bed). Align the top and side edges of the
mattress cover flush with the adjustable
foundation so the mattress cover and the
foundation are a matched pair.
7. Locate the 2 threaded lug mounting
locations (with fingers).
EXACT SIDE AND END ALIGNMENT OF THE
SLEEP NUMBER
®
MATTRESS COVER
ASSEMBLY WITH THE ADJUSTABLE
FOUNDATION MUST BE ACHIEVED BEFORE
PROCEEDING TO STEP 8.
NOTE