Chapter 5 recording/playback, 1 preparing for recording, 1-1 setting switches and menus – Sony HDW-F500 User Manual
Page 93: Chapter 5 recor ding/pla ybac k
Chapter 5
Recording/Playback
5-1
Chapter 5 Recording/Playback
DIGITAL VIDEO CASSETTE RECORDER HDW-F500
Setting switches and menus
5-1 Preparing for Recording
Chapter 5 Recor
ding/Pla
ybac
k
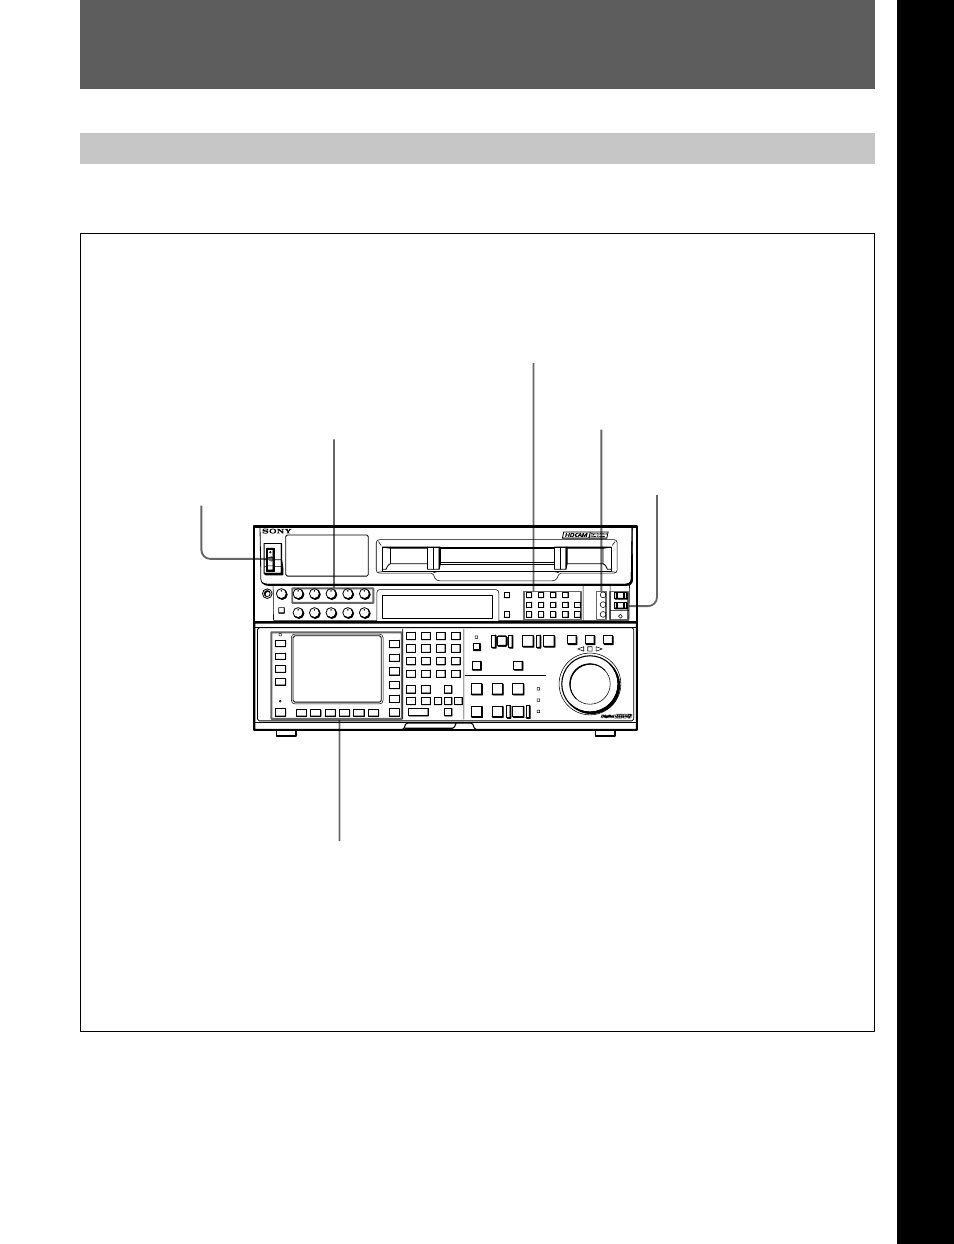
5-1-1 Setting Switches and Menus
Before recording, set the switches and menus as shown
in the diagram below.
For details, refer to the pages indicated in the parentheses.
POWER switch: ON
AUDIO INPUT/MONITOR SELECT buttons:
Audio channels to be recorded (page 5-2)
Indicators: Check the REFERENCE signal.
REC level controls: Reference level or
appropriate recording level (page 5-3)
REMOTE buttons: None of these
buttons light up.
Menu settings
ALT/
[F2]
(REC INH) buttons in the HOME menu: off
[F1]
(TIMER SEL) button in the TC menu: Select the time data to be displayed.
[F6]
(TCG SOURCE) button in the TC menu: int-LTC, int-VITC, ext-LTC, ext-VITC (see page 4-25)
[F7]
(TCG MODE) button in the TC menu: regene, prst, auto (see page 4-25)