2 advanced automatic editing, 2-1 performing dmc editing – Sony HDW-F500 User Manual
Page 123
Chapter 6
Editing
6-15
Chapter 6 Editing
6-2 Advanced Automatic Editing
This section describes the following advanced editing
methods:
• DMC editing
• Animation editing
• Preread editing
6-2-1 Performing DMC Editing
If your player VTR has DT
(Dynamic Tracking)
capability, you can perform variable speed editing by
controlling the playback speed from the lower control
panel. This type of editing is called DMC editing.
Overview of DMC editing
Requirements for DMC editing
• DMC editing may be done during assemble or insert
editing, but not during split editing.
• The player VTR must support DT playback.
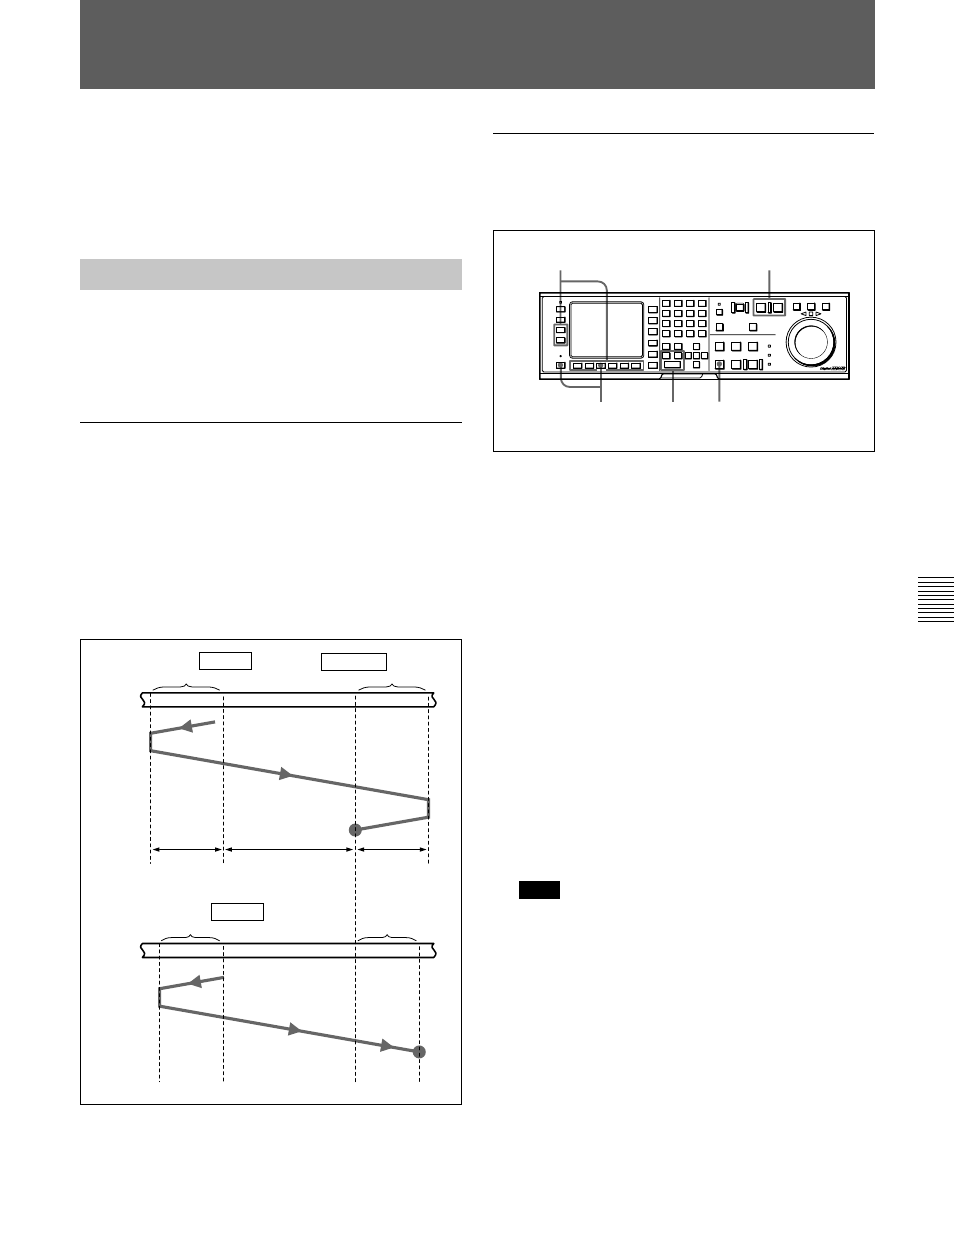
Tape movement during DMC editing
During DMC editing, the tape moves as shown in the
diagram below.
Tape movement during DMC editing
Setting edit points and playback speed
Use the procedure below to set edit points and
playback speeds for DMC editing.
Setting edit points and playback speed
1
Press the
[F3] (ASSEMBLE) button in the HOME
menu, or press the respective INSERT button (
[F4]
(INS TC),
[F5] (INS VIDEO), [F6] (INS A-CH1),
[F7] (INS A-CH2), [F8] (INS A-CH3), [F9] (INS
A-CH4) or
[F10] (INS CUE) button) to select the
edit mode that you want.
2
Press the PLAYER button to set the VTR to act as
the player VTR.
The PLAYER button lights up.
3
Press the ALT/
[F7] (DMC) buttons in the HOME
menu.
The button lights up and the VTR enters DMC
editing mode.
4
Press the IN button while holding down the
ENTRY button to set an edit point.
Note
You cannot set an OUT point for the player VTR
for DMC editing.
Stop
$
$
$
Stop
Preroll
Post-roll time
×
final speed
Post-roll
Recorder
VTR
Player
VTR
Preroll time
×
initial speed
Moves at
the final
speed.
Playback
mode
DMC editing mode
Playback
mode
IN point
OUT point
IN point
Moves at
the initial
speed.
Playback at speeds
stored in memory
2
1
3
5
4