Fence positioning, Fence alignment, Table inserts – Woodstock SHOP FOX W1701 User Manual
Page 17
-14-
W1701 1HP Shaper
O
PE
R
AT
IO
N
S
The two fence faces are independently adjustable to
allow for different shaping tasks. The fence faces can be
set at different positions to remove material from the
entire edge of the wood stock or set at the same position
to shape part of the edge.
To adjust the fence, do these steps:
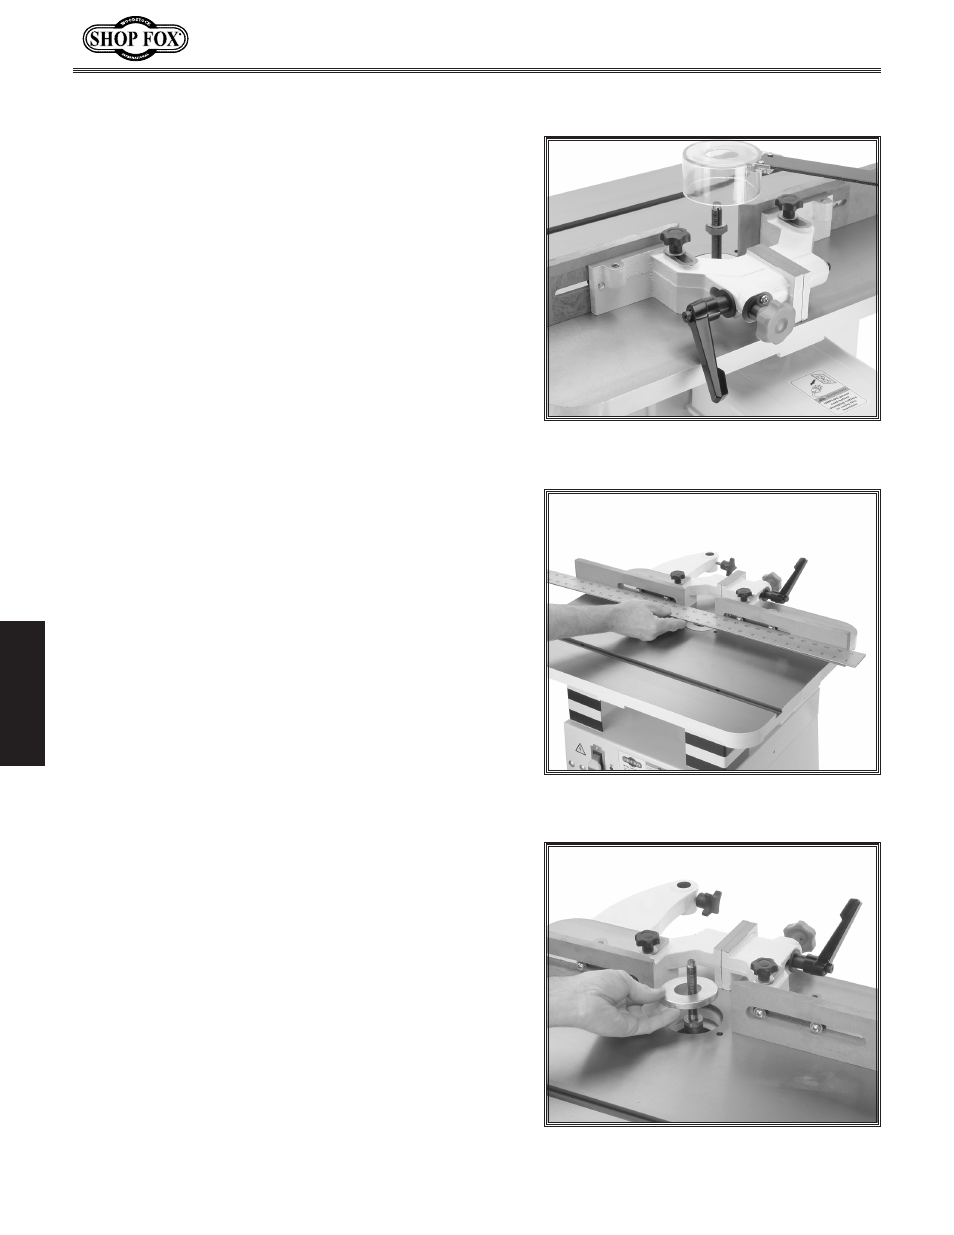
1. Loosen the fence mount lock handle shown in Figure
18.
2. Adjust the position of the fence by turning the
adjustment knob shown in
Figure 18.
3. Once the fence is in the desired position, tighten
down the fence mount lock handle.
Fence Positioning
Figure 18. Fence mount lock handle and
adjustment knob.
Figure 19. Use straightedge to check
fence.
Figure 20. Using table insert to keep
wood shavings on the table.
Before shaping, check that the two fence faces are paral-
lel.
To align the fences so they are parallel with each
other, do these steps:
1. Get a quality straightedge that is long enough to
span the entire length of the fence assembly.
2. Adjust the fence faces so they are in as close to the
same parallel position as possible.
3. Hold the straightedge across both of the fence faces
as shown in
Figure 19.
4. If the fence faces are not parallel, place shims
between the back of the fence face and the face of
the fence mount. With some trial and error shim
adjusting, parallel fence faces can be achieved.
Fence Alignment
Two inserts (
Figure 20) are provided allowing for three
different opening sizes to be achieved. Use the smallest-
size opening for a cutter to reduce wood chips falling into
the machine. Using the smallest-size opening also covers
any unused portion of the bit below the surface of the
table, thus reducing the chance of operator injury.
Table Inserts