Smart Technologies SMART Board Interafctive Whiteboardd PMWT-660/680 User Manual
Page 16
14
PMWT-660/680 Installation Guide
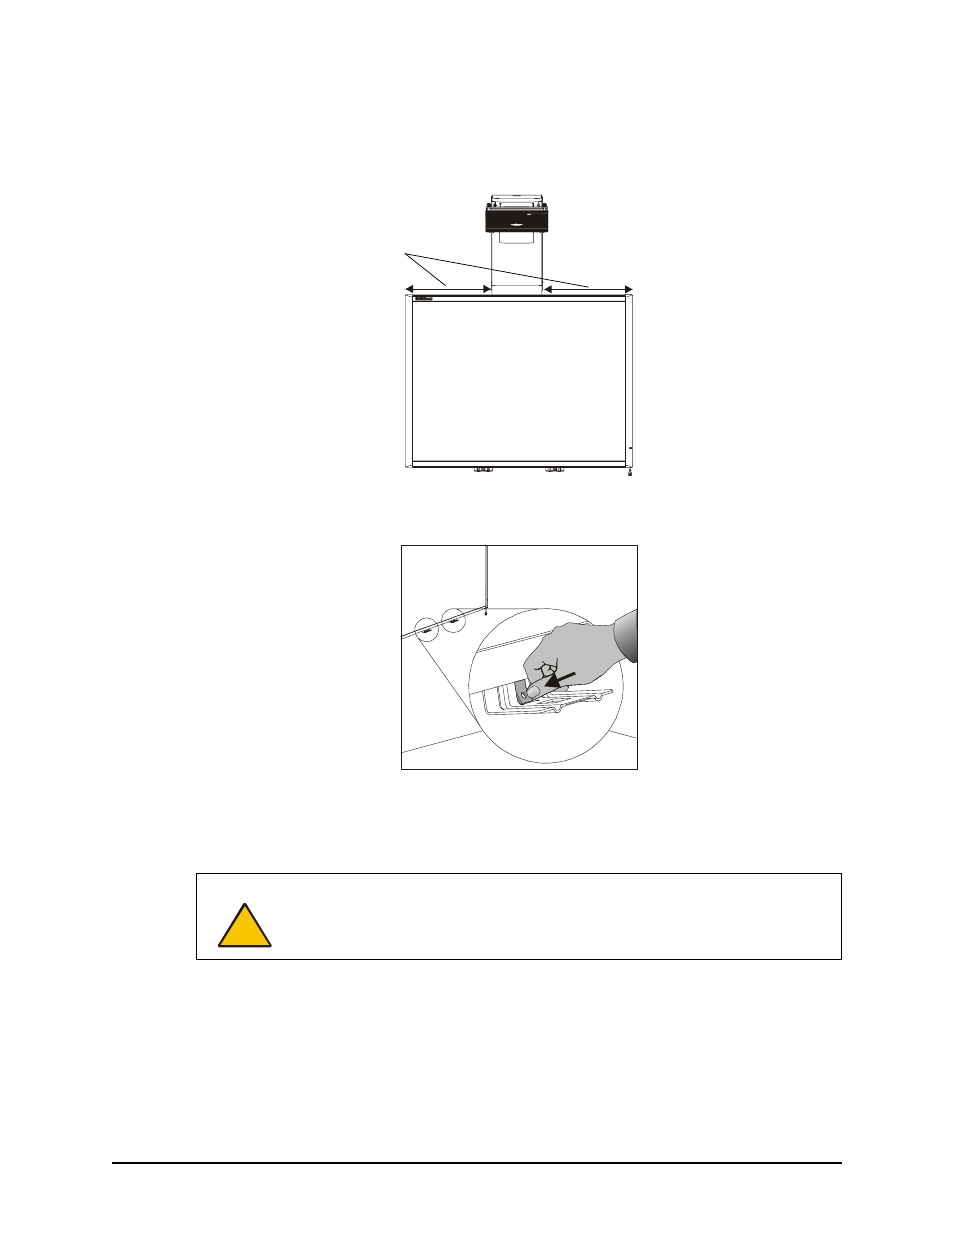
2. Center the interactive whiteboard on the wall mount bracket by measuring the distances
between the edges of the interactive whiteboard and the wall mount bracket. Move the
interactive whiteboard to the left or right until it’s centered.
3. Push the center tab of each pen tray bracket so it’s flush with the wall.
4. Use a pencil to mark the location of the holes in the pen tray tabs.
5. Remove the interactive whiteboard from the wall mount bracket and set it aside in a safe
place.
6. Using a Phillips No. 2 screwdriver, screw the anchors that are supplied with the interactive
whiteboard into the wall at the locations you marked in step 4.
NOTE: Do not use a hammer to tap these anchors into the wall.
7. Put the interactive whiteboard back on the wall mount bracket, and then move it left or right
until the holes in the pen tray tabs line up with the wall anchors.
8. Secure the pen tray bracket to the anchors using two of the screws that came with your
interactive whiteboard or the two screws you removed in step 6 on page 4.
CAUTION
To avoid damage, make sure the interactive whiteboard remains upright,
resting on the pen tray brackets. These brackets are designed to sustain the
weight of the interactive whiteboard. Do not rest the interactive whiteboard on
its sides or the top.
Move the interactive whiteboard left or
right on the wall mount bracket until
these distances are the same