Smart Technologies SMART Board Interafctive Whiteboardd PMWT-660/680 User Manual
Page 12
10
PMWT-660/680 Installation Guide
6. Tighten all the screws that attach the upper and lower supports to the wall mount.
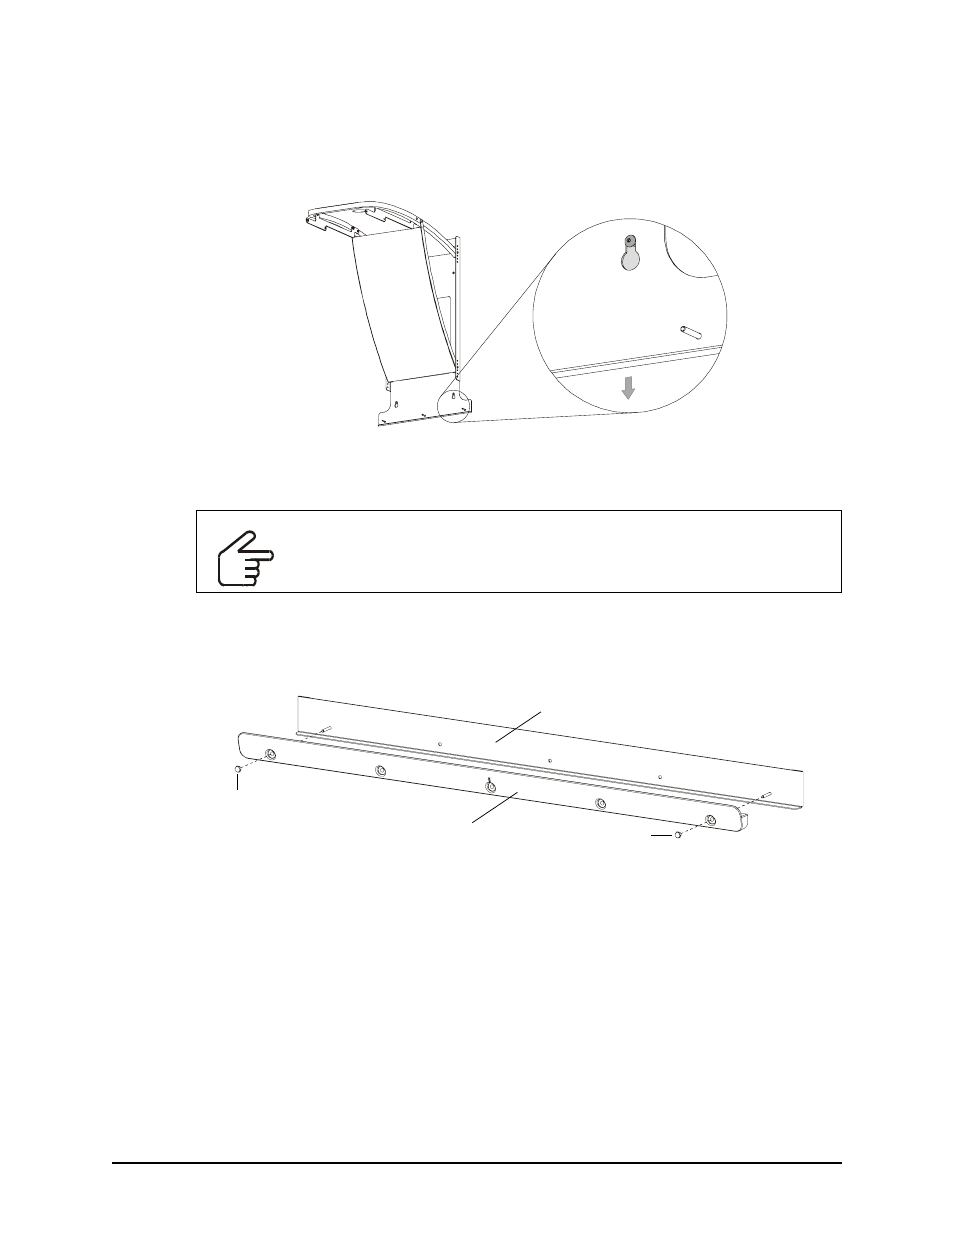
7. Hang the assembled projector mount on the four wall screws, pushing the mount down firmly
so the keyholes fit snugly on the protruding screws.
8. Thread the remaining 1/4-20 × 2" security hex screws into the two vacant wall anchors.
9. Using the 5/32" security hex key, tighten the six wall screws.
10. Locate the horizontal bracket and the wall mount bracket that came with your SMART Board
interactive whiteboard. Align the brackets as indicated below, and use a 5/16" socket wrench,
or nut-driver, and two acorn nuts to secure the two brackets together.
IMPORTANT
If you’re installing the projector mount on drywall, it’s important not to
overtighten the wall screws. Doing so may damage the drywall on the interior
of the wall. Tighten the screw until it is snug, and then tighten another half-turn.
Acorn Nut
Wall Mount Bracket
Acorn Nut
Horizontal Bracket