Sanyo DSR - 300 User Manual
Page 55
RECORDING AREA SET
3
54
English
SE
TTIN
GS
MENU 1>
Recording area allocations
The highest possible allocation for the normal recording
area and the alarm recording area is 99%.
The allocation for the archive area cannot be set
manually. This allocation will be automatically set to at
least 1%.
If the normal recording area is set to *1%
When the normal recording area is set to “*1%”, alarm
recording is possible for the complete memory available
in the alarm recording area. For “1%” and other
settings, up to 16,000 items are recorded per hard disk.
However, if set for *1%, “ALARM SEARCH”, “ALARM
THUMBNAIL SEARCH”, and “MOTION DETECTION
SEARCH” will not be available. Use “TIME/DATE
SEARCH” instead.
Furthermore, since the alarm skip function will also be
inactive, it will be necessary to carry out fast-forward
and fast-rewind playback.
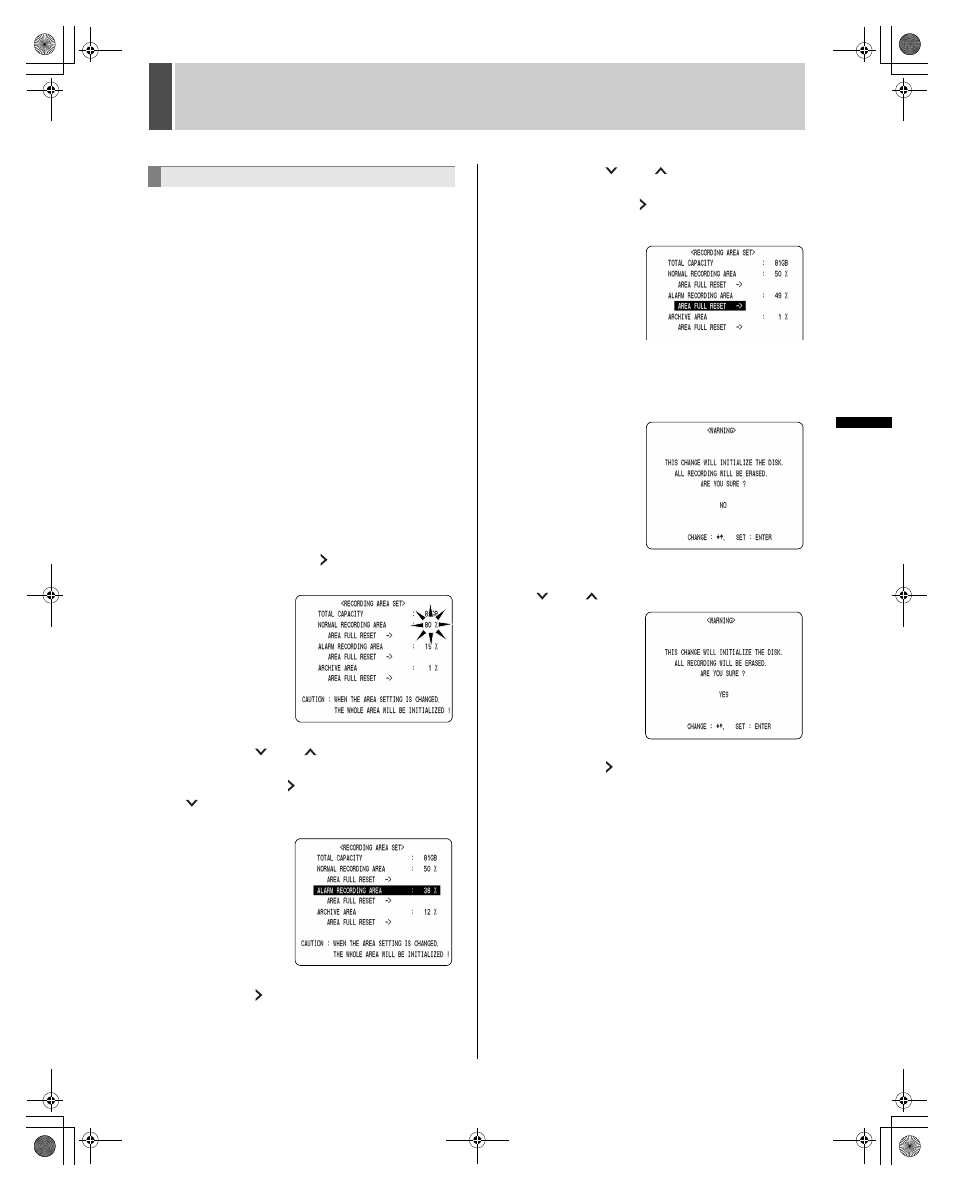
Example:
To set the normal recording area to 50% and the alarm
recording area to 49%
1
With “NORMAL RECORDING AREA”
selected, press the [ ] button.
The capacity setting flashes.
2
Press the [
] or [
] button to set
“NORMAL RECORDING AREA” to 50%,
then press the [ ] button, and press the
[
] button.
The cursor moves to “ALARM RECORDING AREA”.
3
Press the [ ] button, causing the
setting value for “ALARM RECORDING
AREA” to flash.
4
Press the [
] or [
] button to set
“ALARM RECORDING AREA” to 49%,
then press the [ ] button.
The cursor moves to “AREA FULL RESET”.
5
Press the [EXIT/OSD] button.
The
the entire hard disk is about to be initialized.
6
To proceed with initialization, press the
[
] or [
] button to select “YES”.
7
Press the [ ] button.
A message appears indicating the disk is being initialized.
The hard disk is initialized and set to the modified capacity.
Changing recording areas
e00_l8had_us_7.book Page 54 Wednesday, March 10, 2004 2:47 PM