State Industries GS675YRVIT User Manual
Page 27
27
INSTALLED IN SUITABLE AREA: To insure sufficient ventilation
and combustion air supply, proper clearances from the water heater
must be maintained. See “Locating the New Water Heater” section.
Combustible materials such as clothing, cleaning materials, or
flammable liquids, etc. must not be placed against or adjacent to
the water heater which can cause a fire.
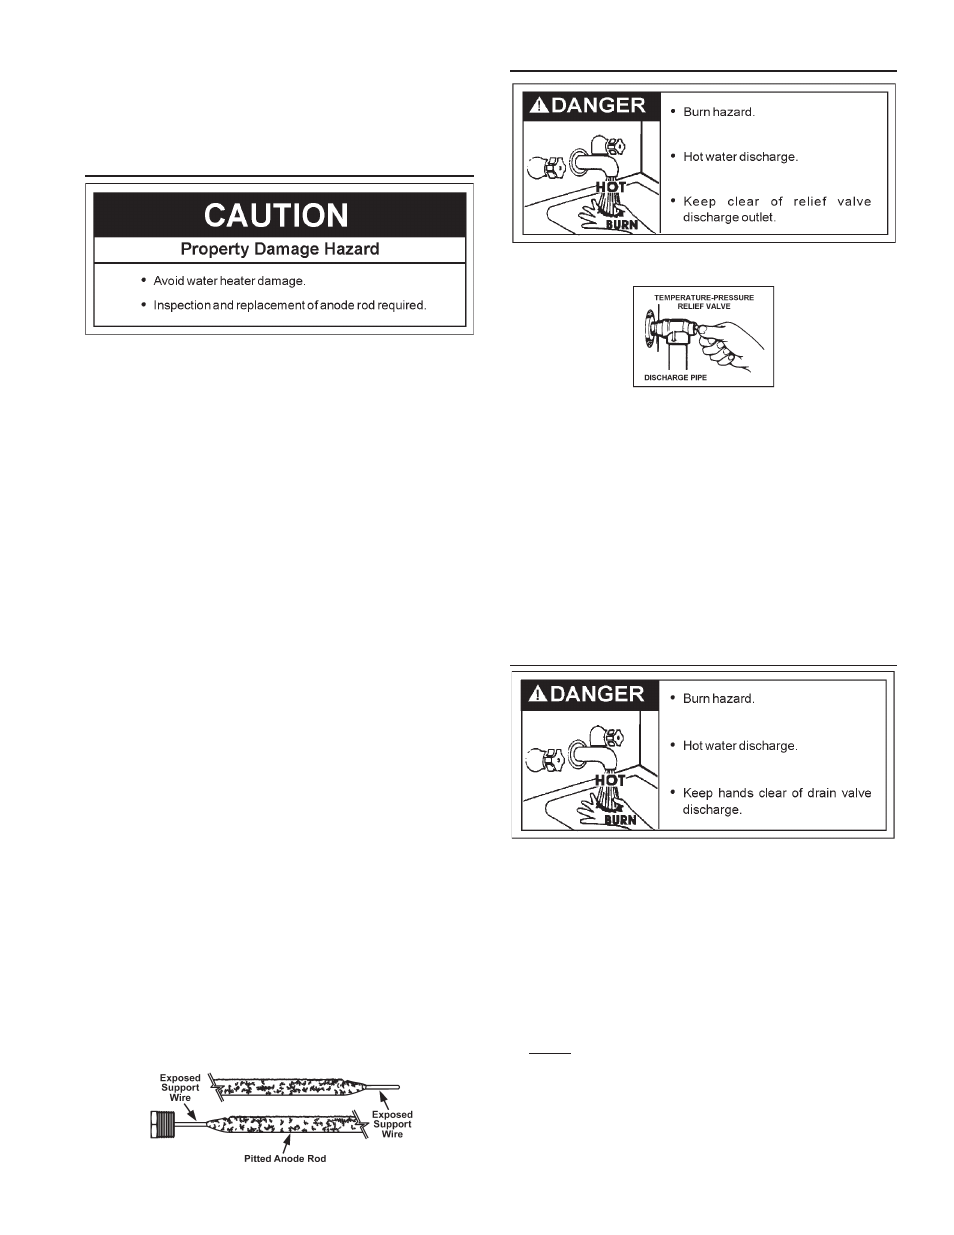
anode rod InspectIon
Each water heater contains at least one anode rod, which will slowly
deplete (due to electrolysis) prolonging the life of the water heater by
protecting the glass-lined tank from corrosion. Adverse water quality,
hotter water temperatures, high hot water usage, and water softening
methods can increase the rate of anode rod depletion. Once the anode
rod is depleted, the tank will start to corrode, eventually developing a leak.
Certain water conditions will cause a reaction between the anode rod
and the water. The most common complaint associated with the anode
rod is a “rotten egg smell” produced from the presence of hydrogen
sulfide gas dissolved in the water. IMPORTANT: Do not remove this
rod permanently as it will void any warranties. The parts list includes a
special anode rod that can be ordered if water odor or discoloration occurs.
NOTE: This rod may reduce but not eliminate water odor problems. The
water supply system may require special filtration equipment from a water
conditioning company to successfully eliminate all water odor problems.
Artificially softened water is exceedingly corrosive because the
process substitutes sodium ions for magnesium and calcium ions. The
use of a water softener may decrease the life of the water heater tank.
The anode rod should be inspected after a maximum of three years
and annually thereafter until the condition of the anode rod dictates
its replacement. NOTE: artificially softened water requires the anode
rod to be inspected annually.
The following are typical (but not all) signs of a depleted anode rod:
* The majority of the rods diameter is less than 3/8”.
* Significant sections of the support wire (approx. 1/3 or more of the
anode rod’s length) are visible.
If the anode rod show signs of either or both it should be replaced.
NOTE: Whether re-installing or replacing the anode rod, check for
any leaks and immediately correct if found.
In replacing the anode:
1. Turn off gas supply to the water heater.
2. Shut off the water supply and open a nearby hot water faucet to
depressurize the water tank.
3. Drain approximately 5 gallons of water from tank (Refer to “Draining
and Flushing” for proper procedures). Close drain valve.
4. Remove old anode rod.
5. Use Teflon® tape or approved pipe sealant on threads and install
new anode rod.
6. Turn on water supply and open nearby hot water faucet to purge air
from water system. Check for any leaks and immediately correct
any if found.
Restart the water heater as directed under “Operating Your Water
Heater.” See the Repair Parts Illustration for anode rod location.
anode rod depletIon detaIl.
teMperature-pressure relIef valve operatIon
The temperature-pressure relief valve must be manually operated
at least once a year.
fIGure 23.
When checking the temperature-pressure relief valve operation, make sure
that (1) no one is in front of or around the outlet of the temperature-pressure
relief valve discharge line, and (2) that the water discharge will not cause
any property damage, as the water may be extremely hot, see Figure 23.
If after manually operating the valve, it fails to completely reset and
continues to release water, immediately close the cold water inlet
to the water heater, follow the draining instructions, and replace the
temperature-pressure relief valve with a new one.
If the temperature-pressure relief valve on the appliance weeps or
discharges periodically, this may be due to thermal expansion. You
may have a check valve installed in the water line or a water meter with
a check valve. Consult your local water supplier or service agency for
further information. Do not plug the temperature-pressure relief valve.
draInInG
The water heater should be drained if being shut down during
freezing temperatures. Also periodic draining and cleaning of
sediment from the tank may be necessary.
1. Set the blower switch to the “OFF” position.
2. CLOSE the cold water inlet valve to the water heater.
3. OPEN a nearby hot water faucet and leave open to allow for
draining.
4. Connect a hose to the drain valve and terminate to an adequate
drain.
5. OPEN the water heater drain valve to allow for tank draining.
note: If the water heater is going to be shut down and
drained for an extended period, the drain valve should be
left open with hose connected allowing water to terminate
to an adequate drain.
6. CLOSE the drain valve.
7. Follow instructions in the “Filling The Water Heater” section.
8. Follow the lighting instructions on the label or see “Lighting
Instructions” in this manual to restart the water heater.